Computer controlled cutting
The laser cutter (BRM 90130)
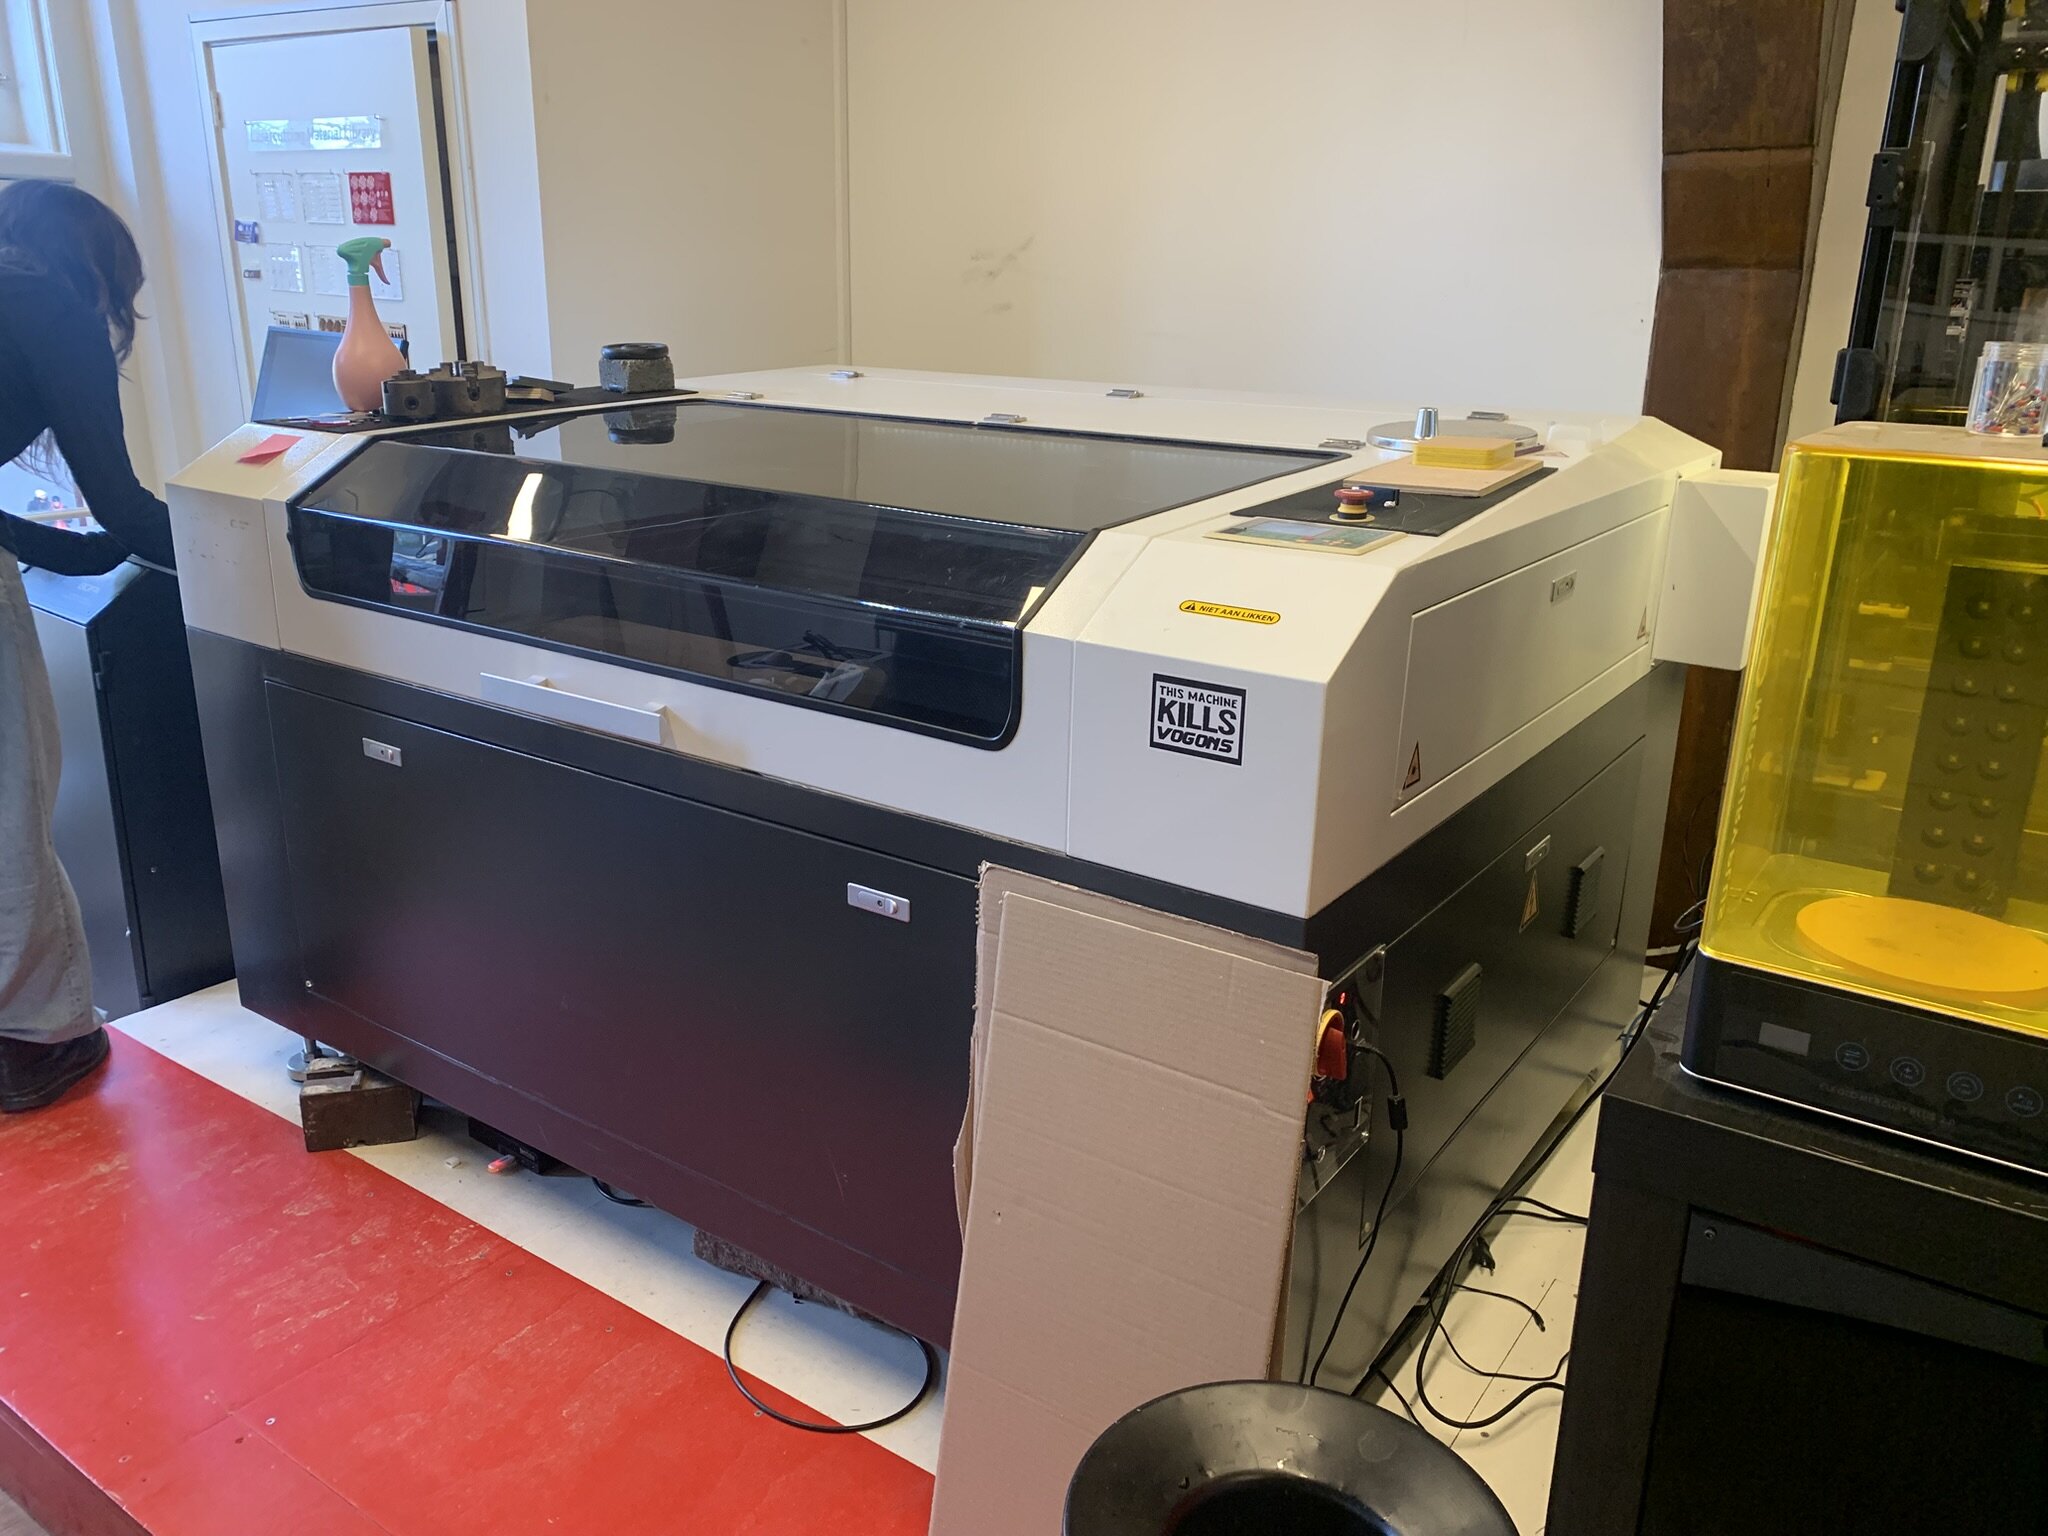
Today we got a tour on how to use the laser cutter and how it works and maintenance. This is our laser cutter. We first got thought the safety instructions. We always need to stand on the red platform and always watch the lasercutter while its busy.
//TODO: add parameters of the laser
Where the laser gets made
On the back of the machine there is a hatch and under there the laser gets generated.
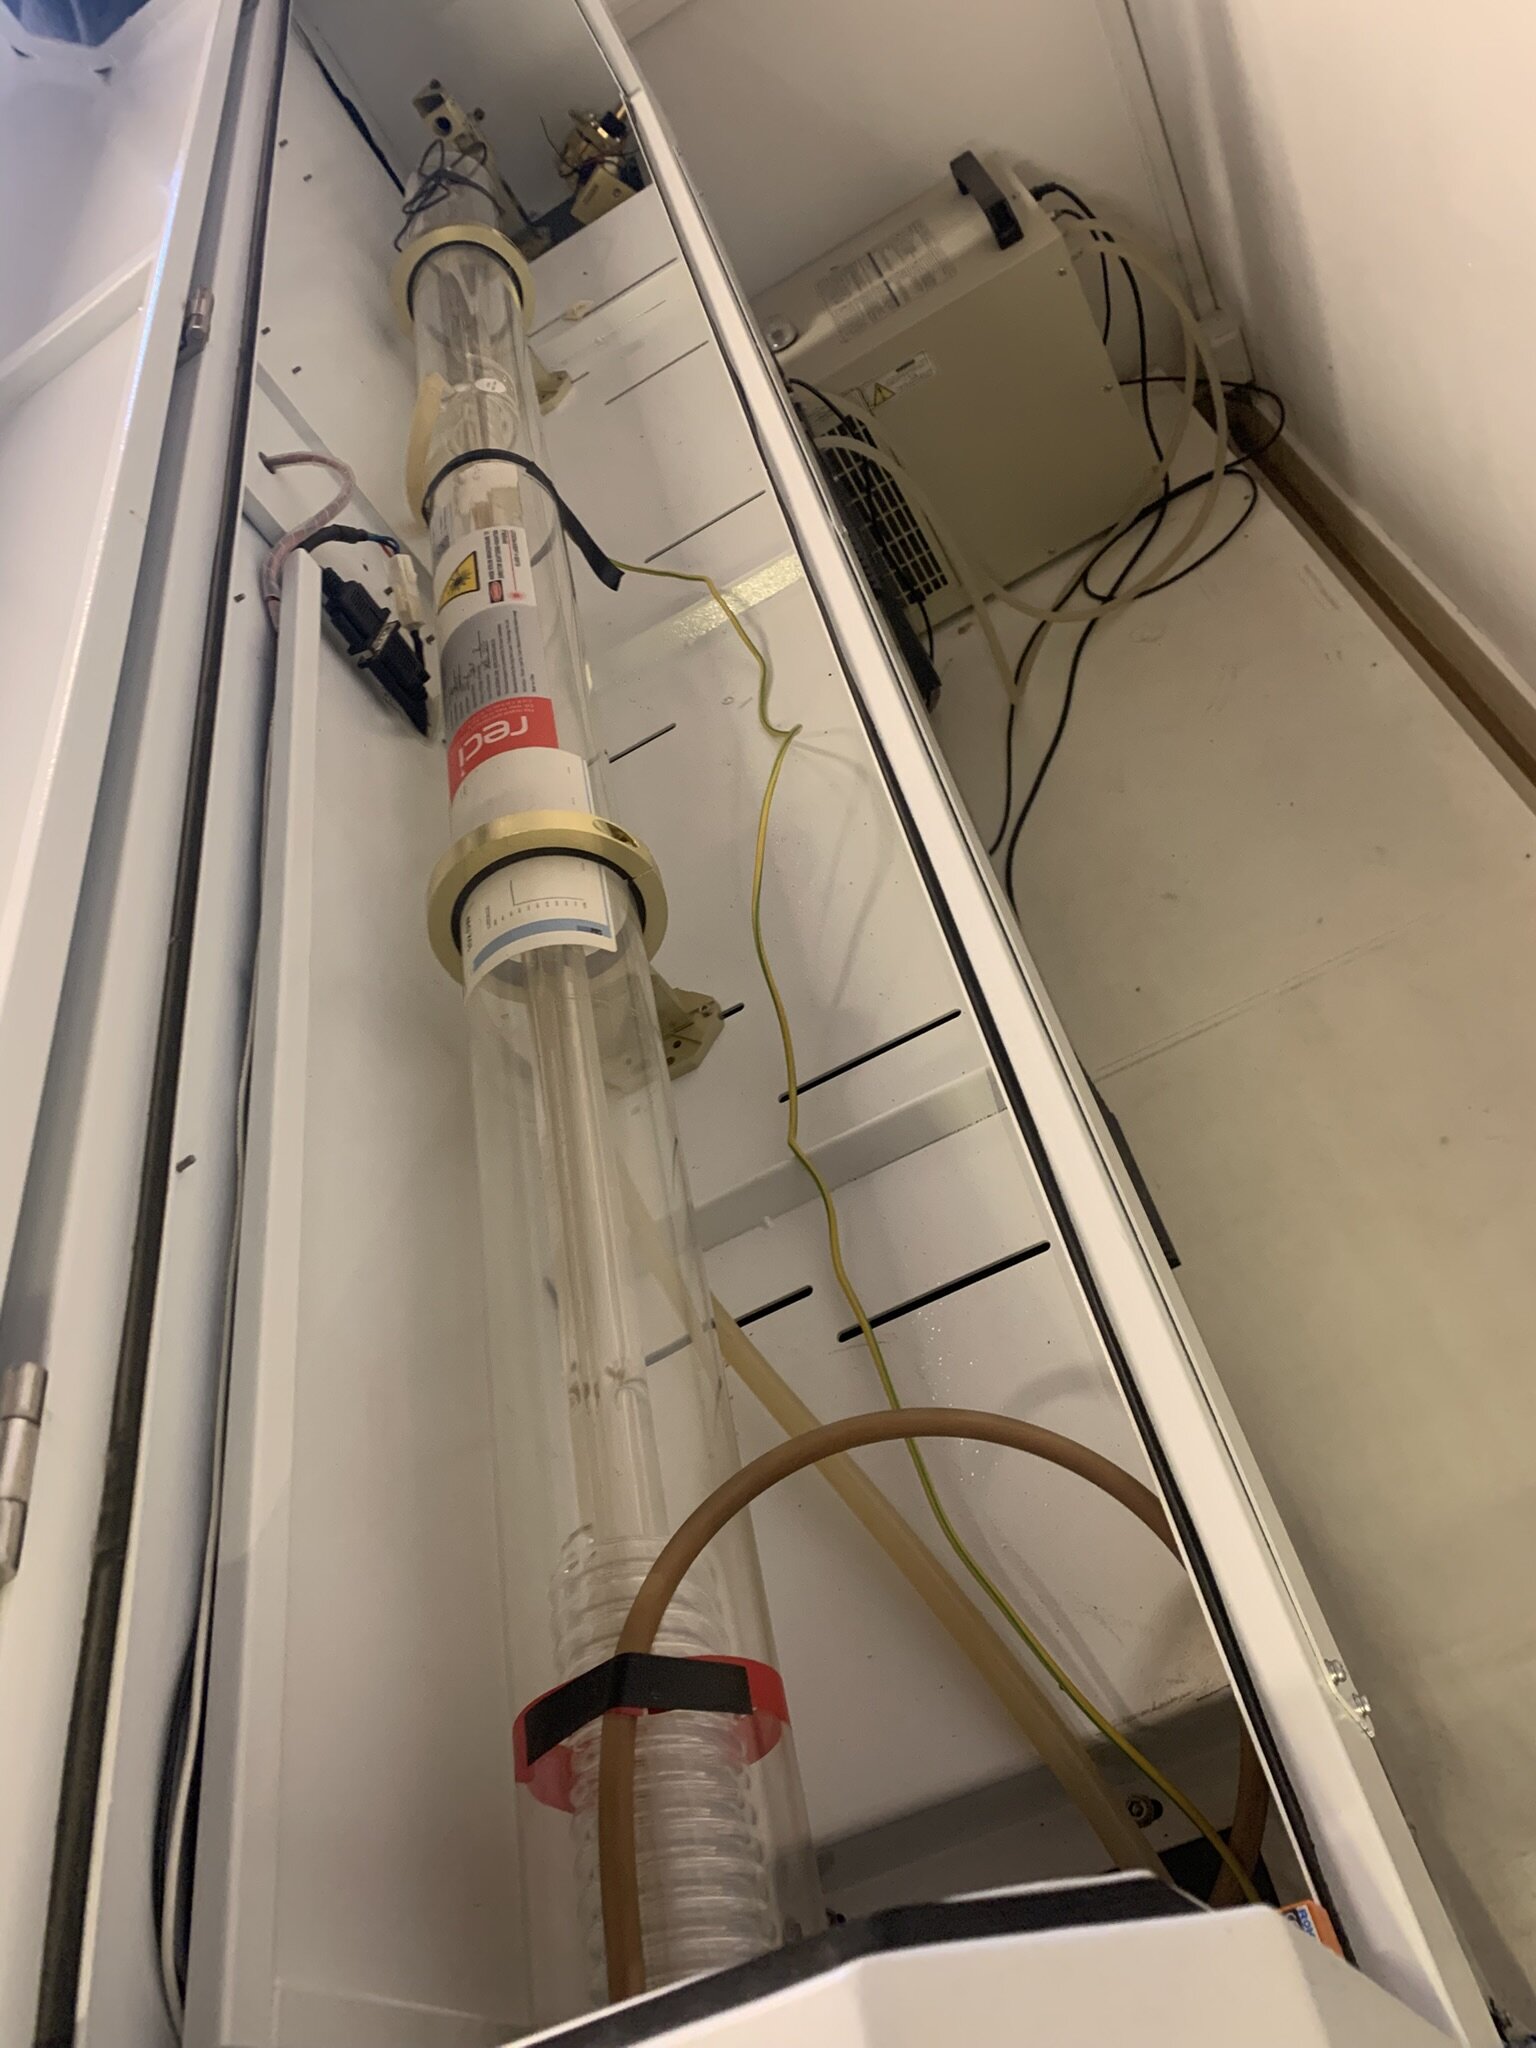 You see a spiral tube with at the end a mirror that shoots the laser into the cutting chamber.
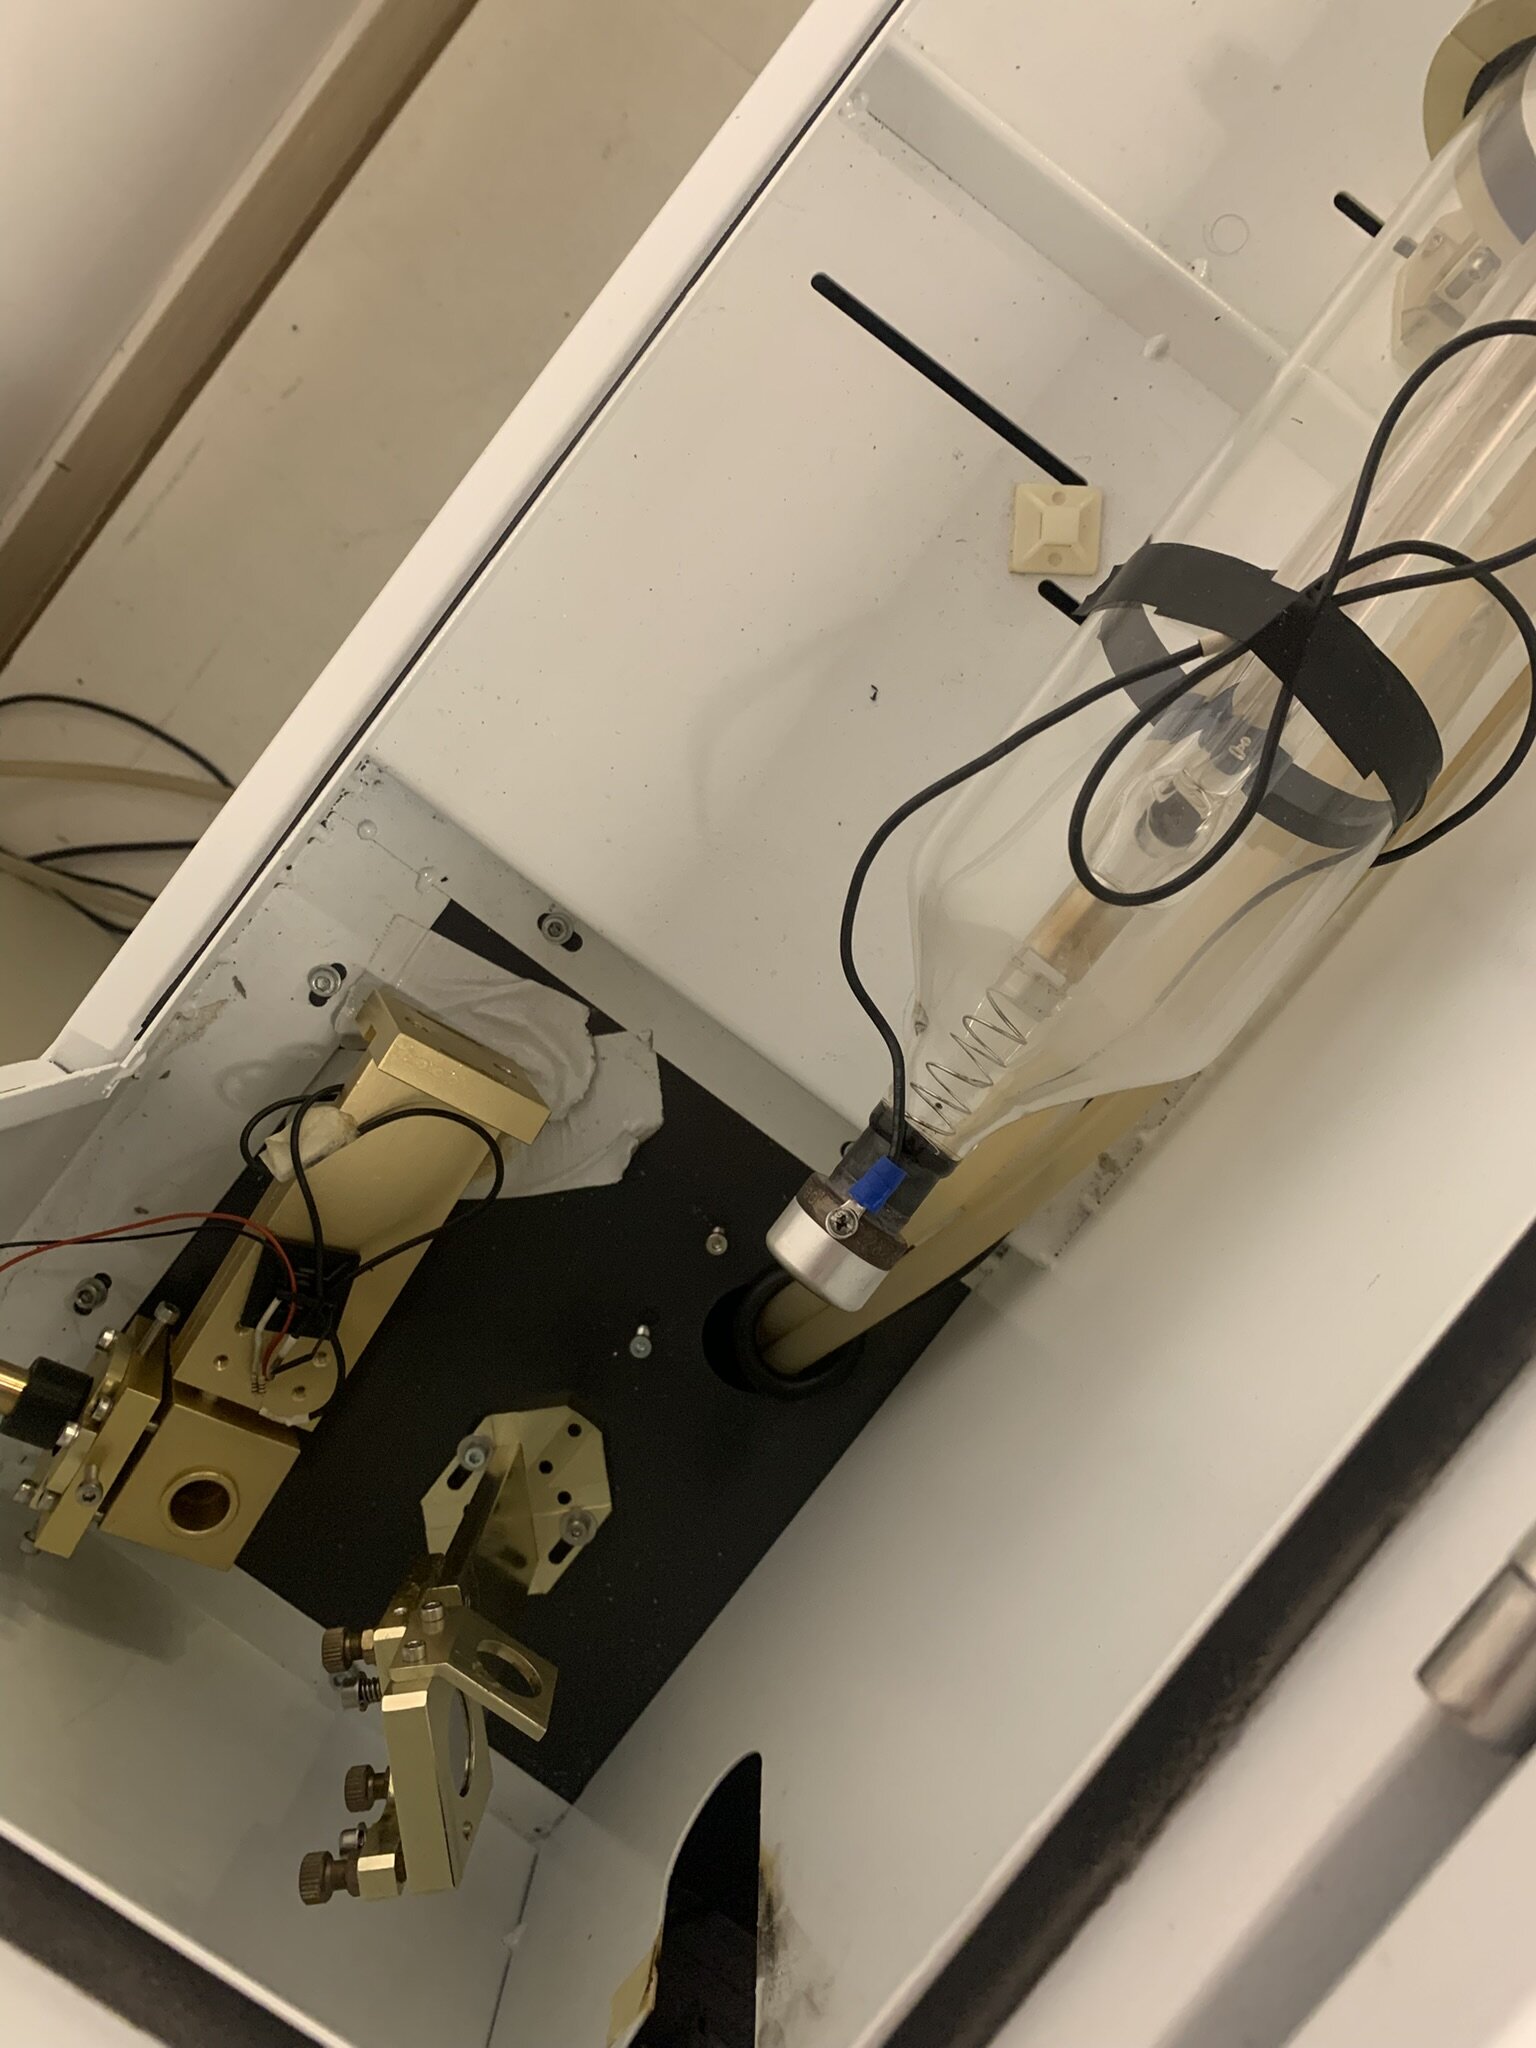 Here is a closer image of the mirror that shoots it into the chamber. The 3 screws on the mirror are to align the mirror. If the mirrors are misaligned the laser won't aim well or aim at all.
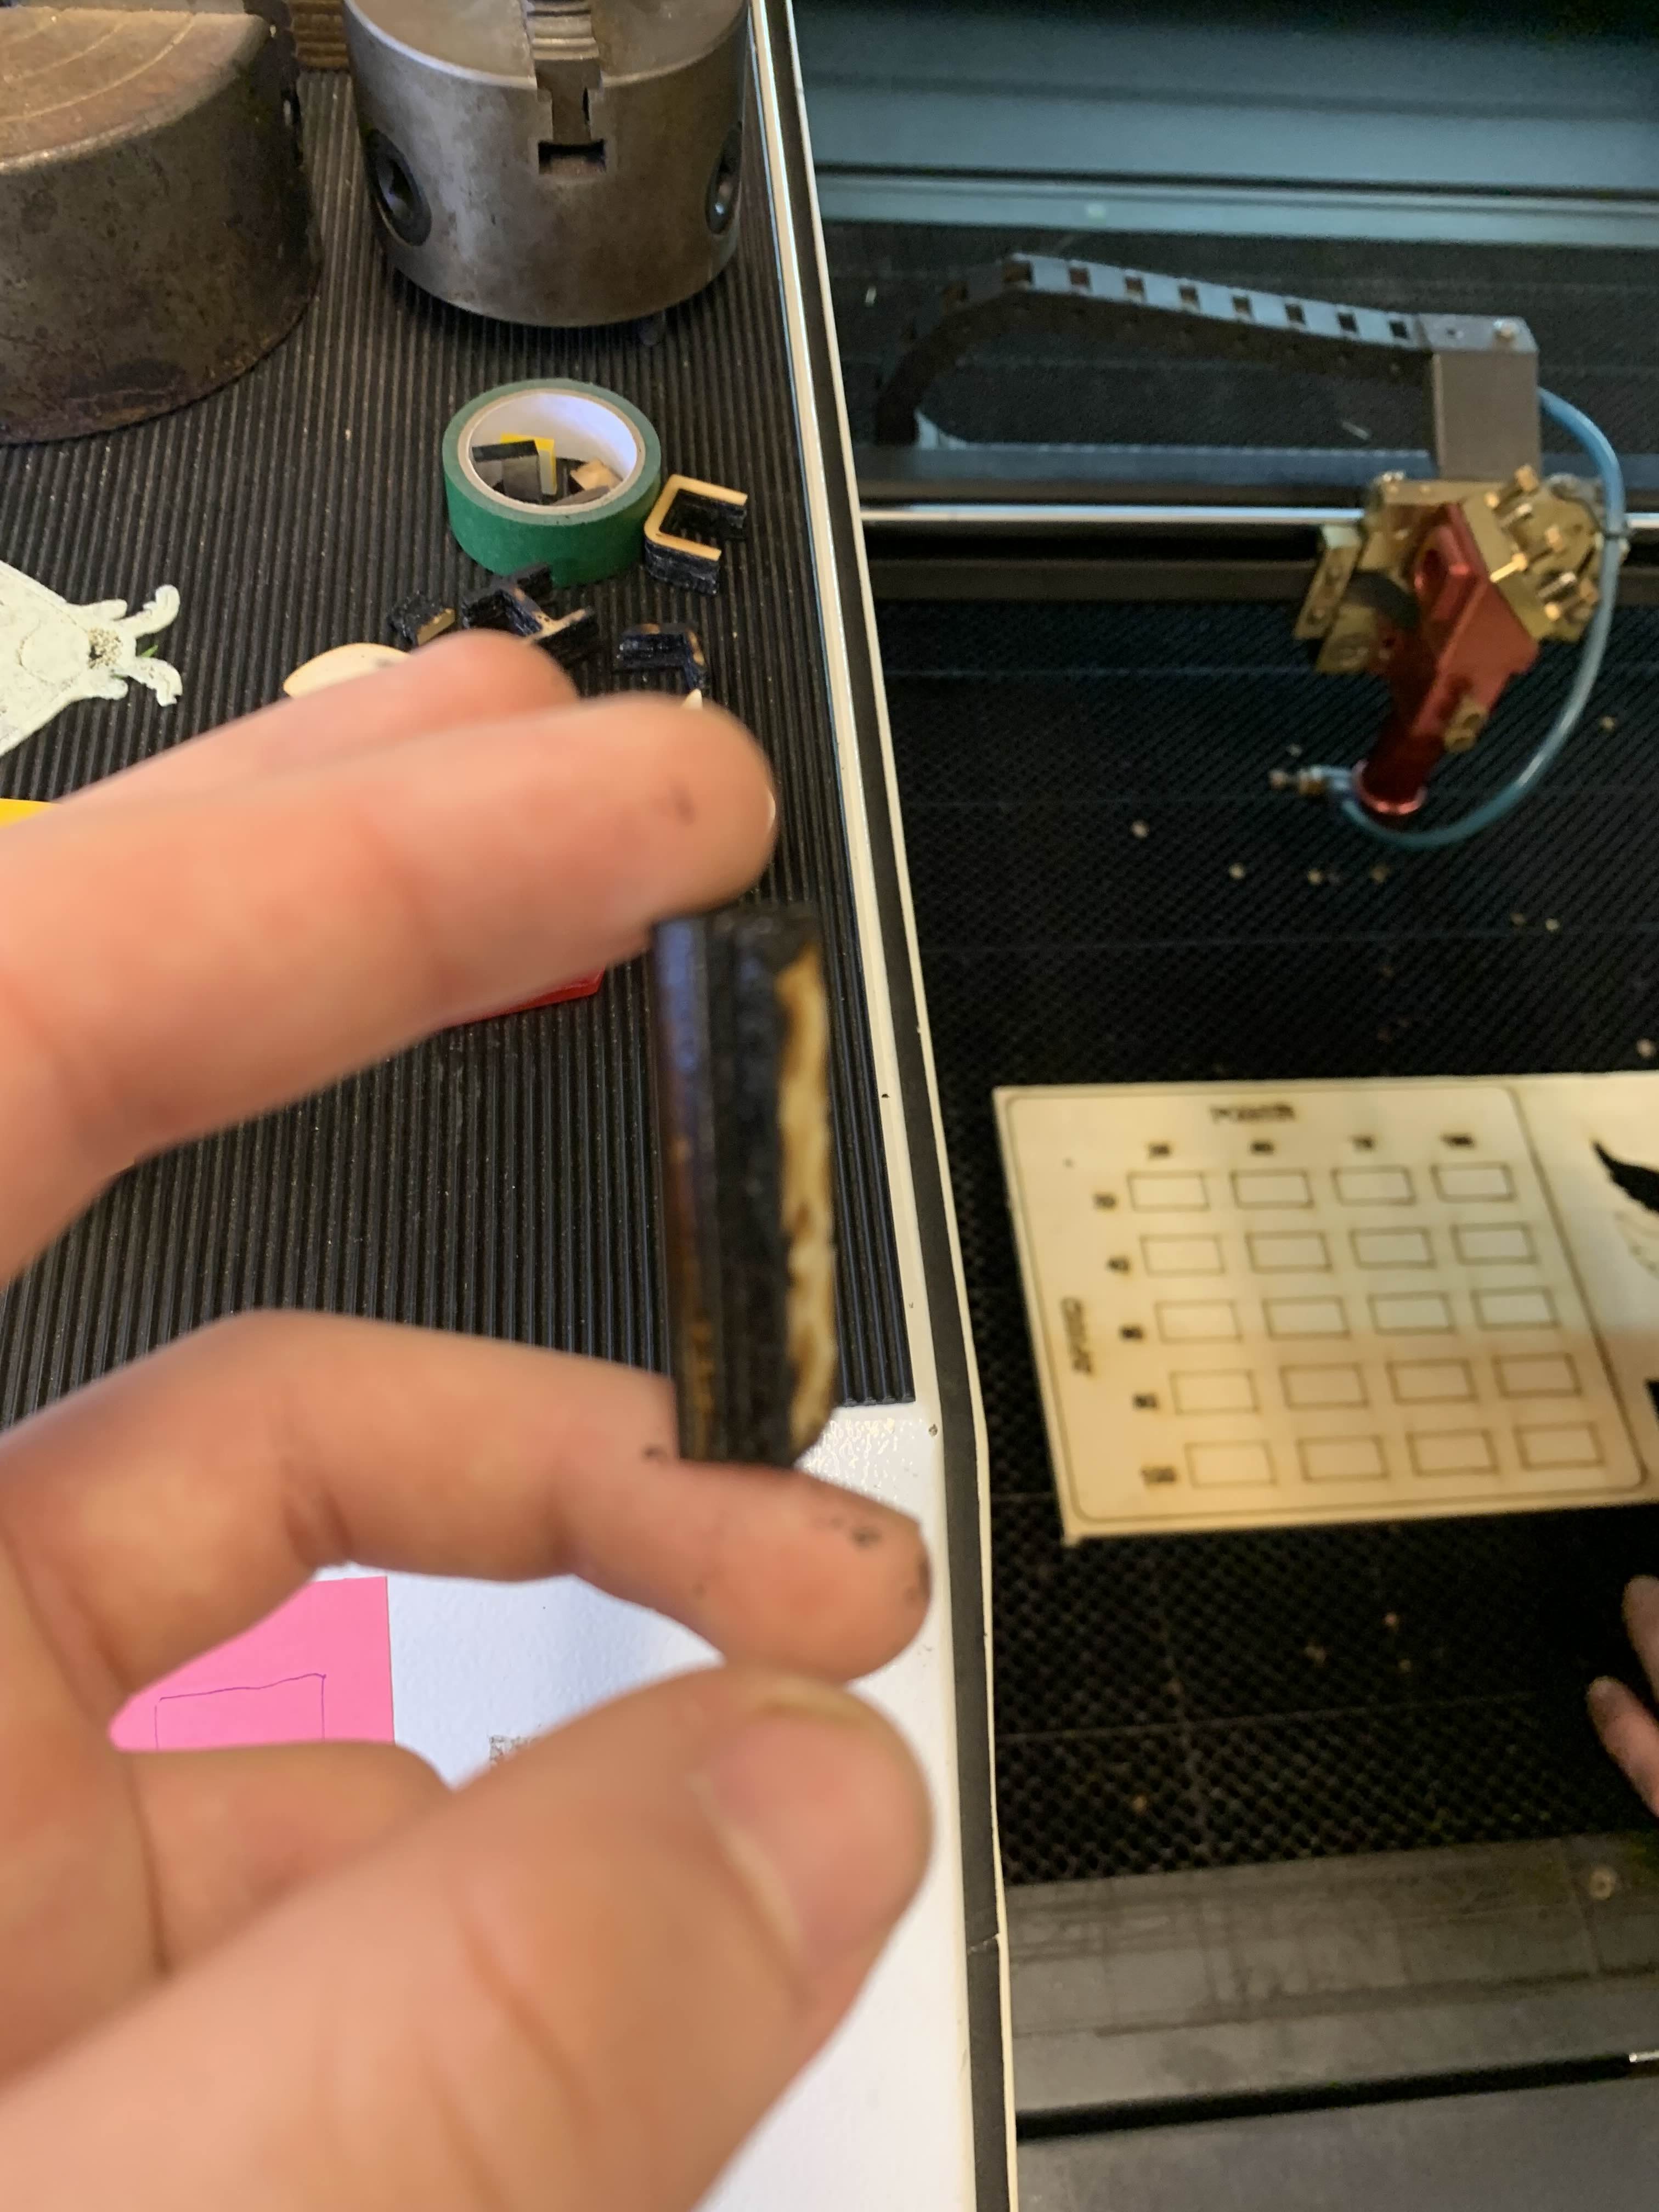
The nozzle and calibration
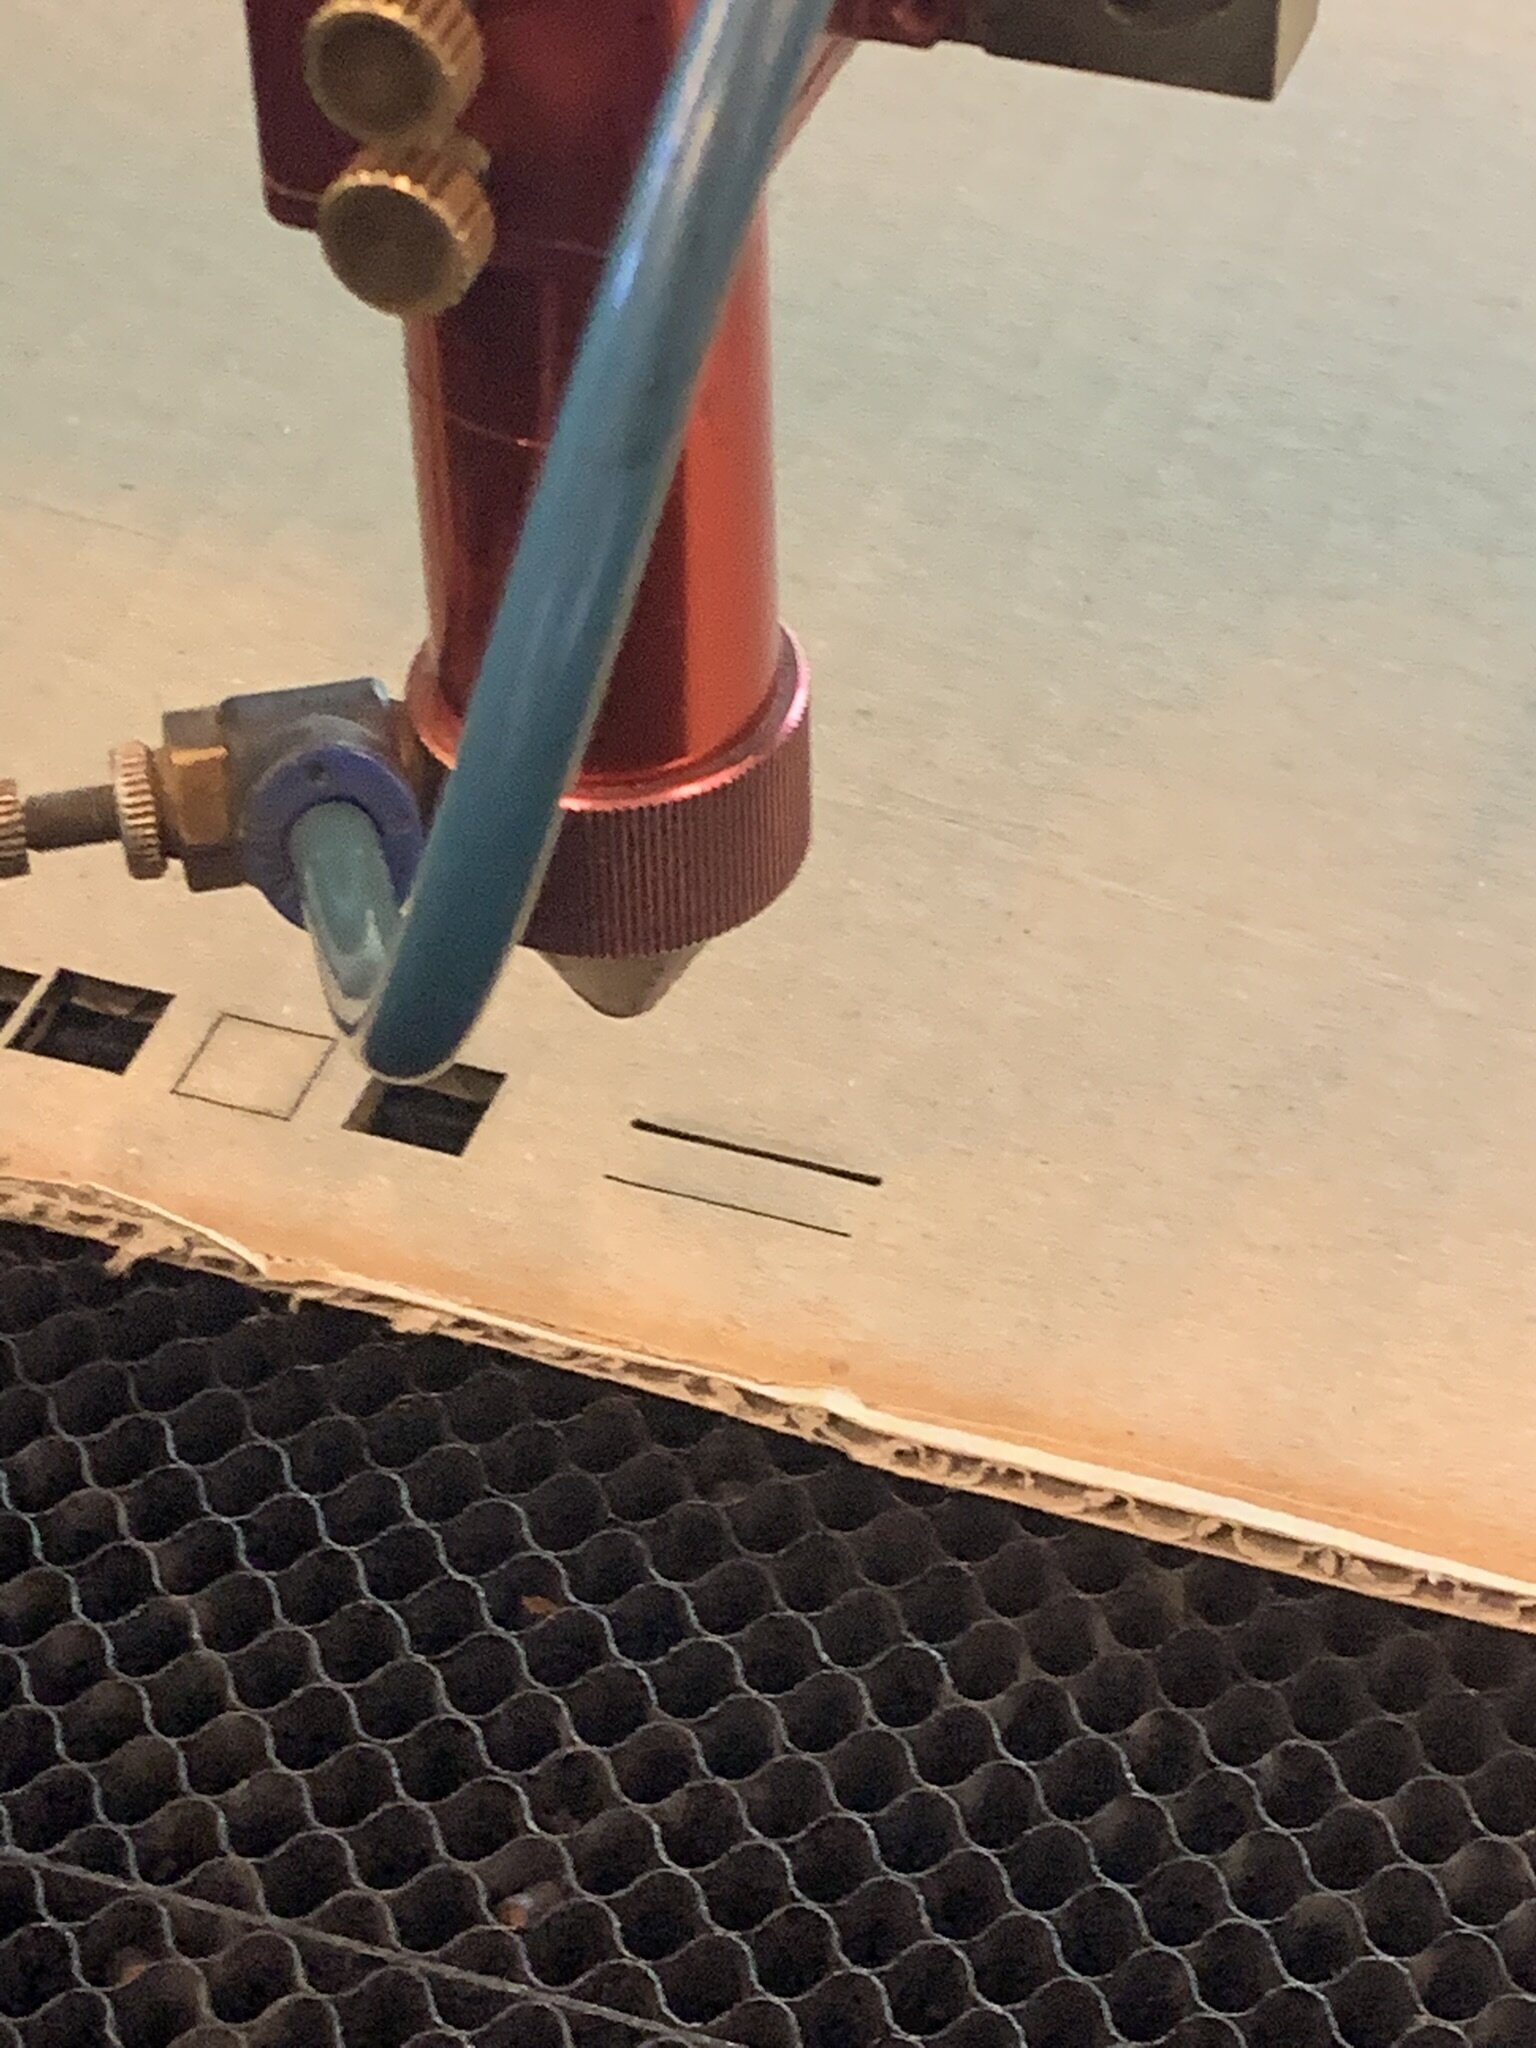
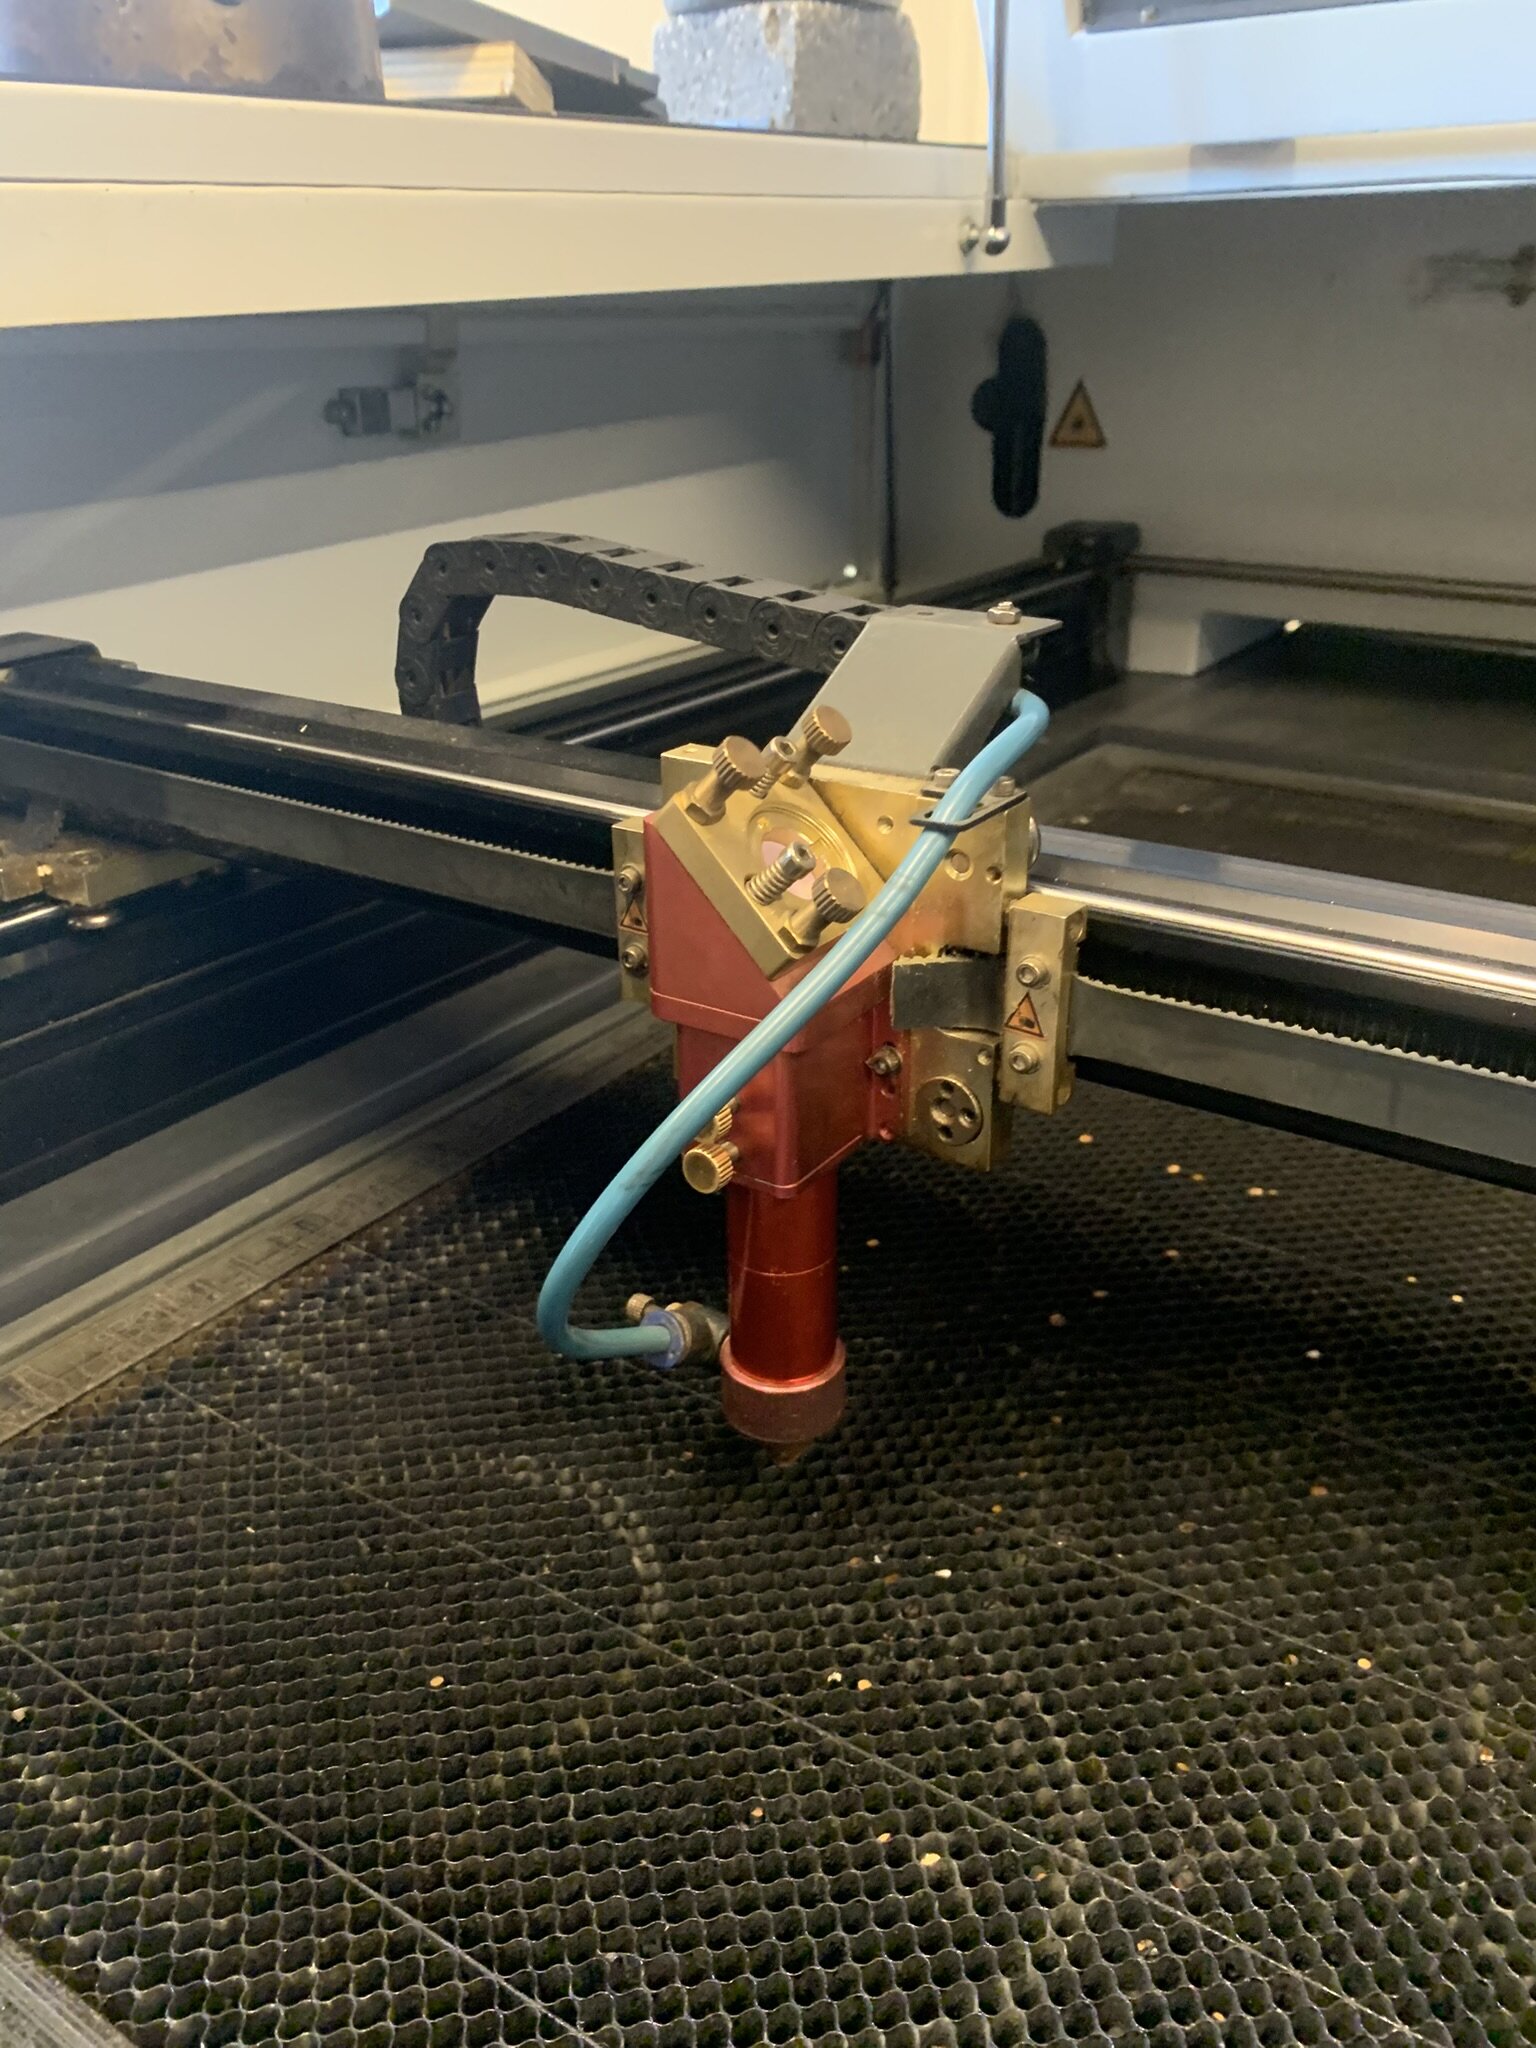 This is the nozzle. There is also a mirror there to redirect the laser down onto the material. There are a total of 3 mirrors. One in the laser chamber. and 1 on the arm of the nozzle and one on top of the nozzle to direct it down onto the material. The blue tube is a air tube that goes into the nozzle that constantly blows air so the material and gasses don't end up inside. We also did a test with and without the air tube. This is the result.
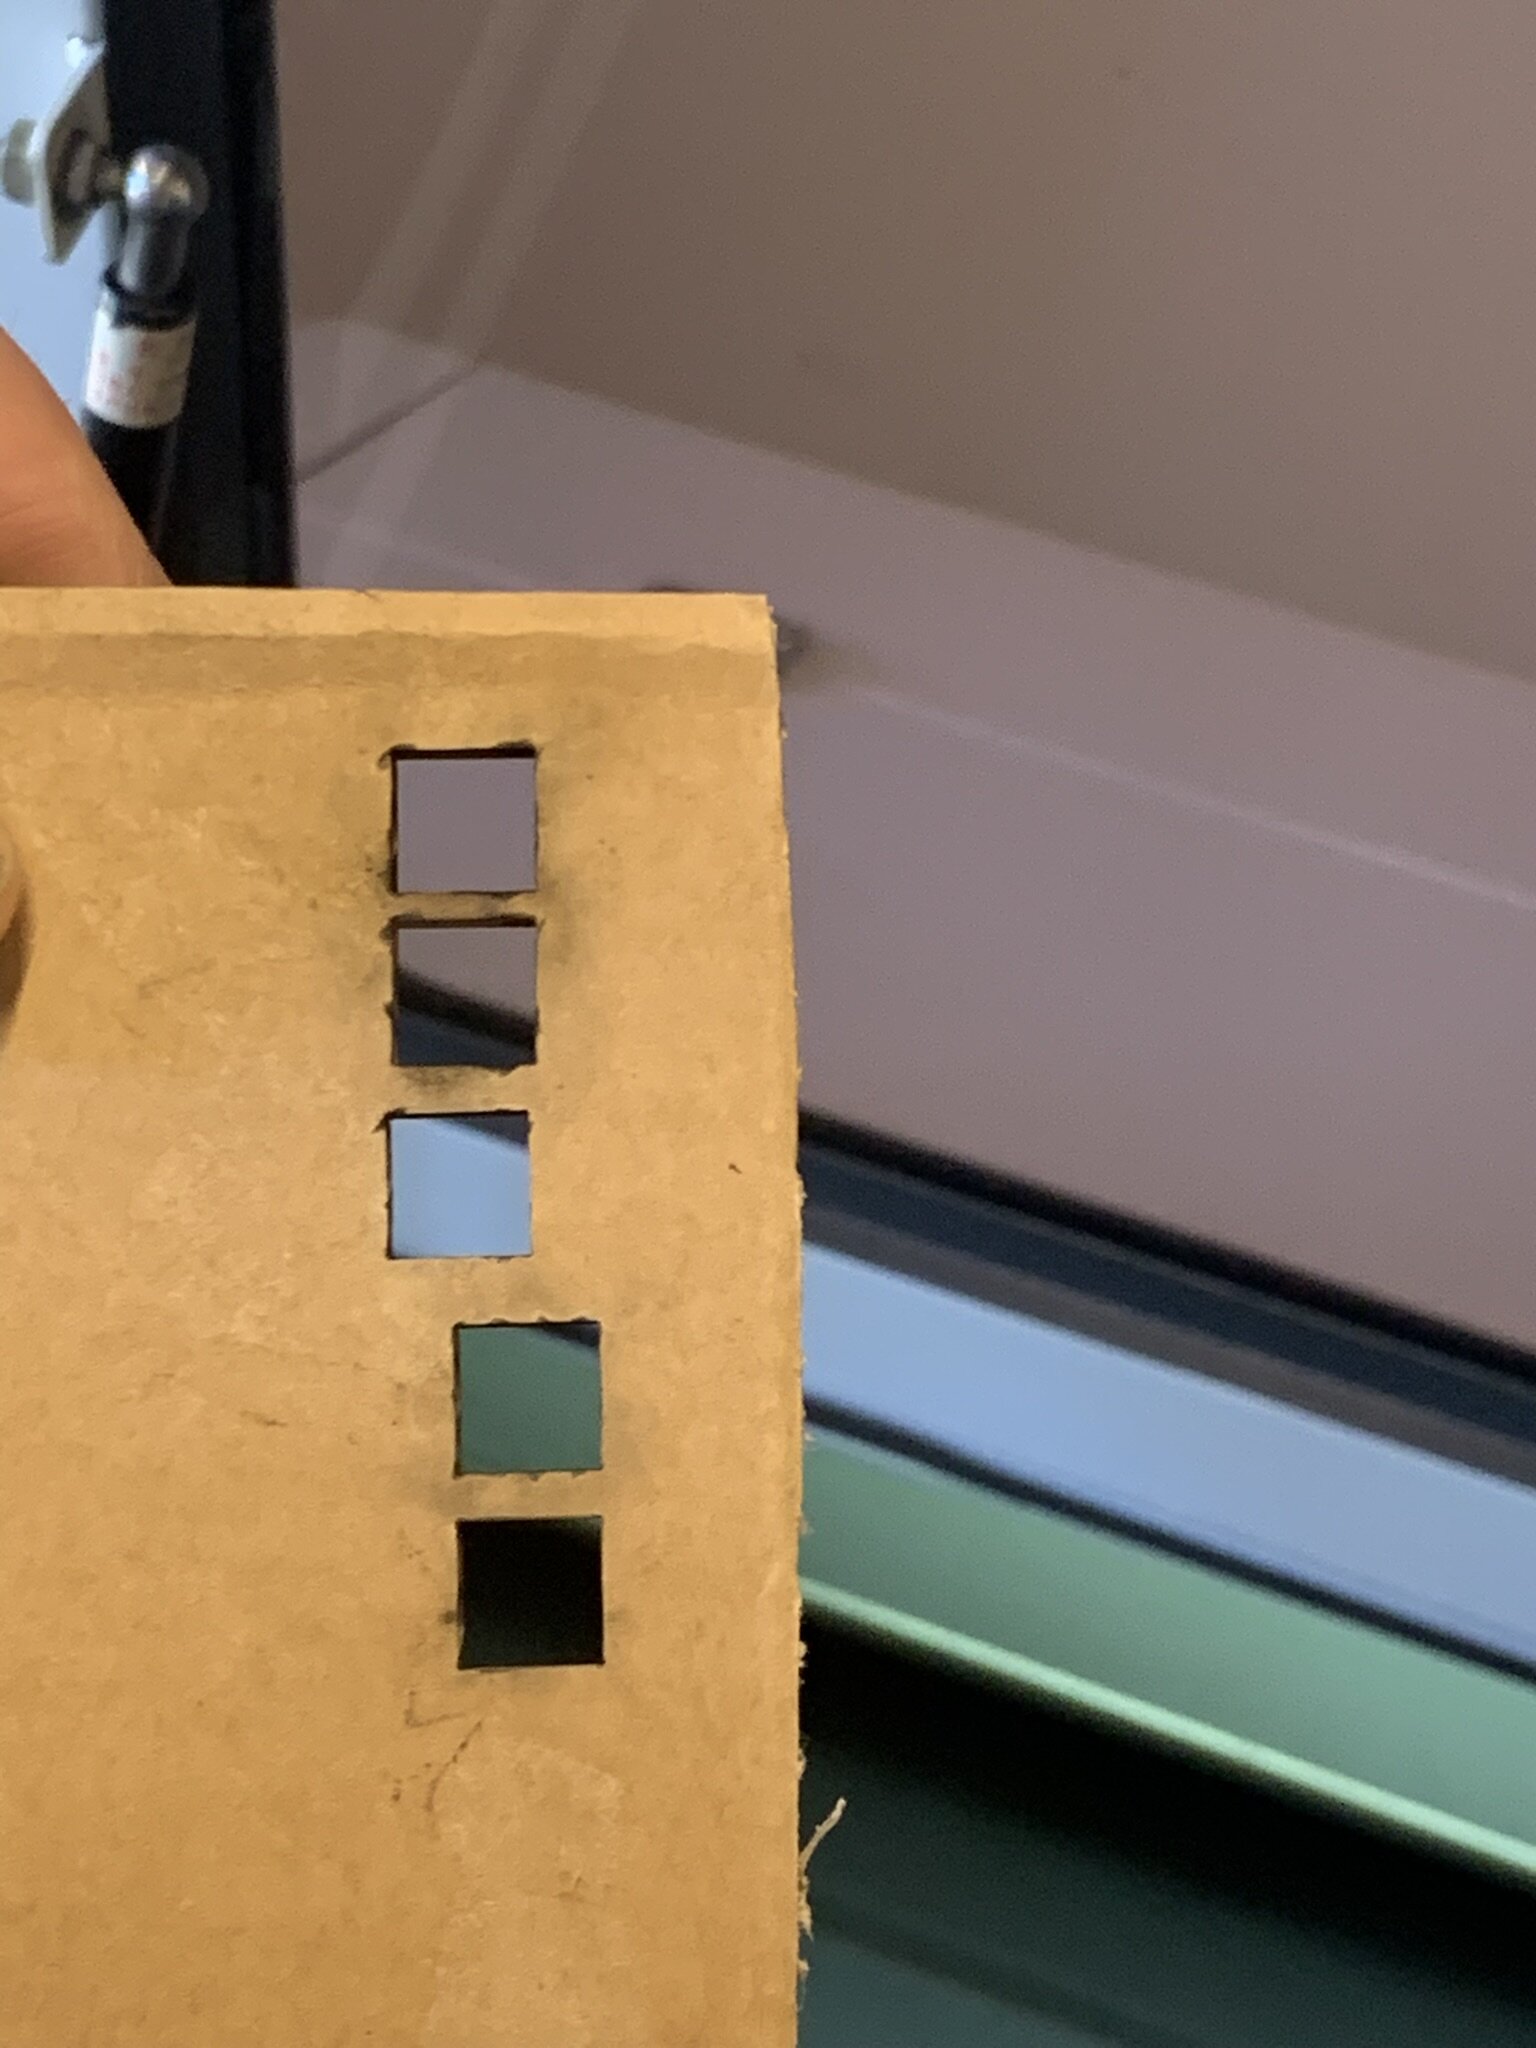
The top square is without and the one below that is with the air tube attached. You can see that there is a small difference in how it cut. What I also noticed is there are a lot less flames when the tube is plugged in.
You can also disassemble the nozzle to clean the lens inside.
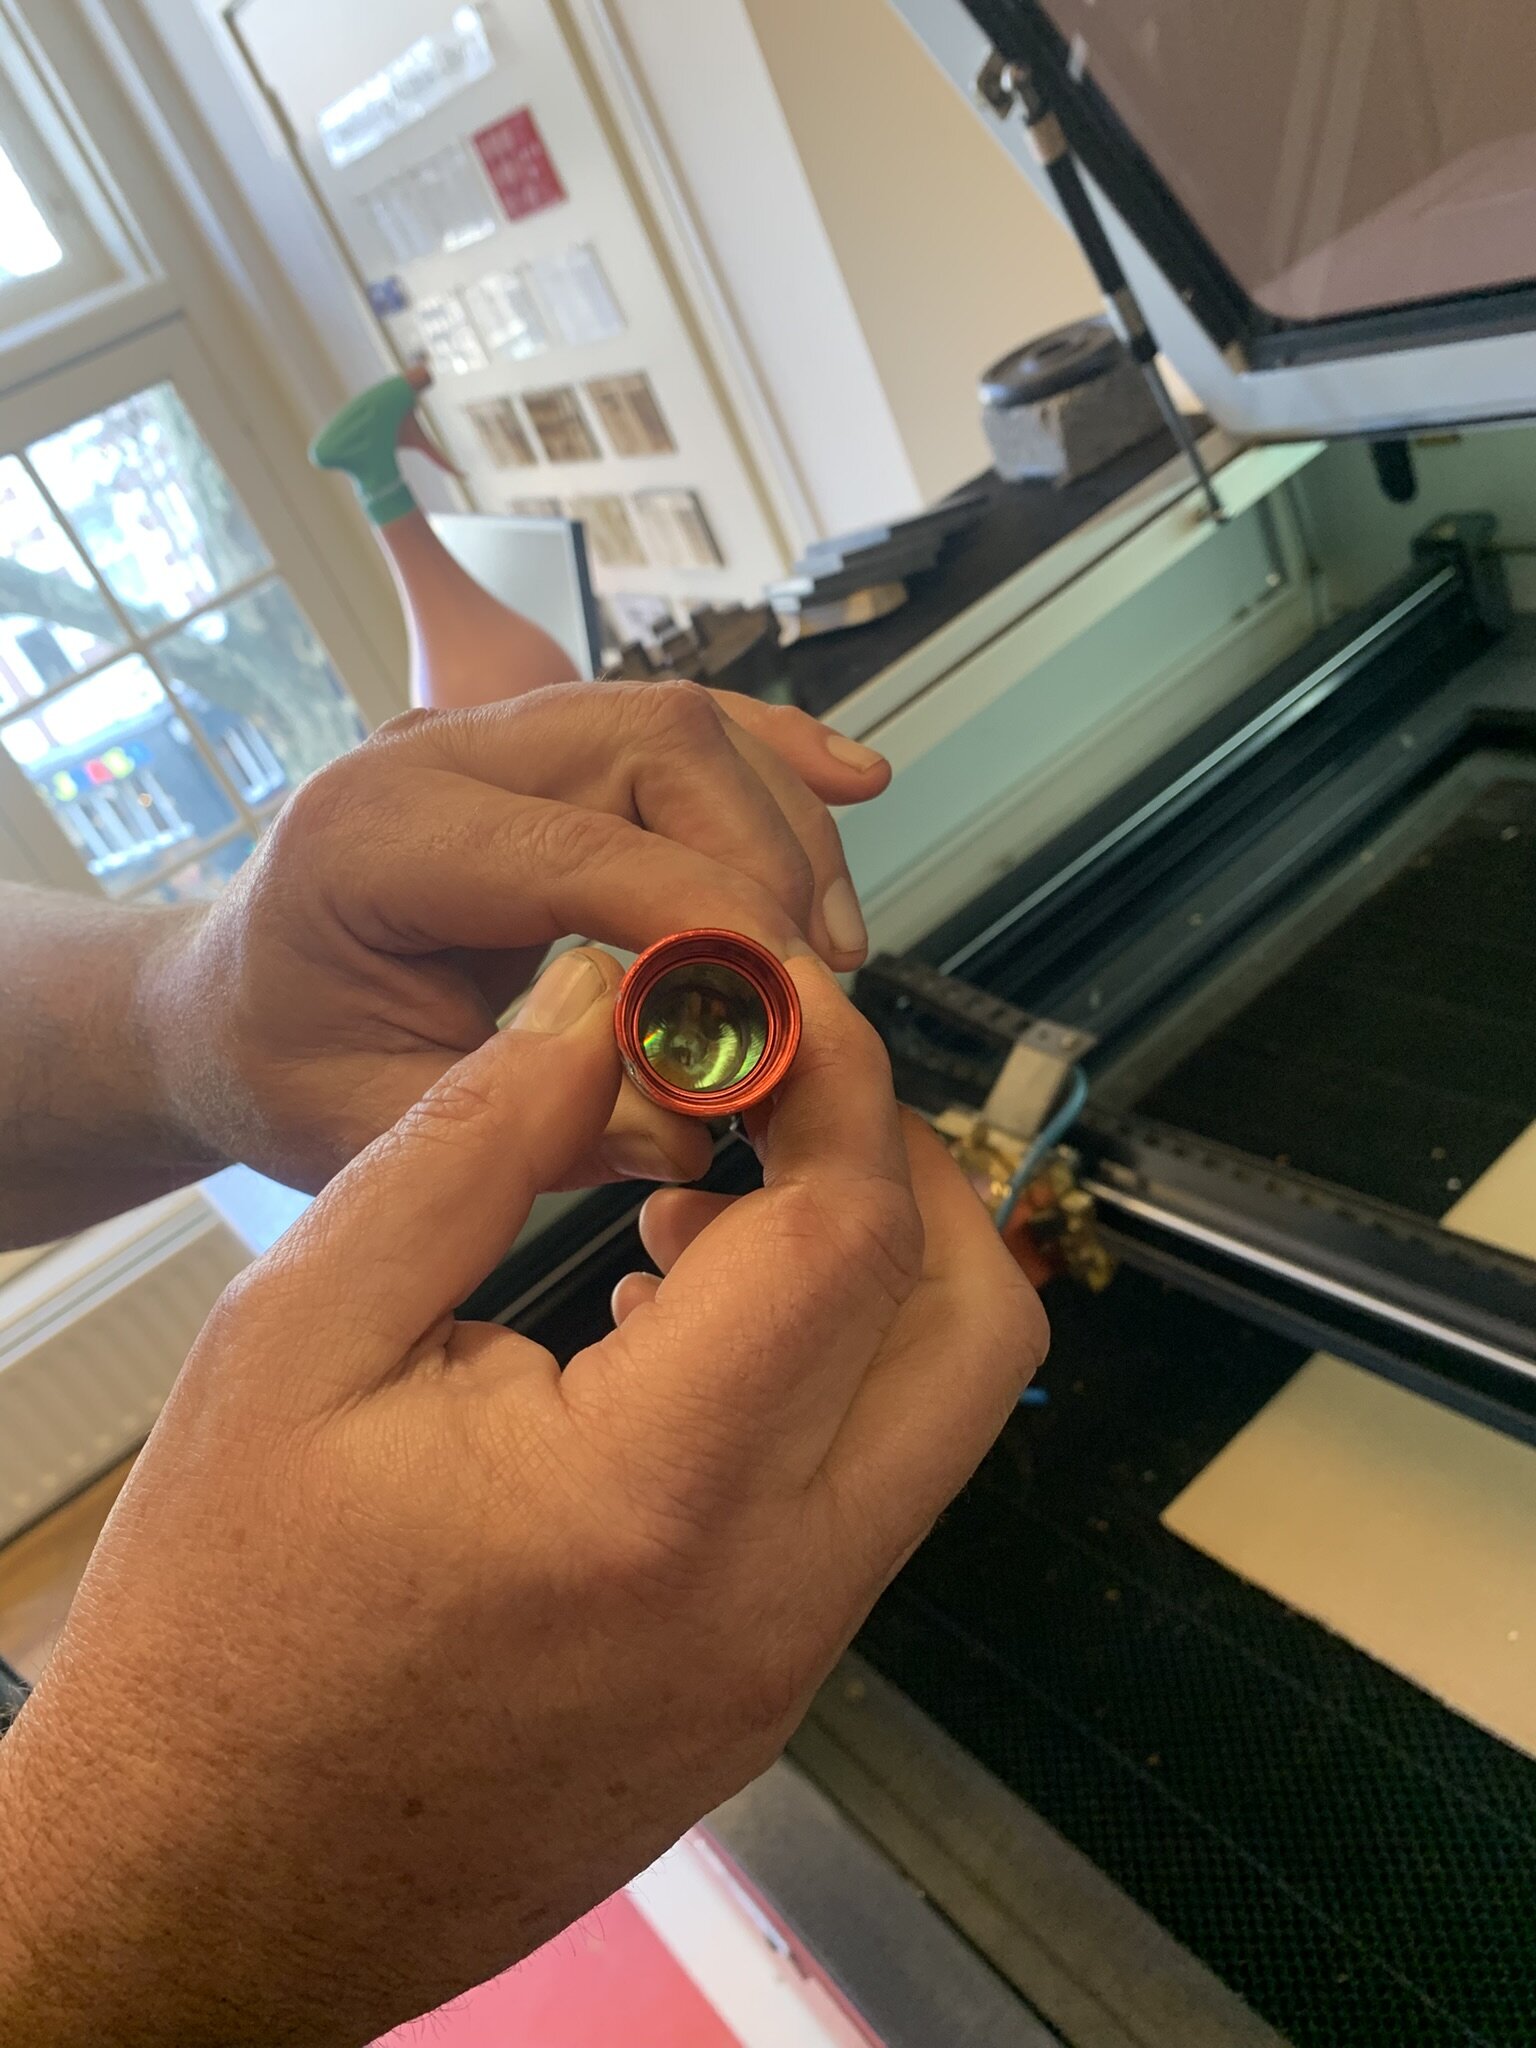
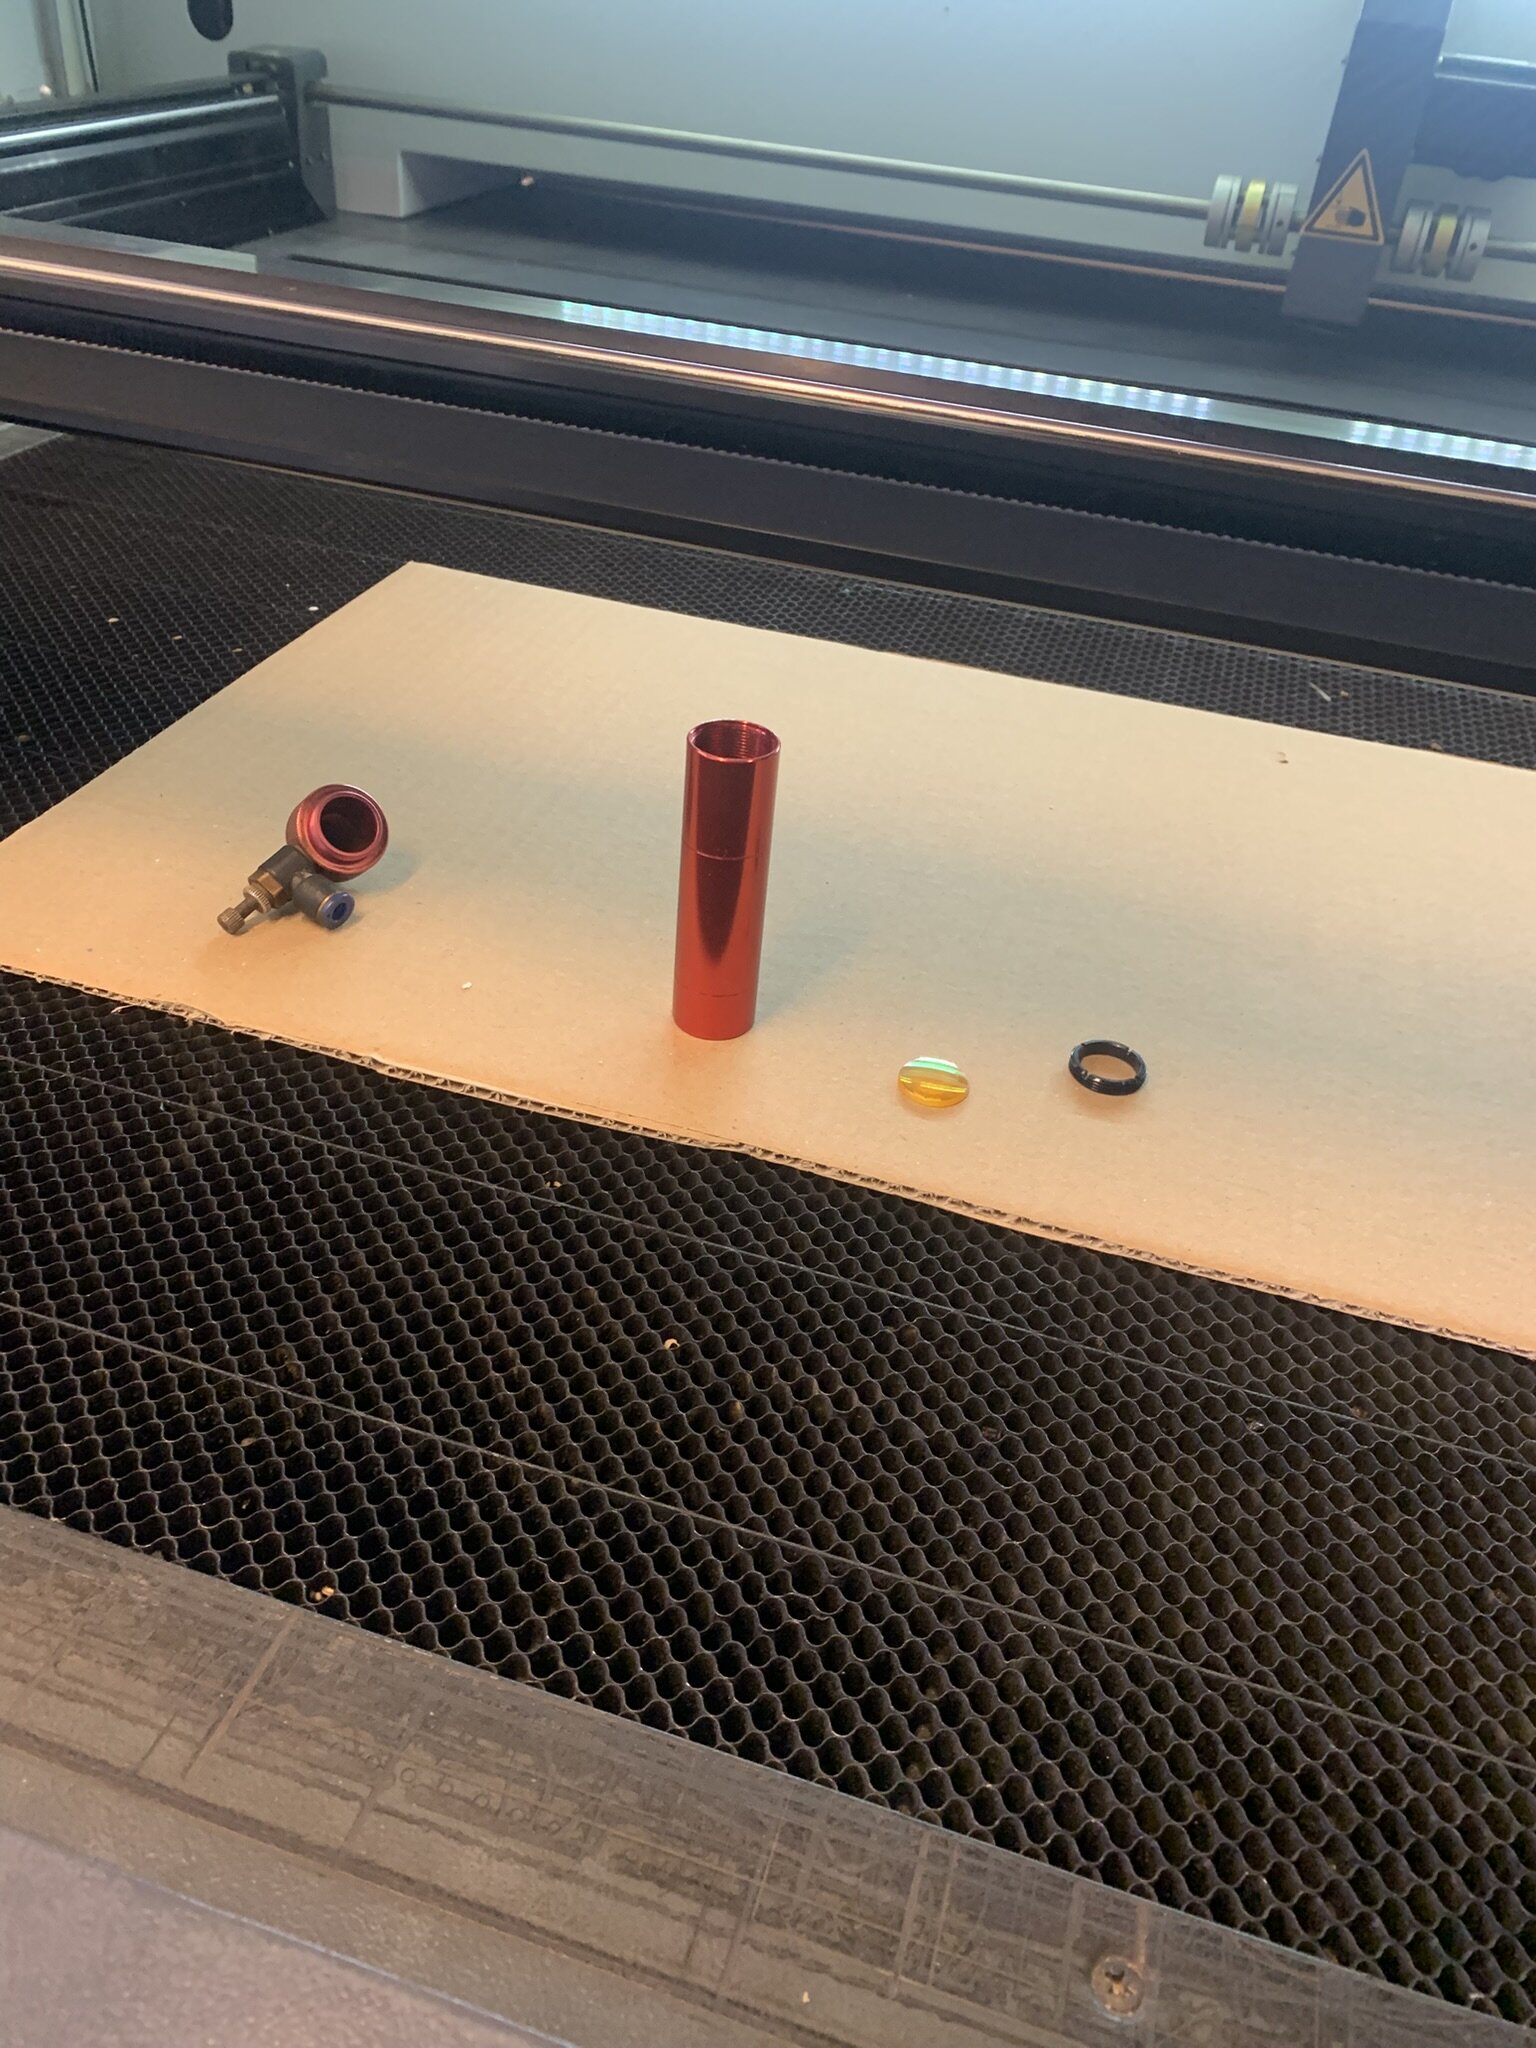 The lens needs to be pointed up with the curved side so the laser collects and concentrates on one point and all the light gets bend to the center. otherwise you get cuts like this.
 The top line cut is with a unfocused laser and the bottom line is with a focussed laser.
But how do I focus the laser?
There is a special tool to help you with that.
The top line cut is with a unfocused laser and the bottom line is with a focussed laser.
But how do I focus the laser?
There is a special tool to help you with that.
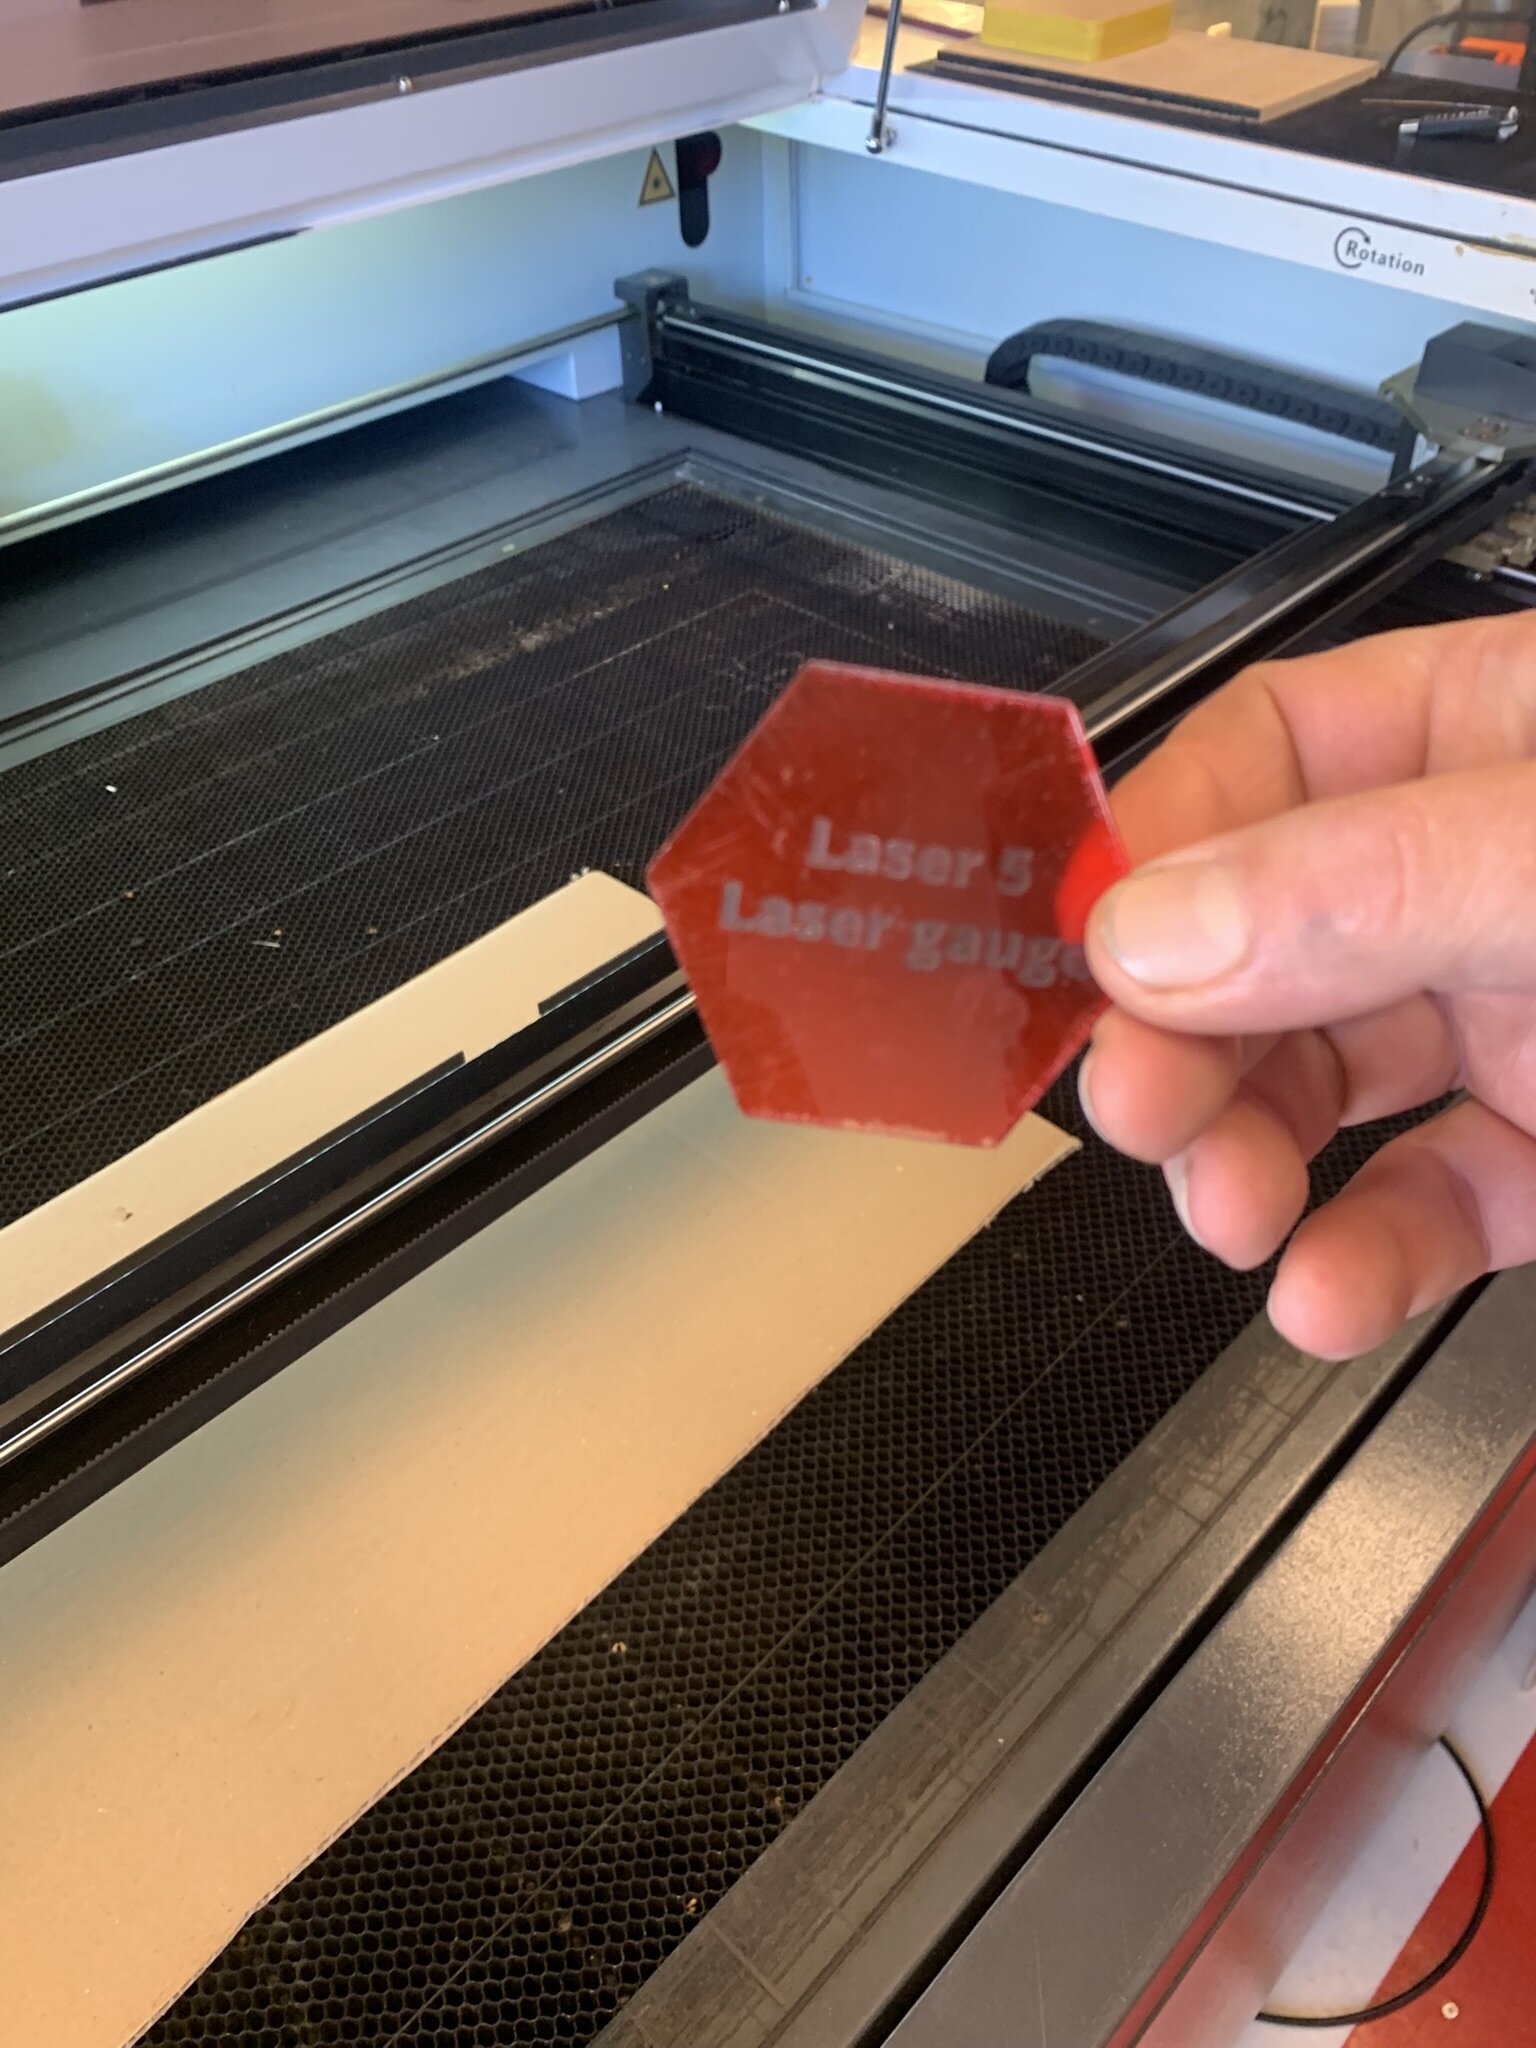
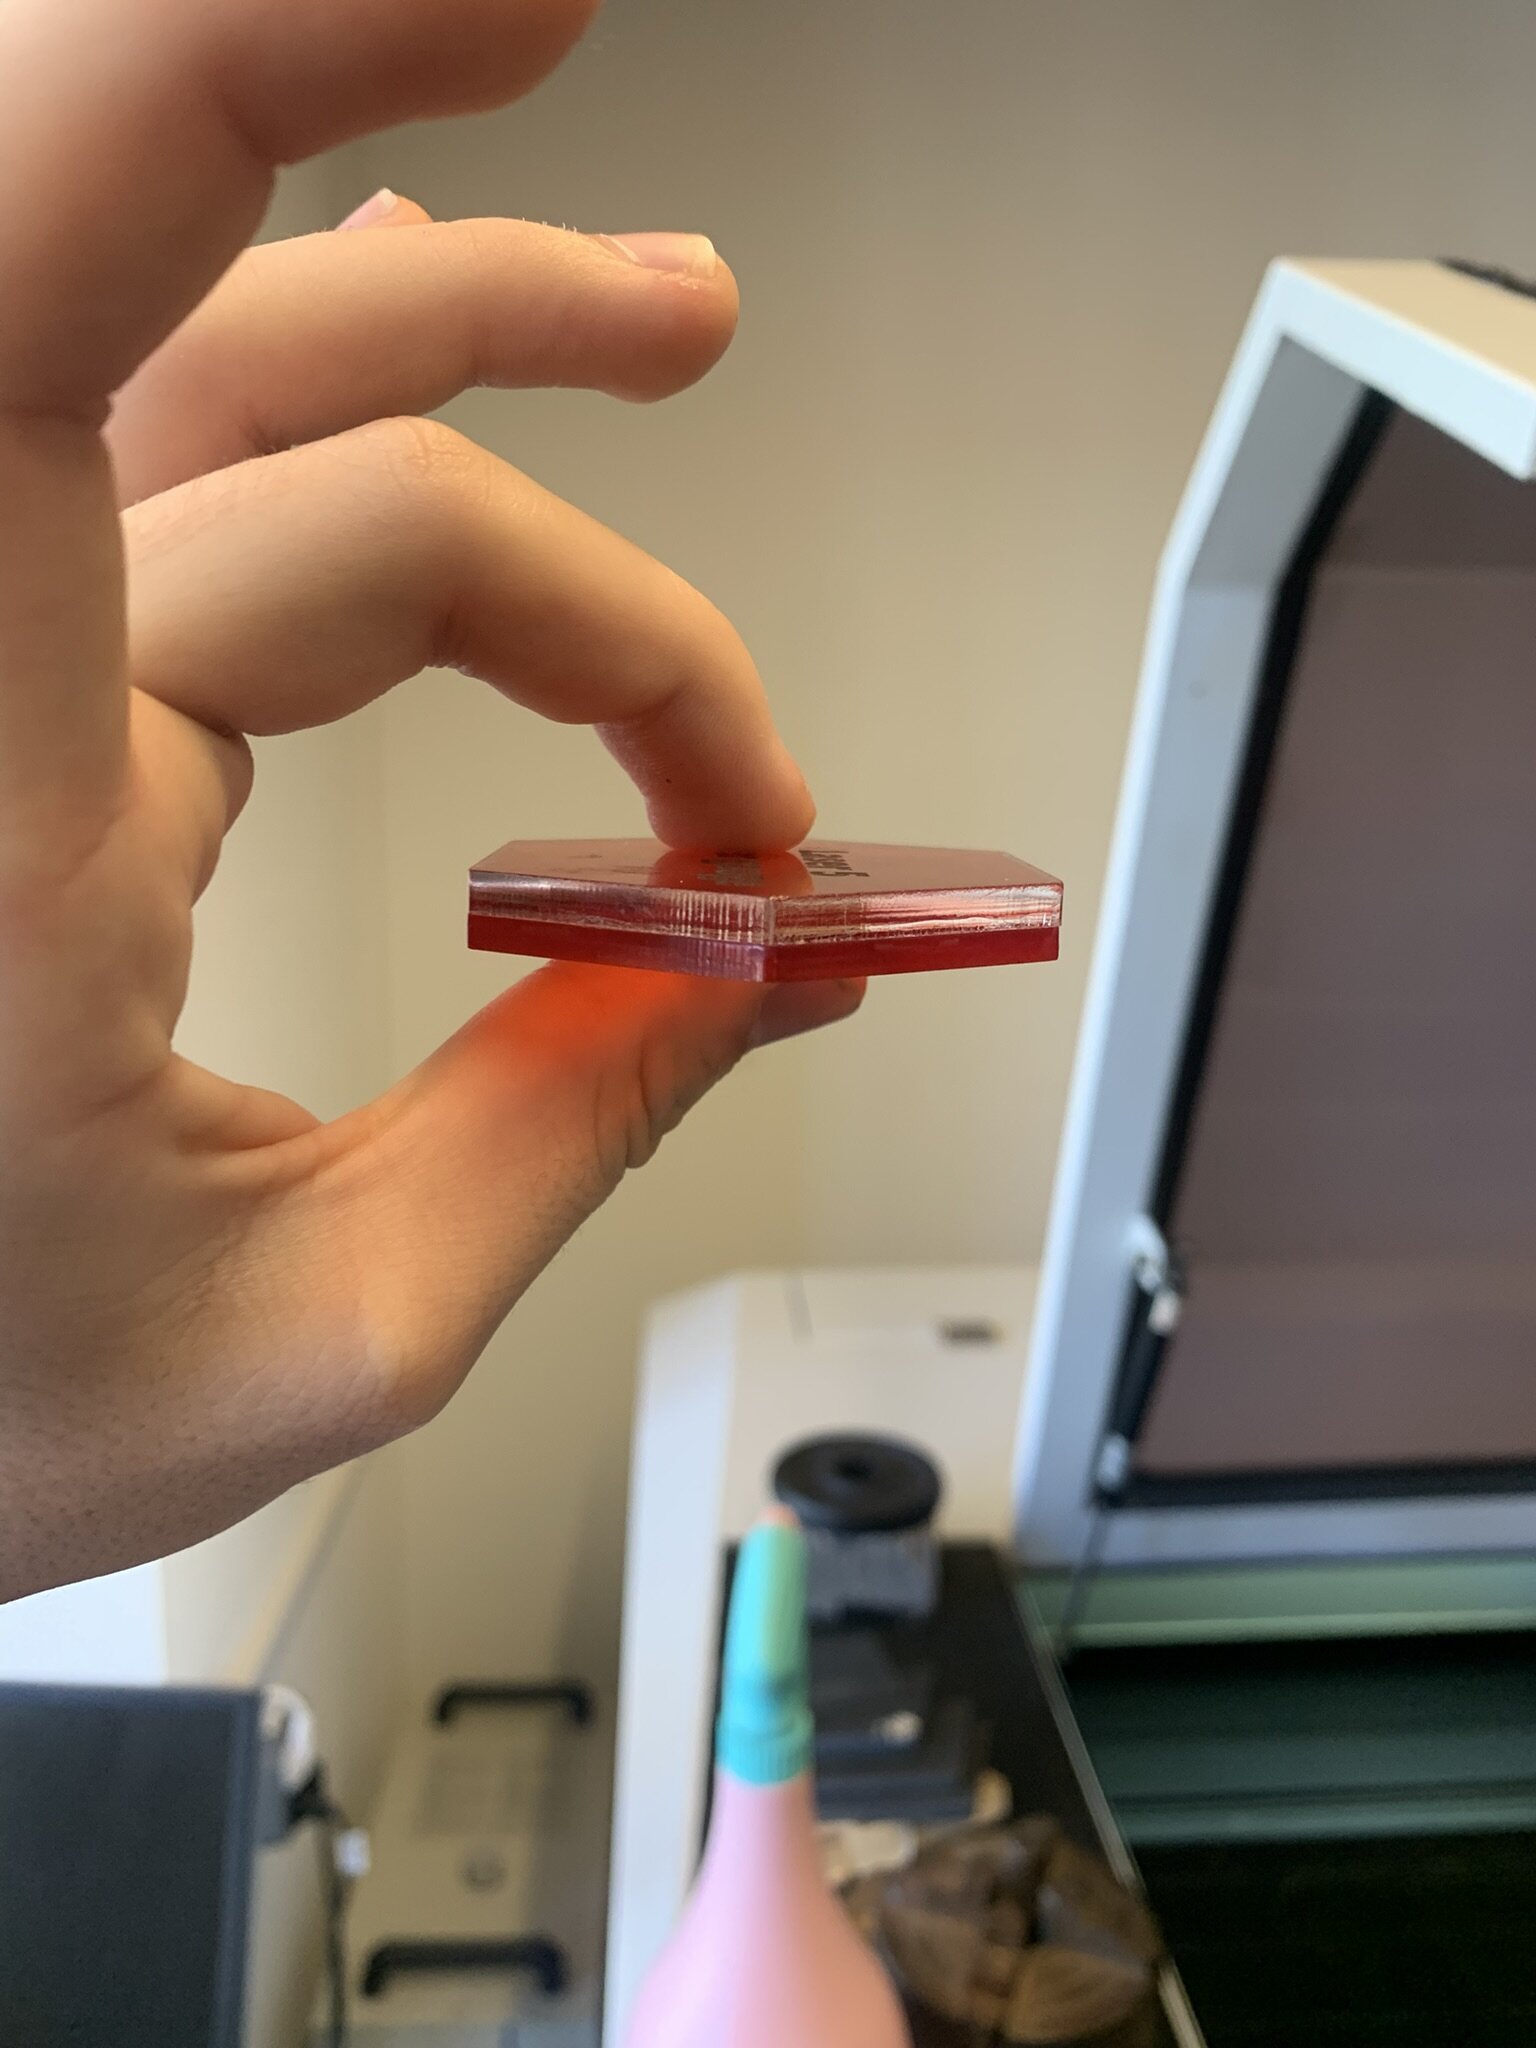
You place this on top of the material and then you can unscrew the nozzle a bit till it drops down on top of the plate like this.
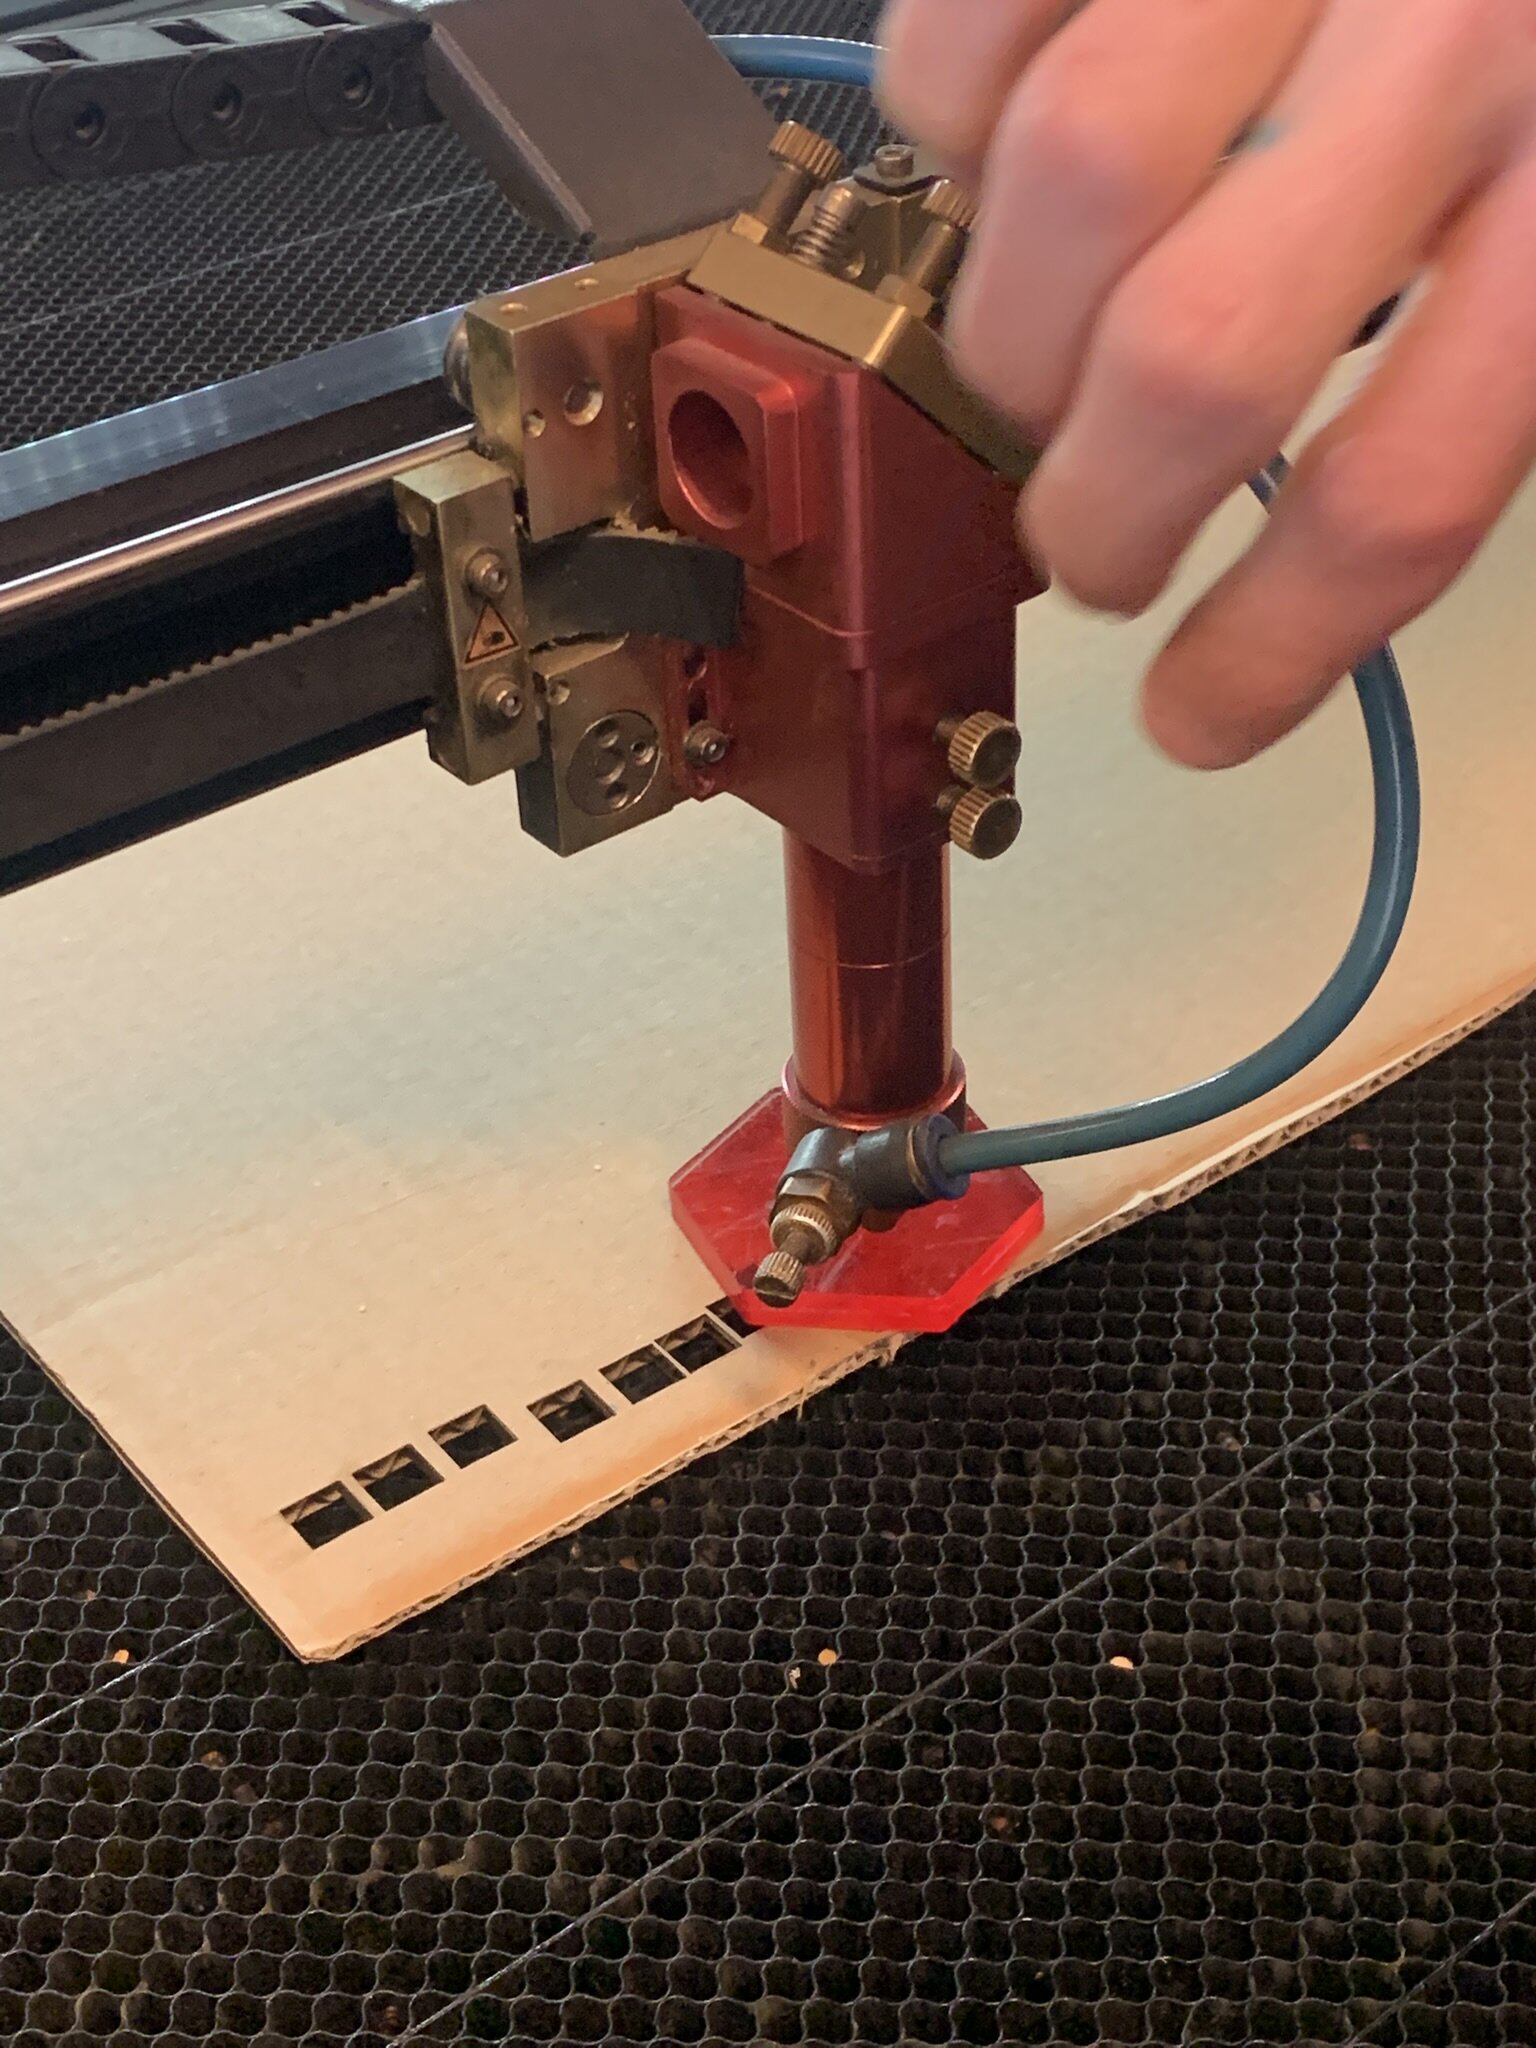
After you've tightened the nozzle again its focused and ready for cutting.
Laser cutting machine safety
Always stand near the laser cutting machine on the red platform. In case a fire breaks out spray it out with the water spray bottle on the side of the machine.
Turning the machine on
When we first turned on the machine it made a lot of noise. Laser cutters are very noisy machines. The power switch is the big red switch on the side.
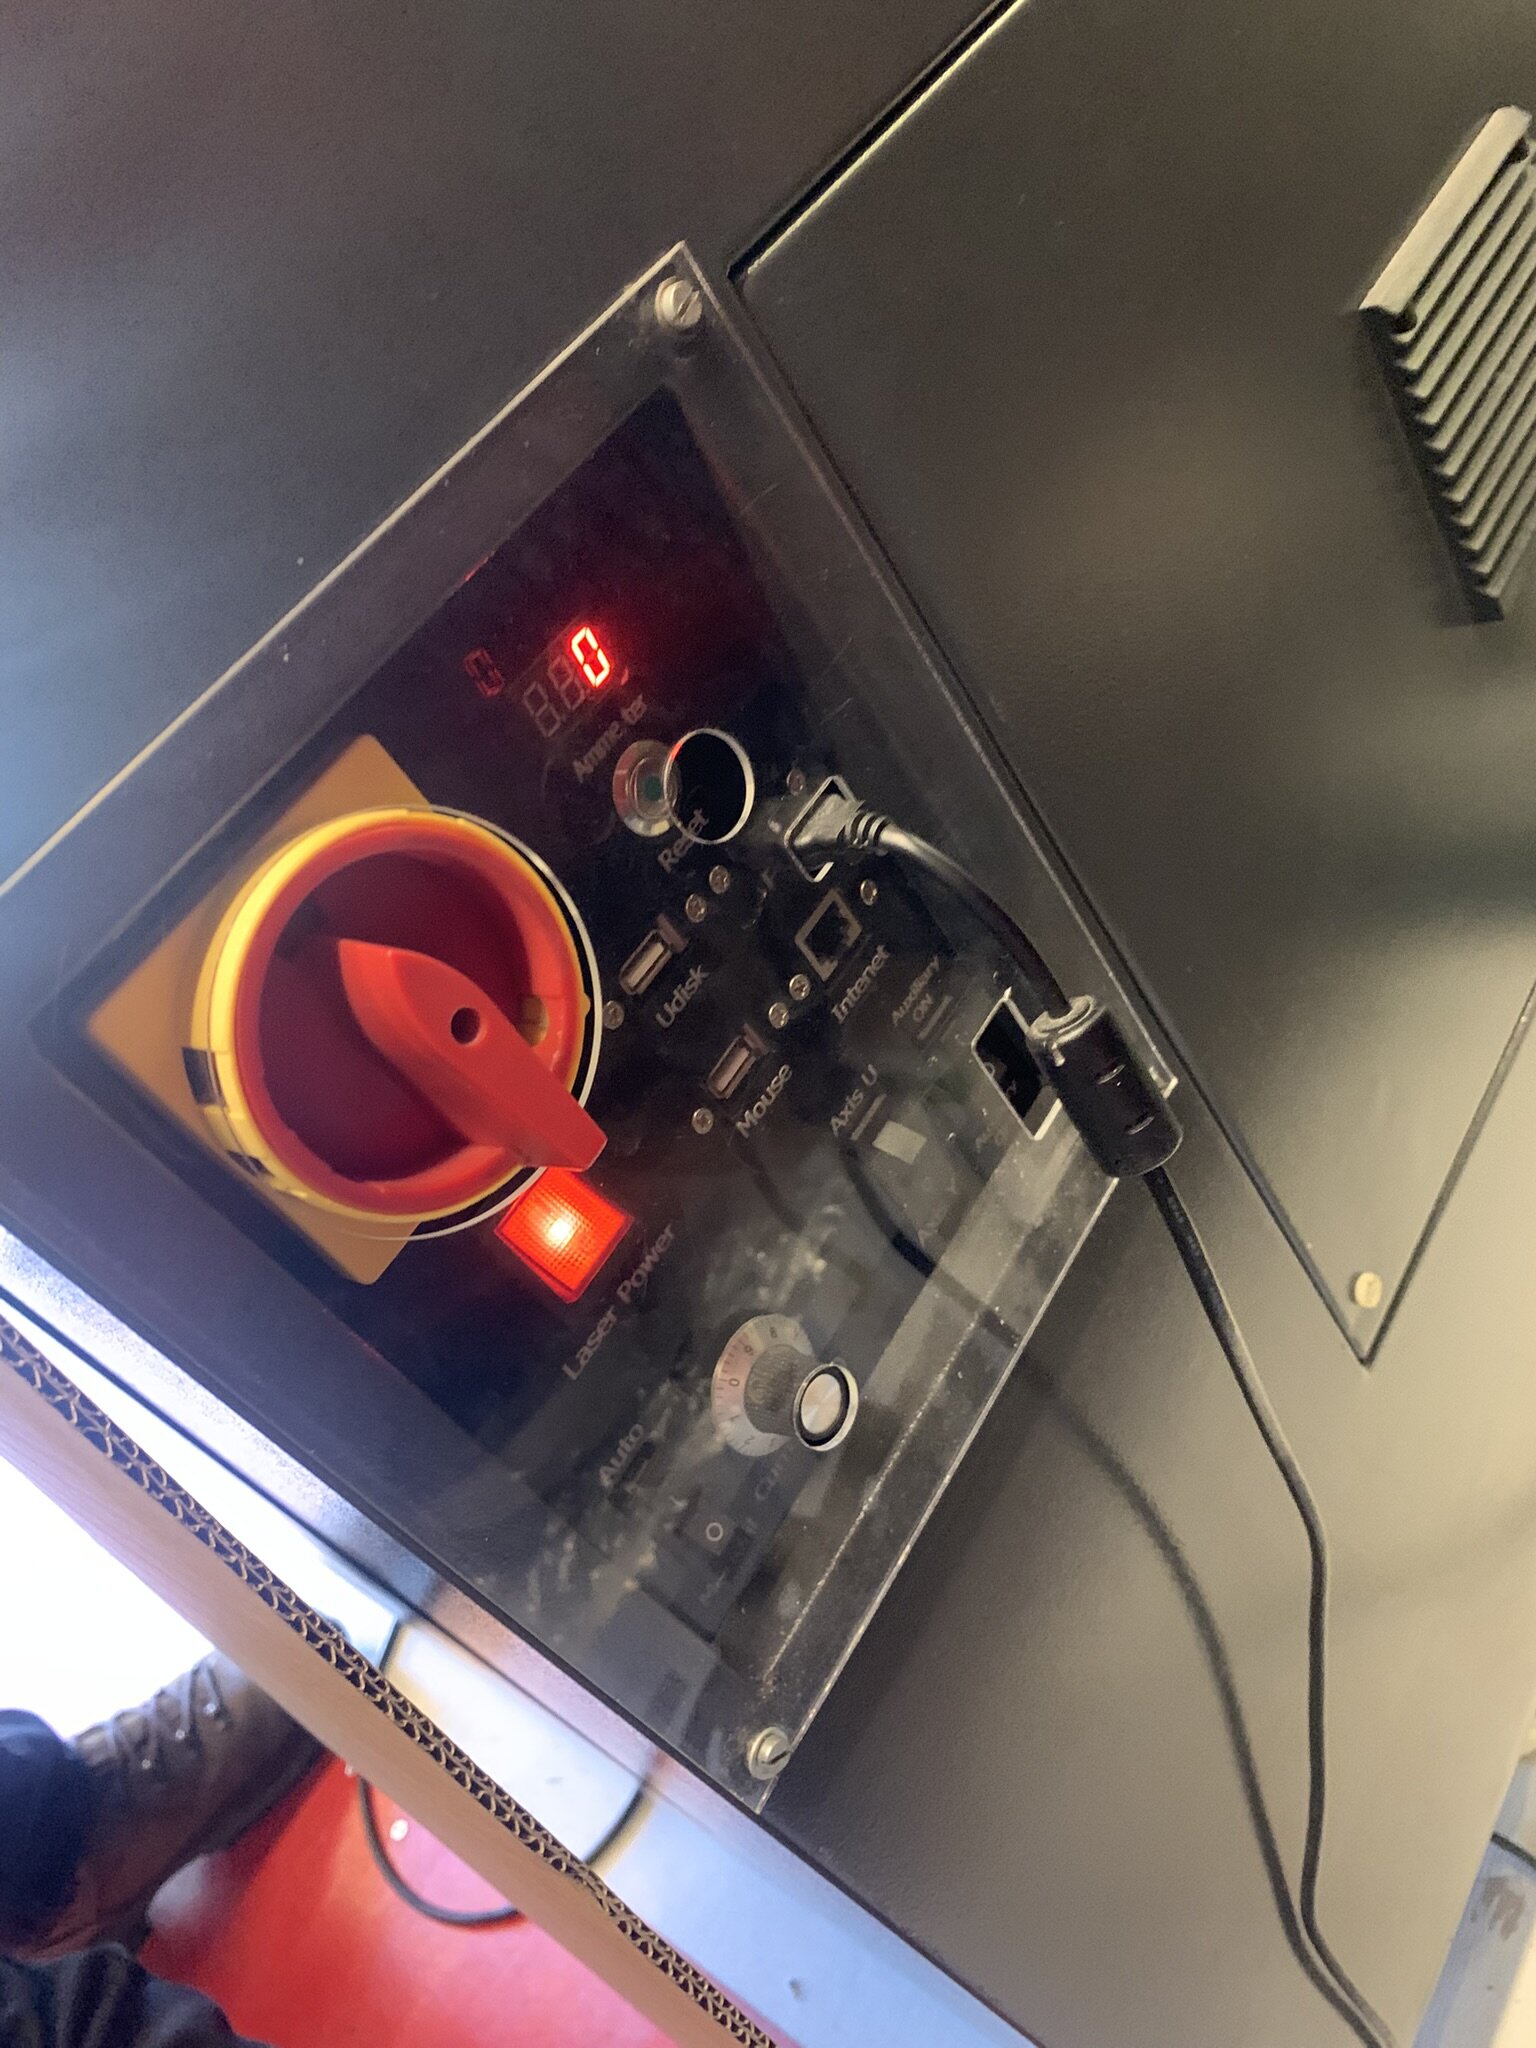
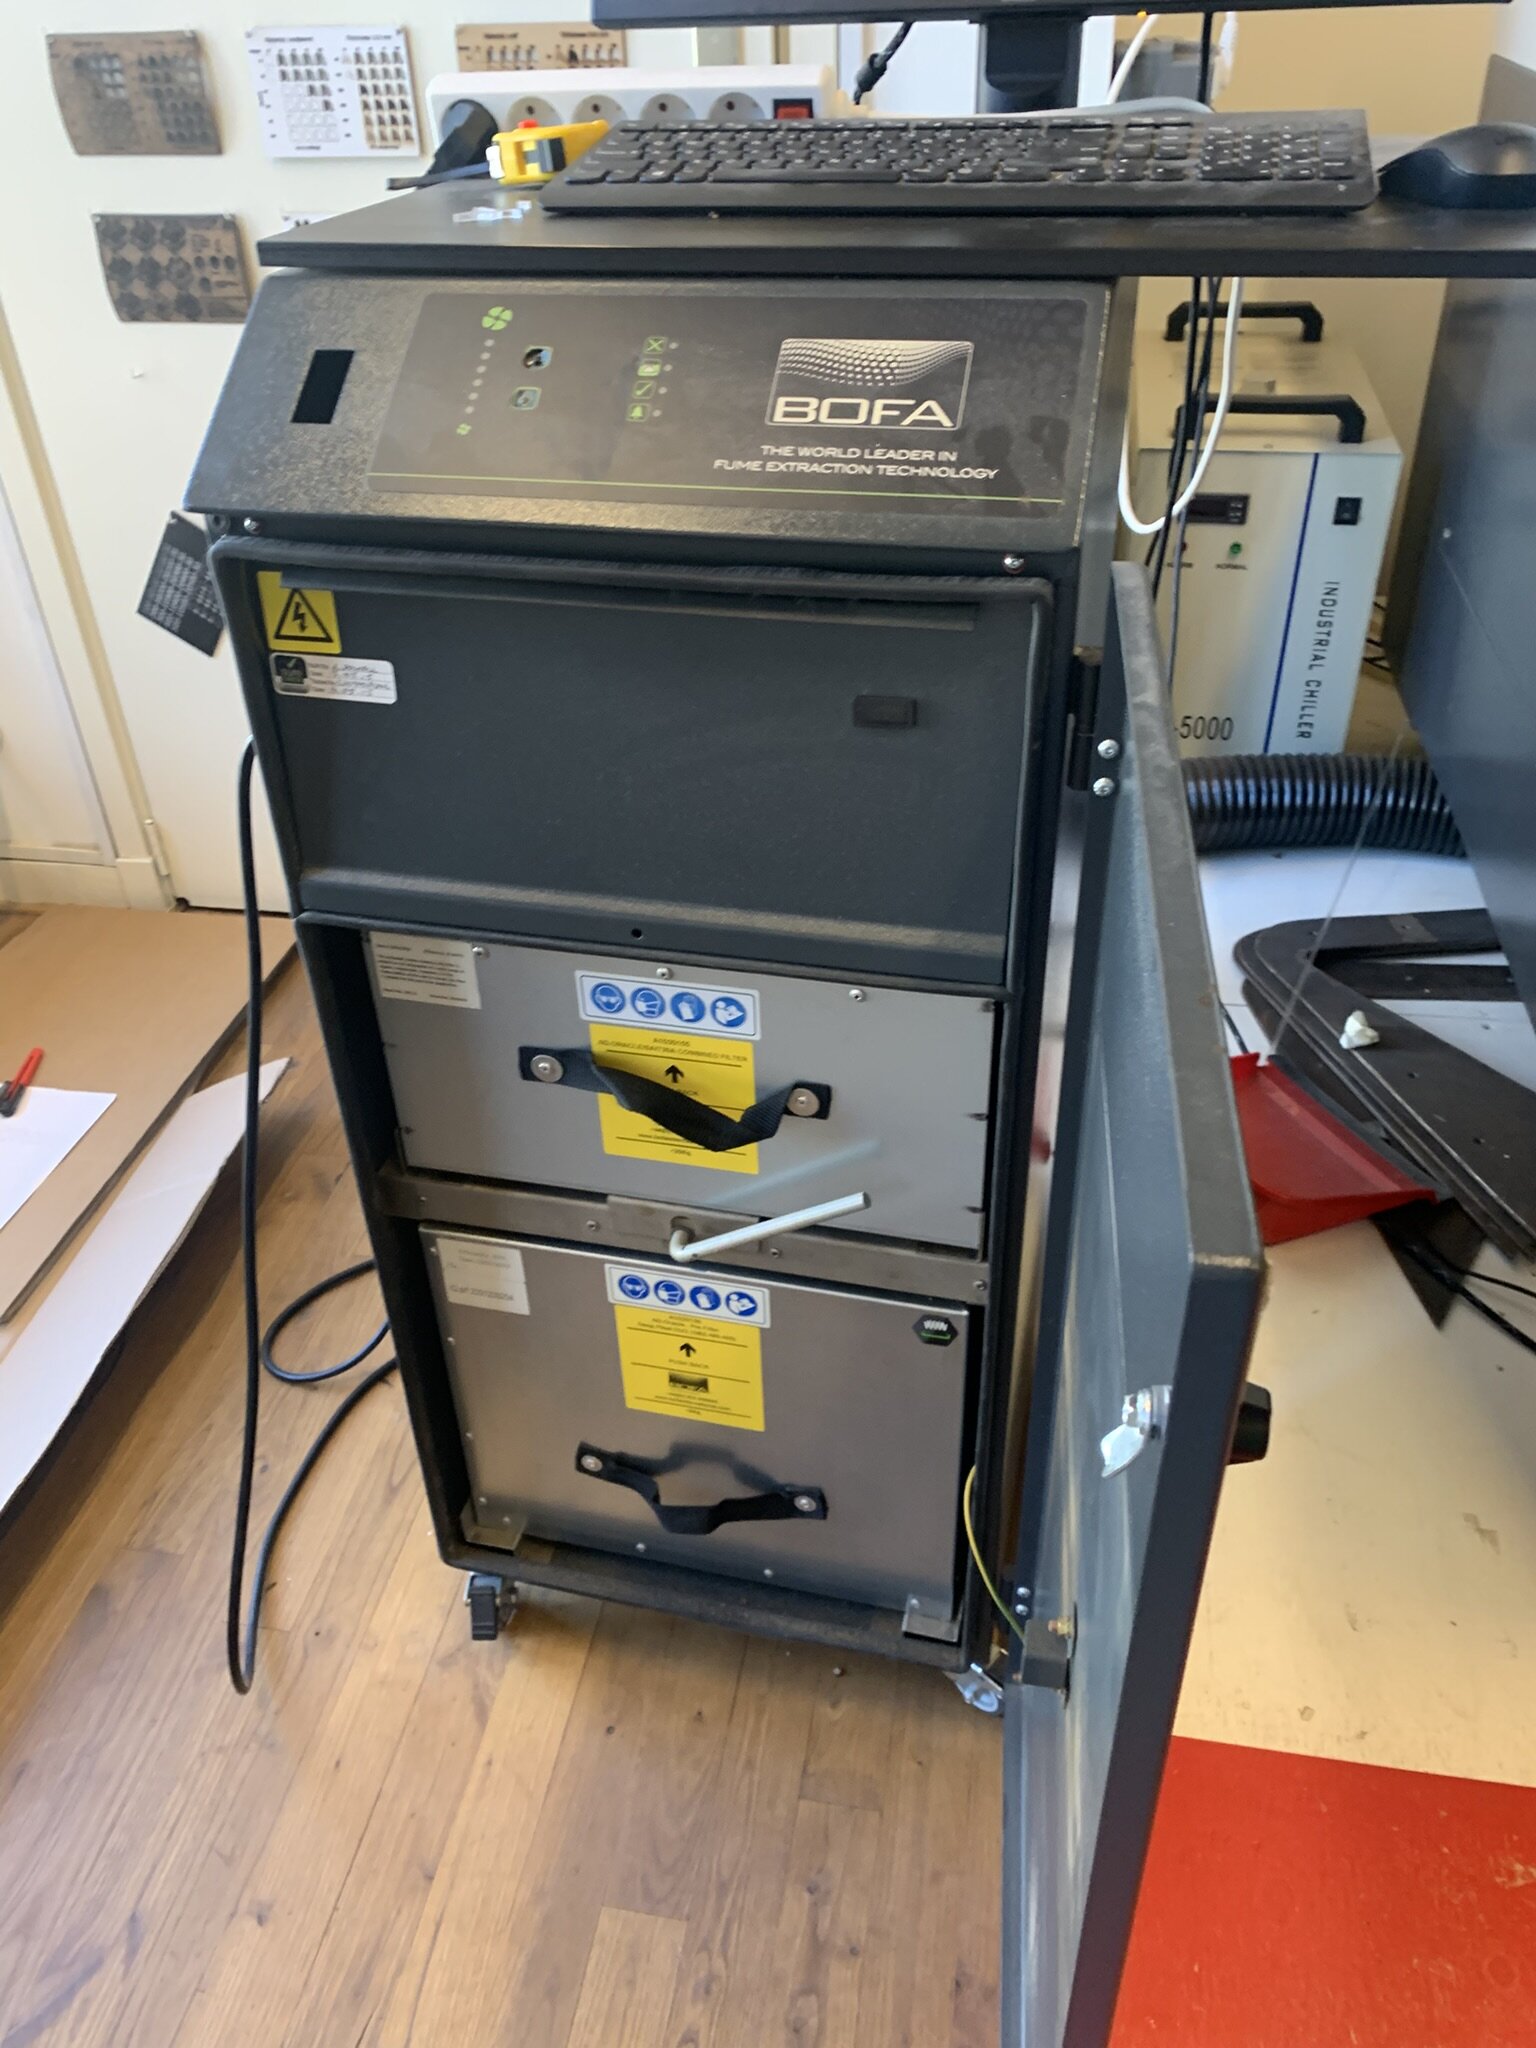
When you turn the switch you also need to press the green button to reset the machine. And turn the auxiliary switch on the enable the air pumps. You also need to enable the air filtration systems. That can be done using the red button on the power strip.
After that you need to wait for a minute for the systems to start up. After that we can finally begin cutting!
Laser software (LightBurn)
To control and program the laser we use LightBurn. It's a easy software to use in my opinion. //TODO: lightburn docs
Testing materials
For testing the laser cutter we're gonna use cardboard, acrylic and wood.
Cardboard
Cutting test
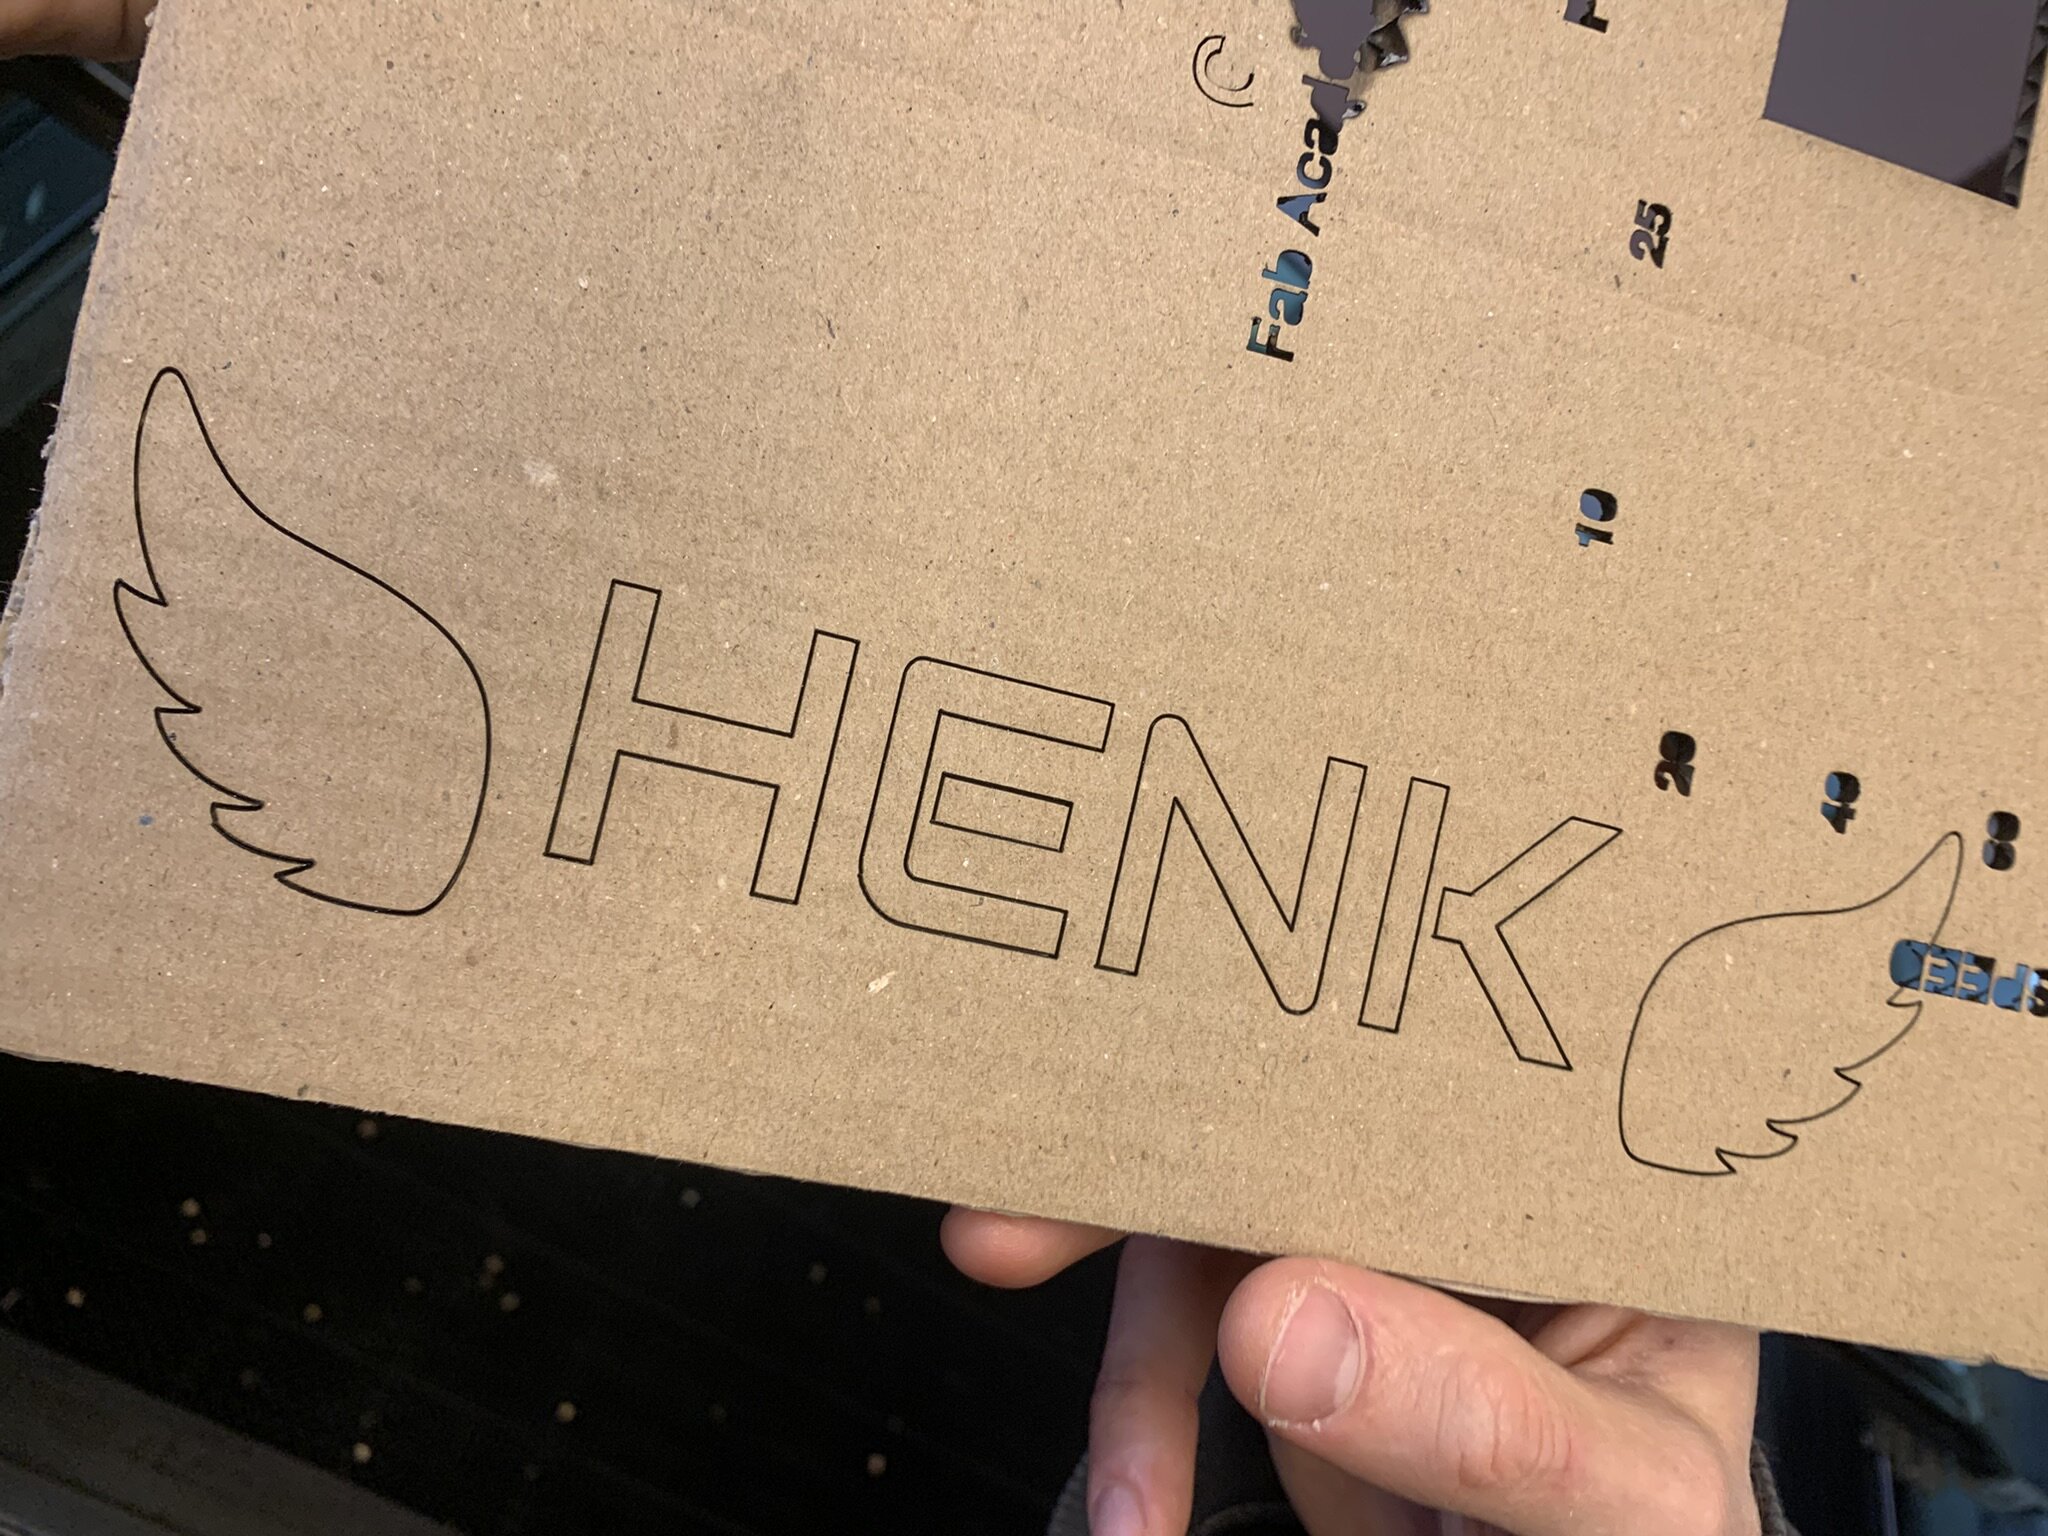
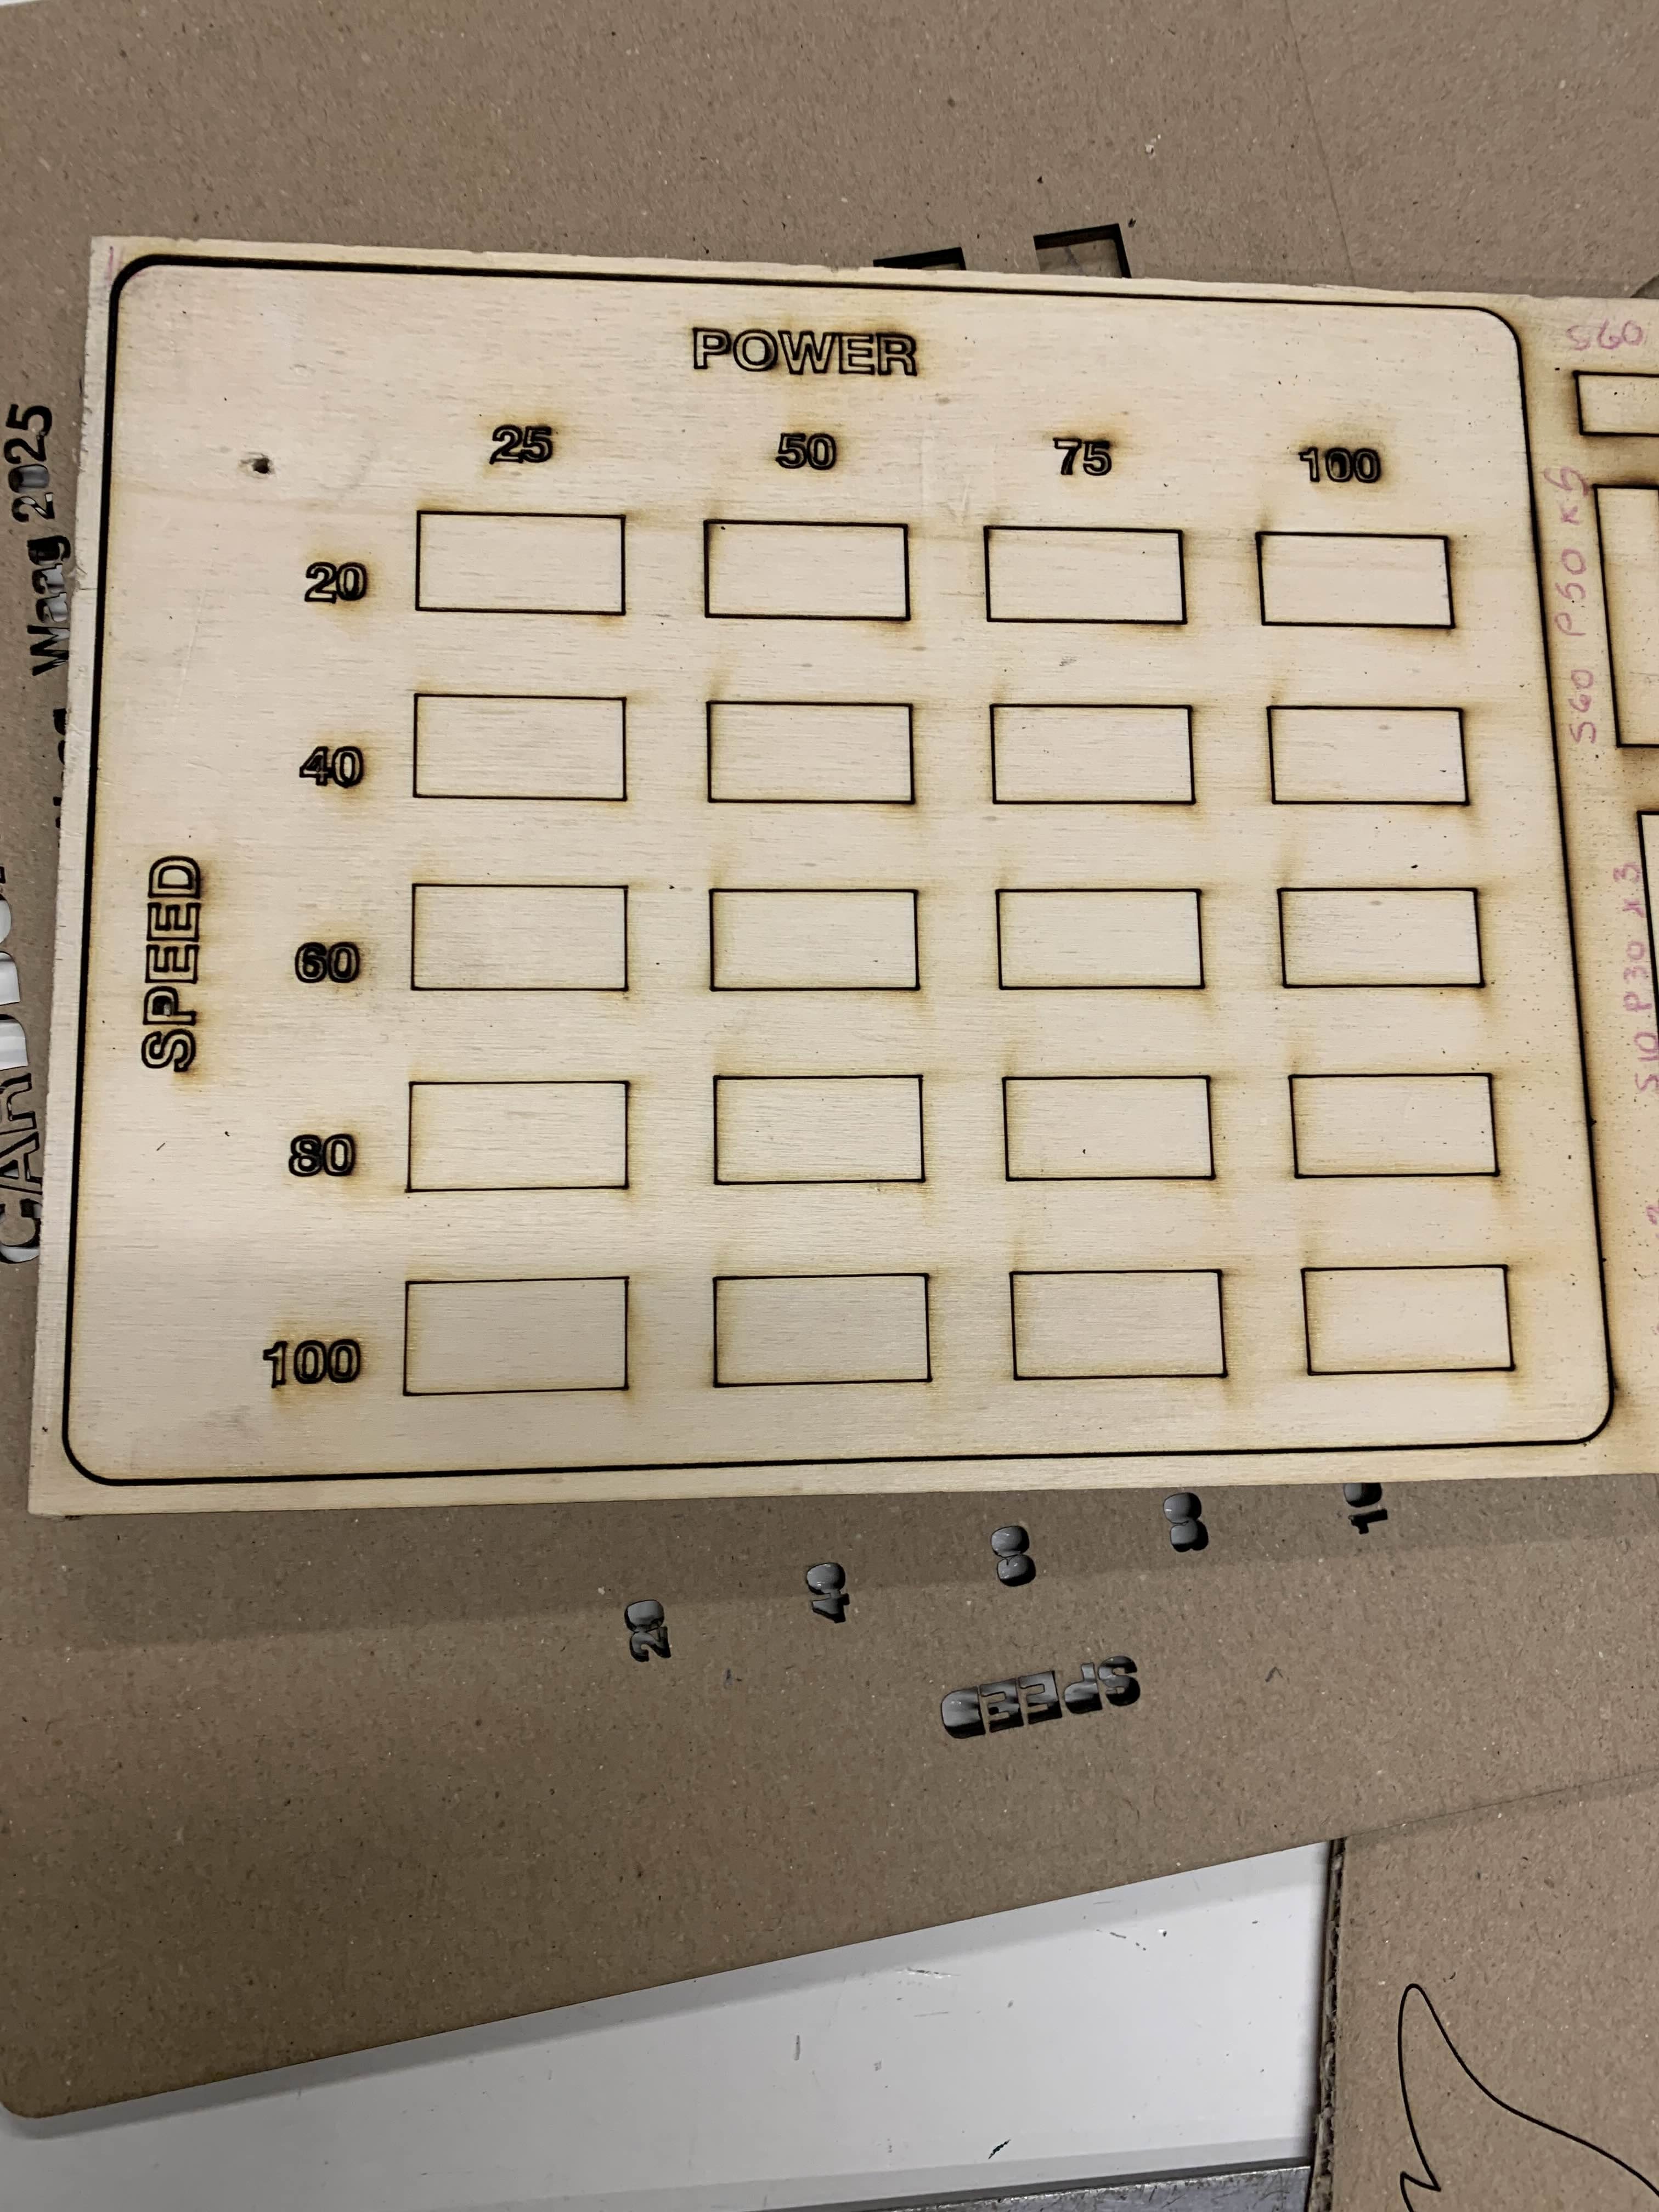
Cutting cardboard is really easy but don't do it too slow otherwise you get what we got. We accidentally burned the cardboard during the cutting test when lasering the name in the cardboard. It probably burned because the heat was near one location for too long.
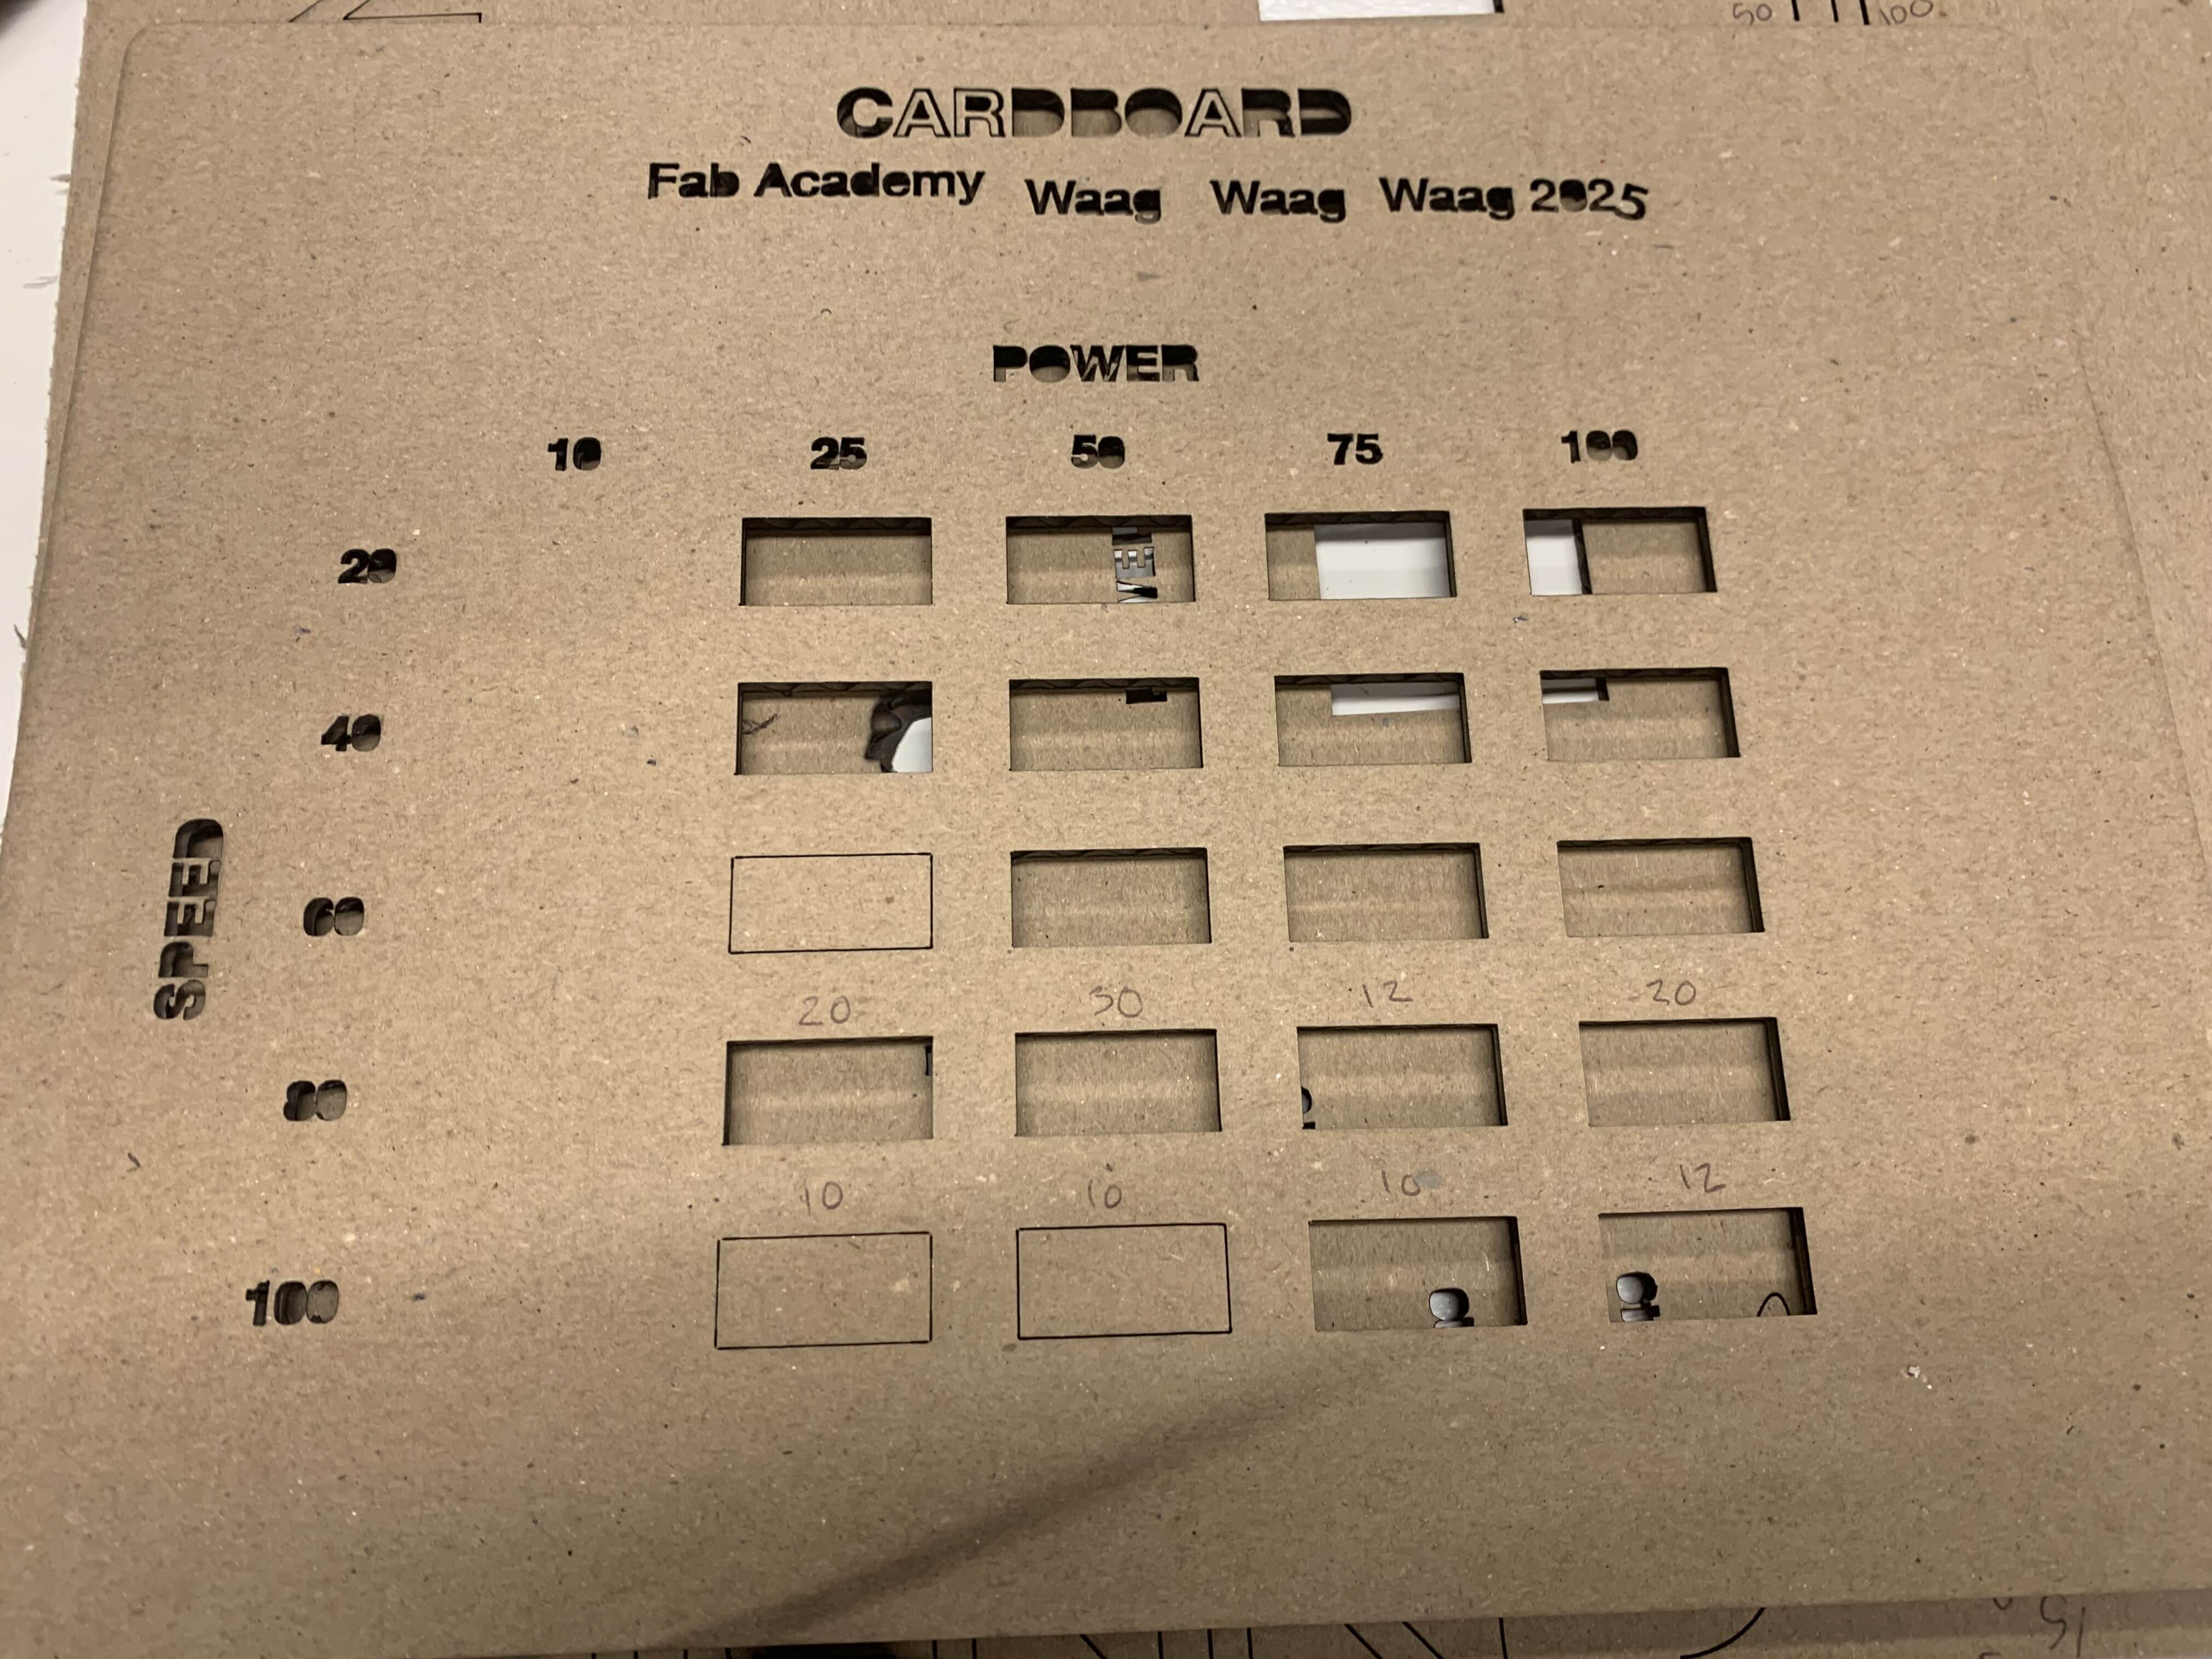 This is the result of our cutting. Cardboard got a really wide curve that you can cut.
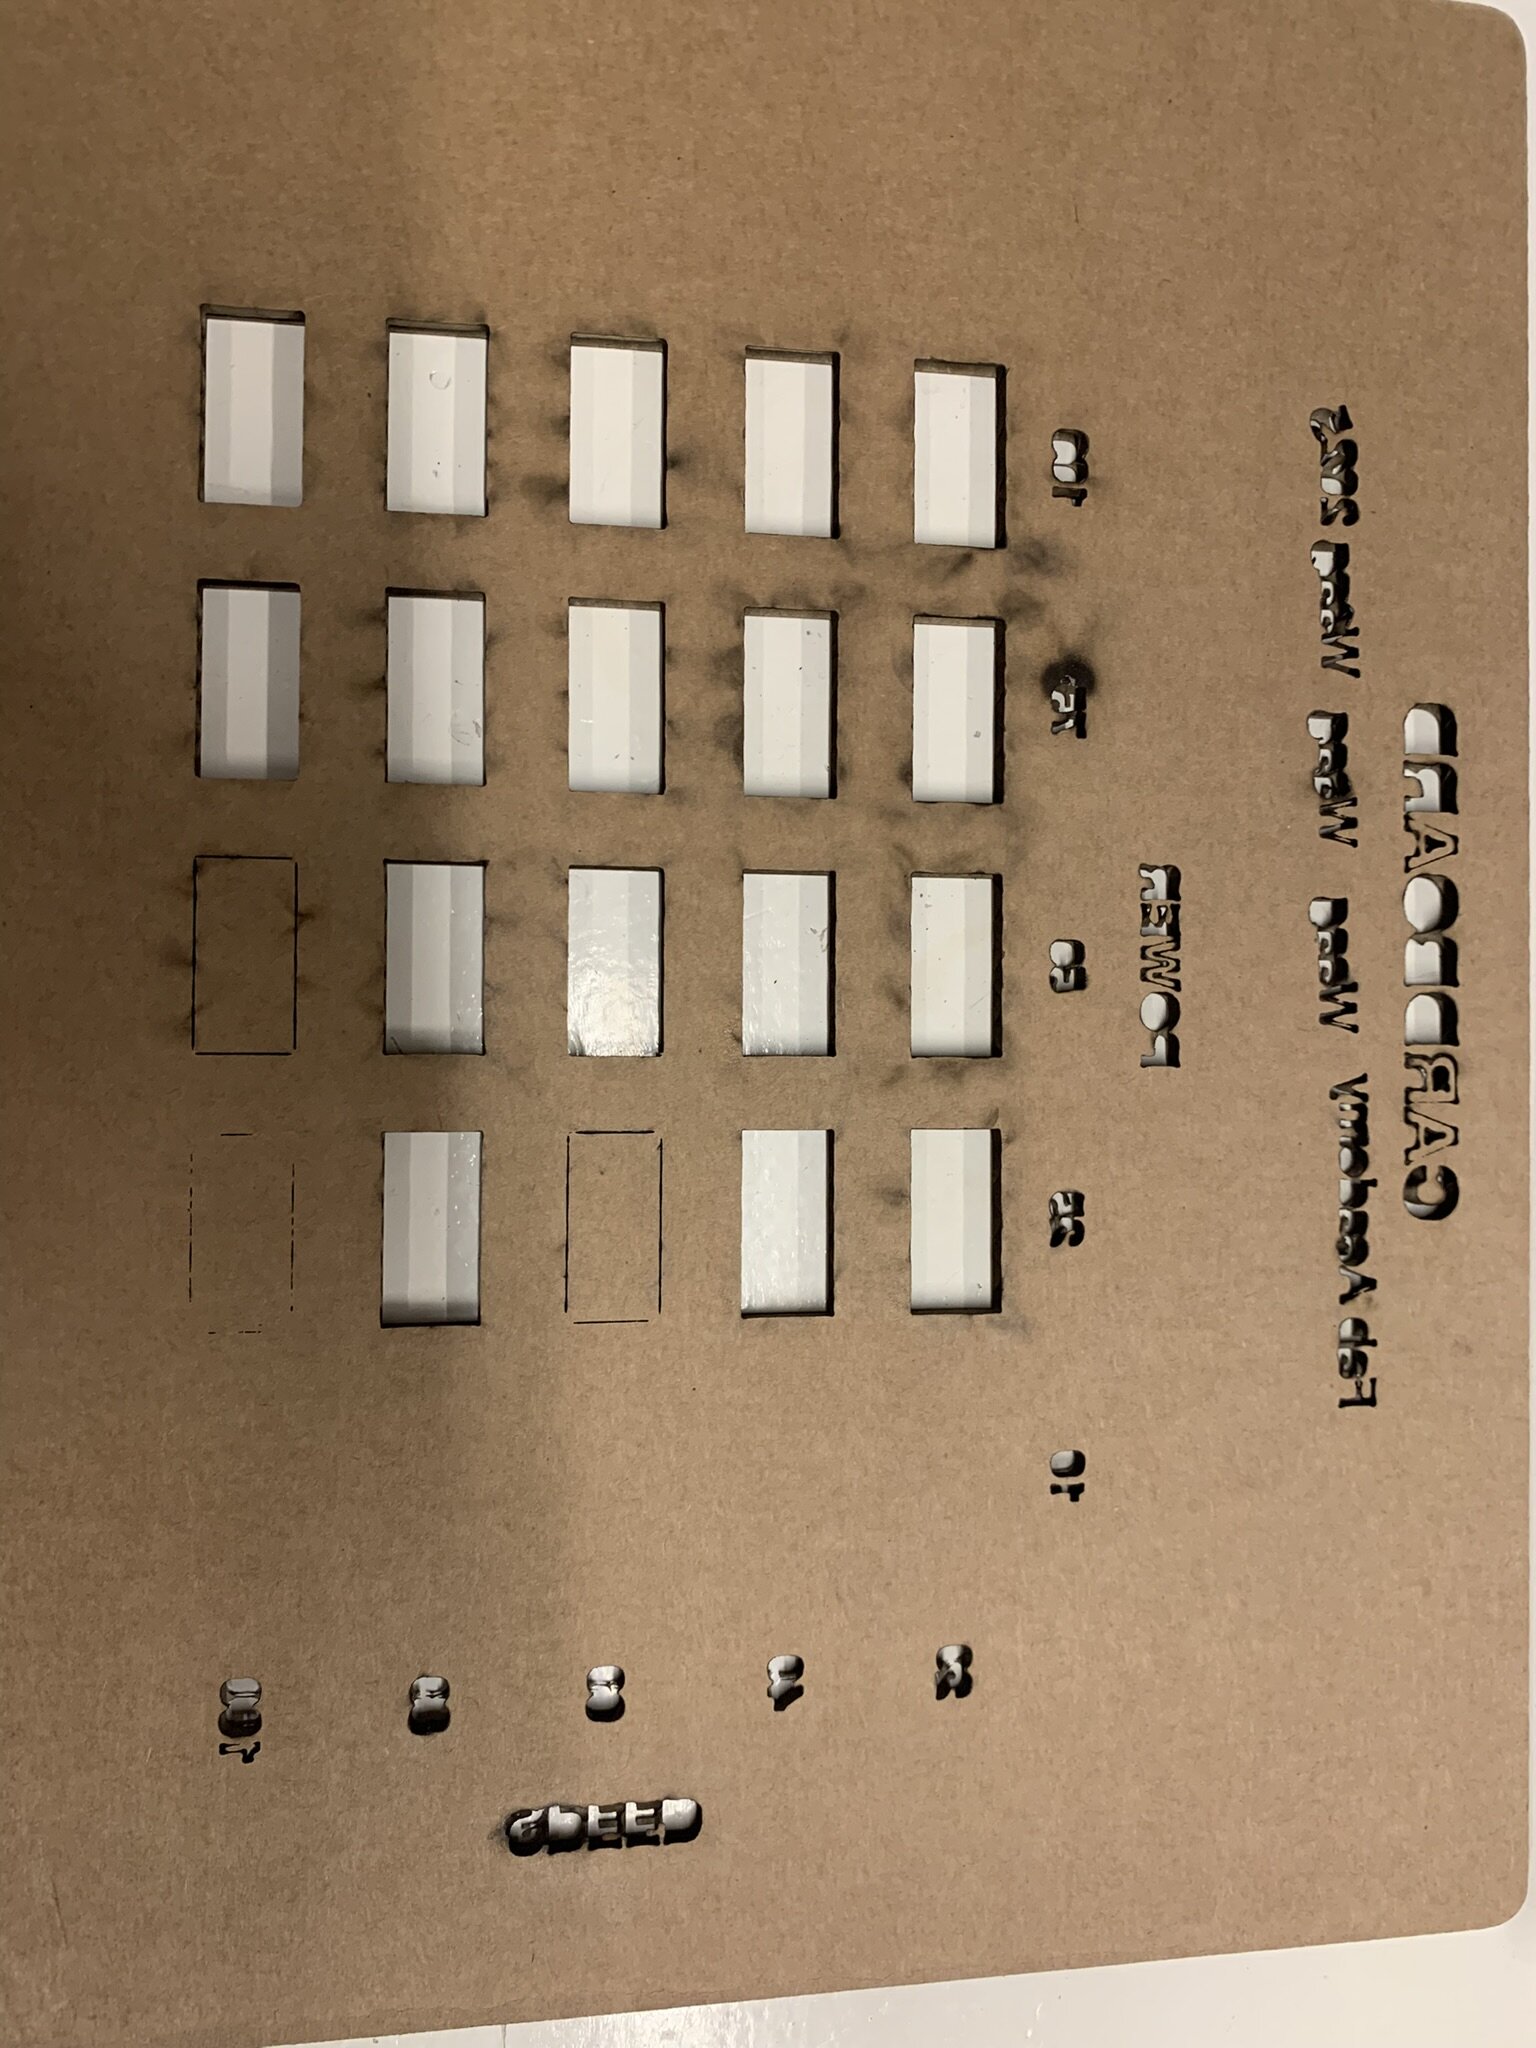 But when looking at the backside you do see a difference with how much it burned. From there I think the best values for cardboard are high power and high speed 100s/100p or medium speed and low power 40s/25p.
We also had one small little incident when we where cutting out the letters. The laser was too too each letter so the cardboard got hot and burned a little. We also noticed that our laser couldn't output a laser at 10 power. So that's why we stopped measuring it in the rest of the tests. These tests up here could be a fluke because all the minimum powers where left unchanged and random.
Karf test
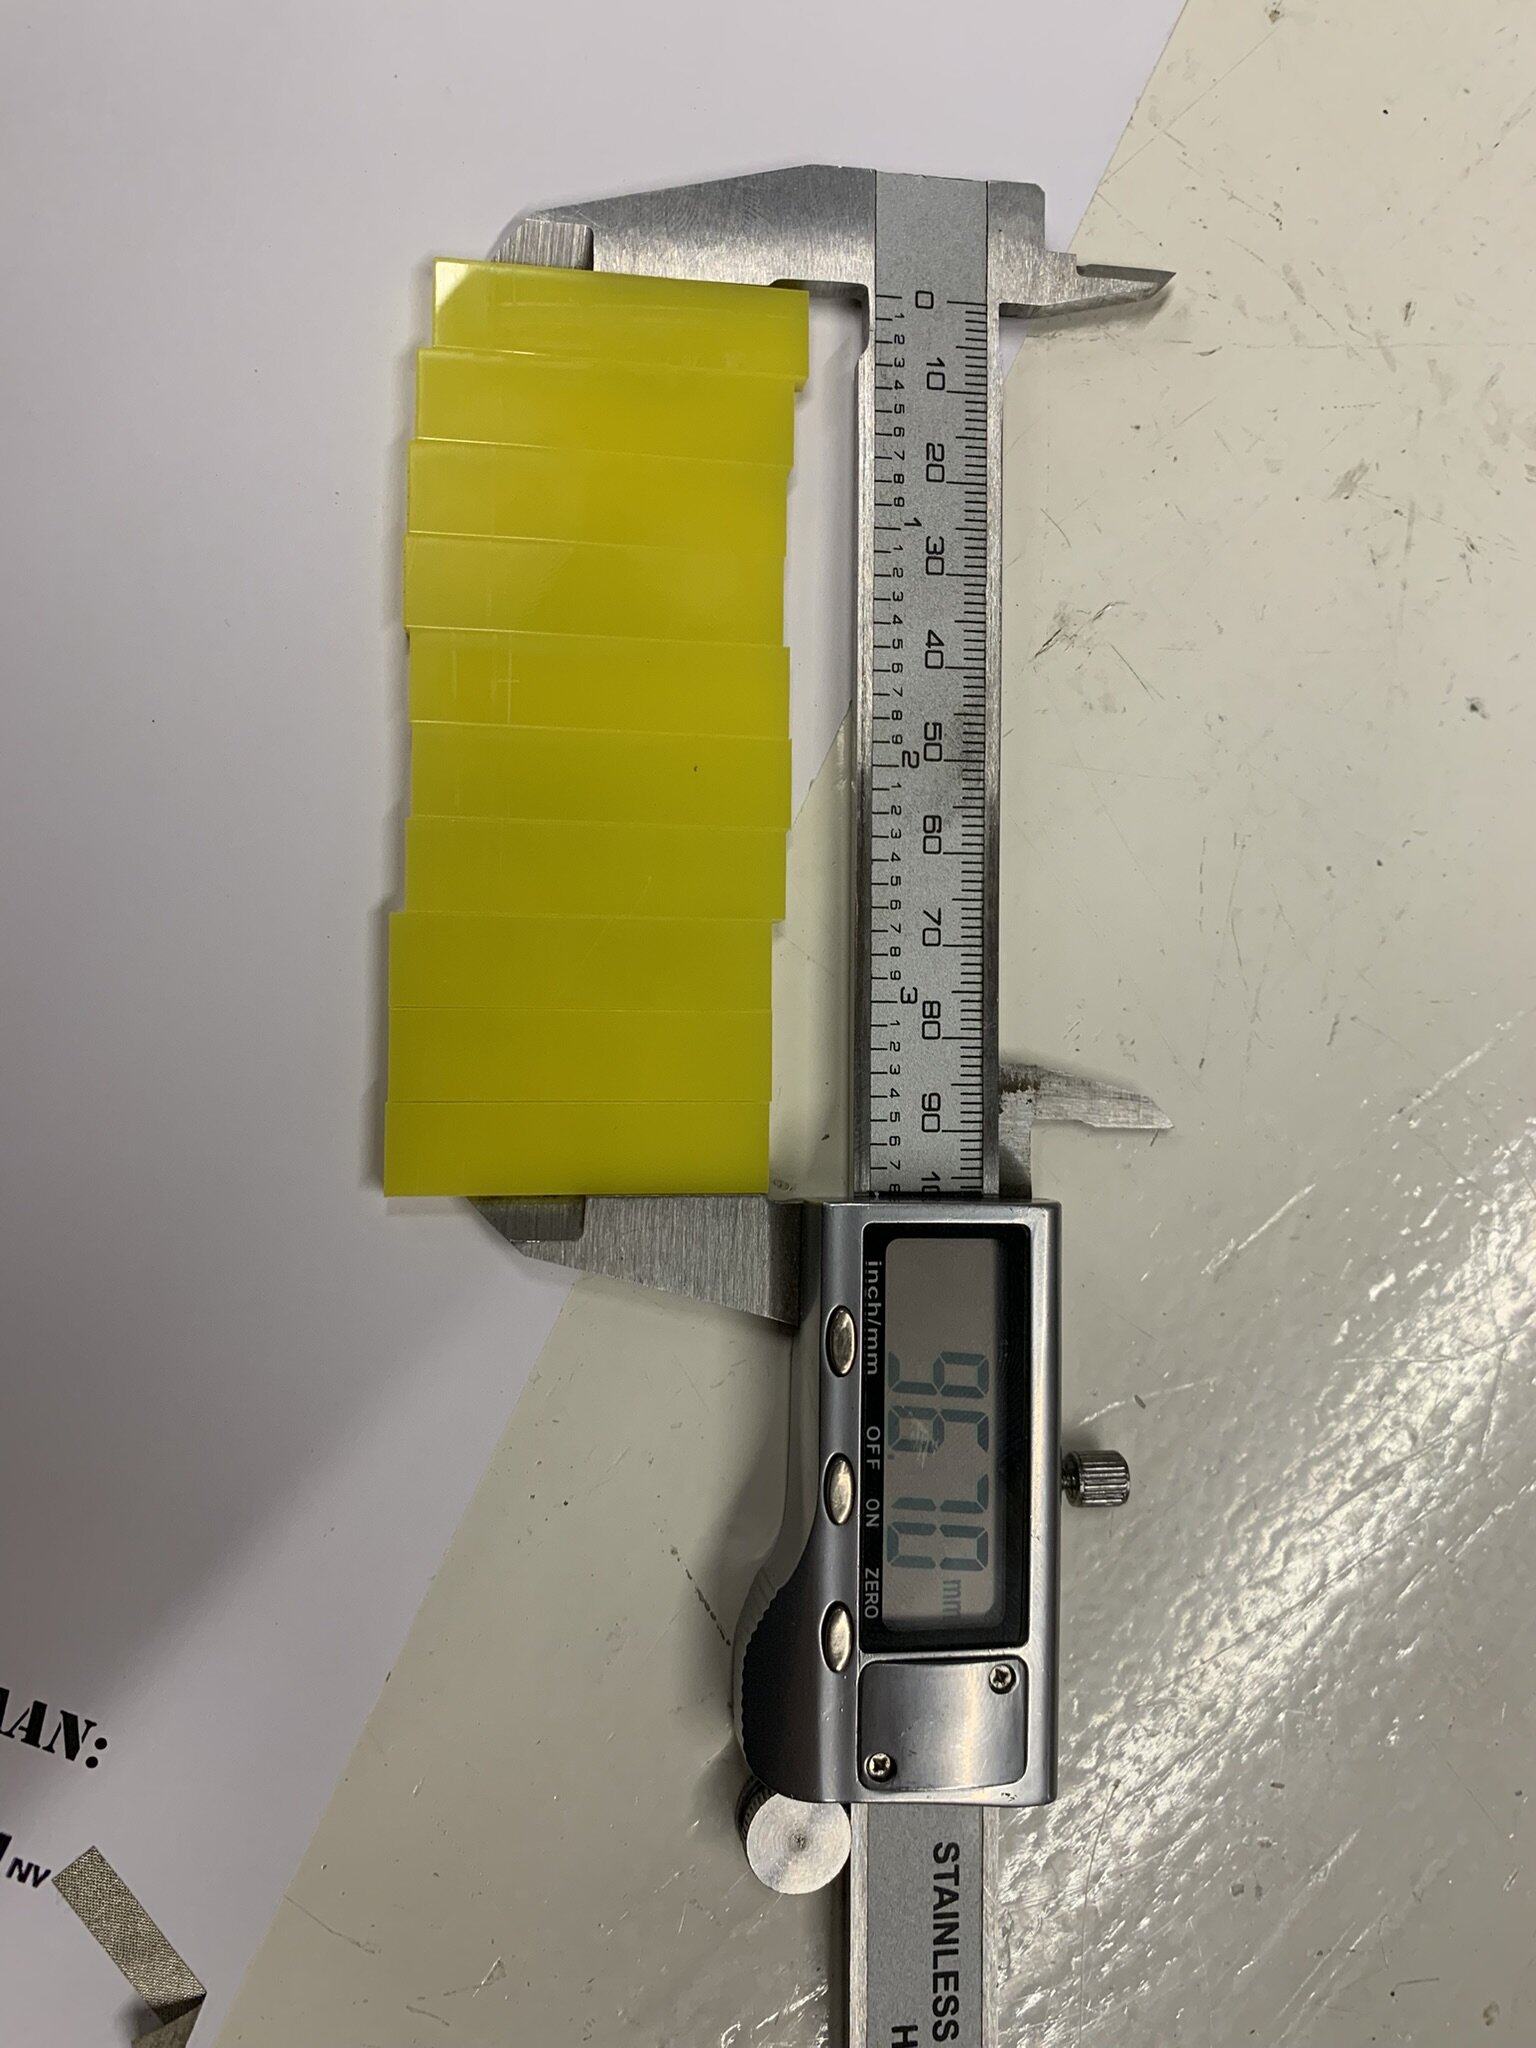
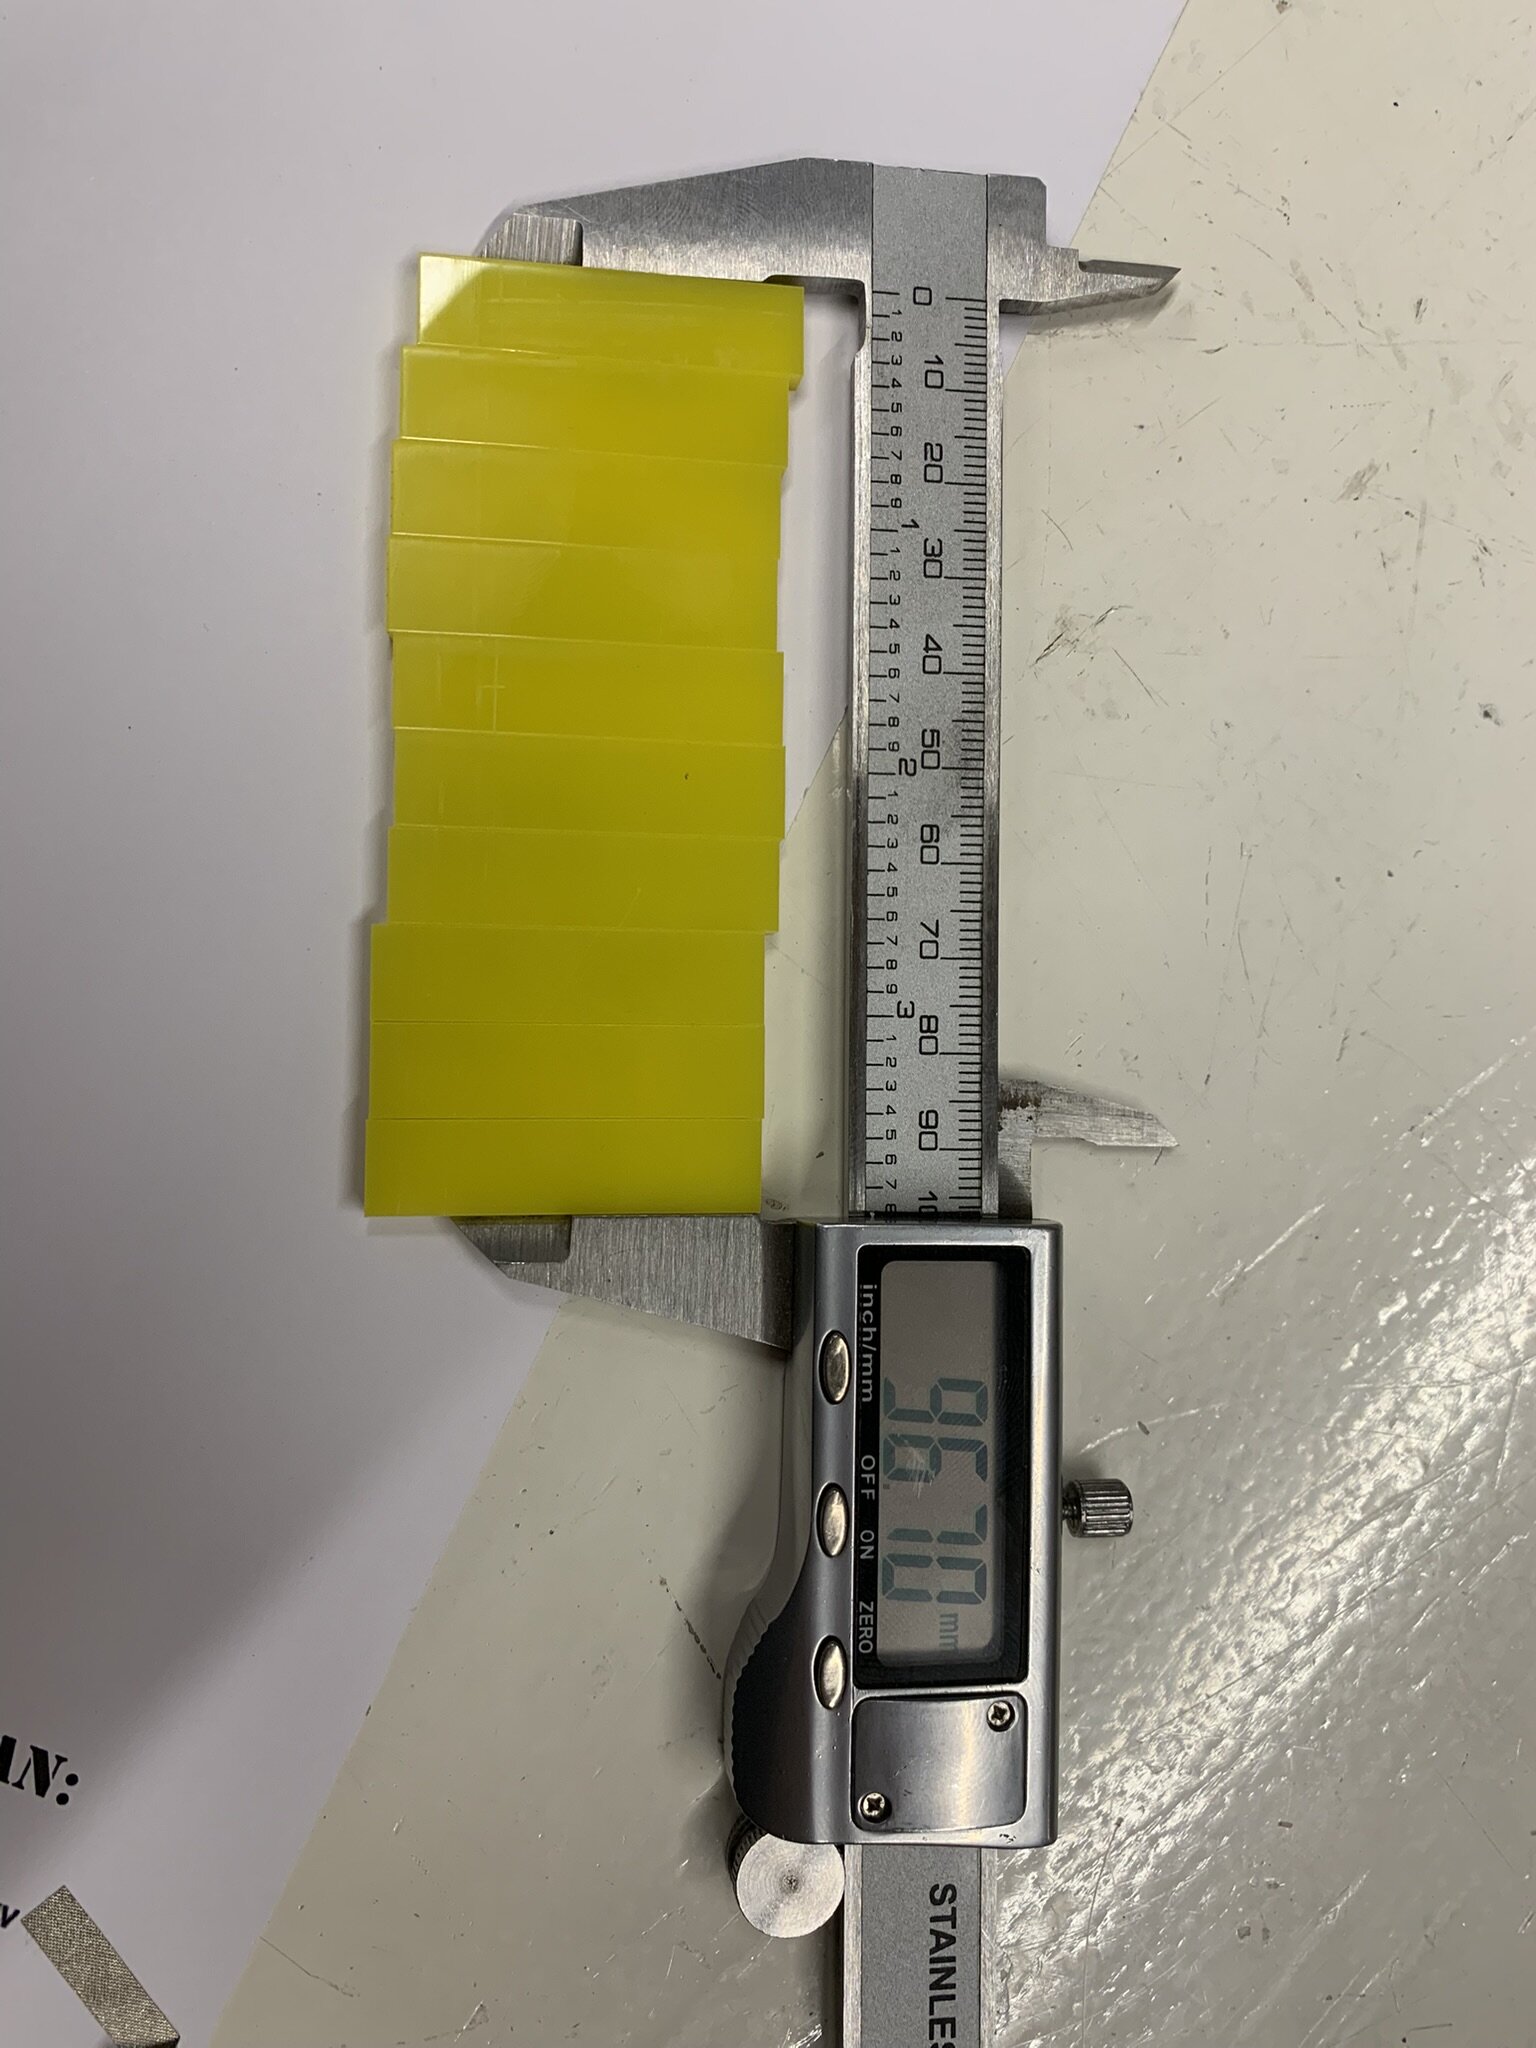
So we did all the test with exactly 10 centimeters. So there are 11 cuts.
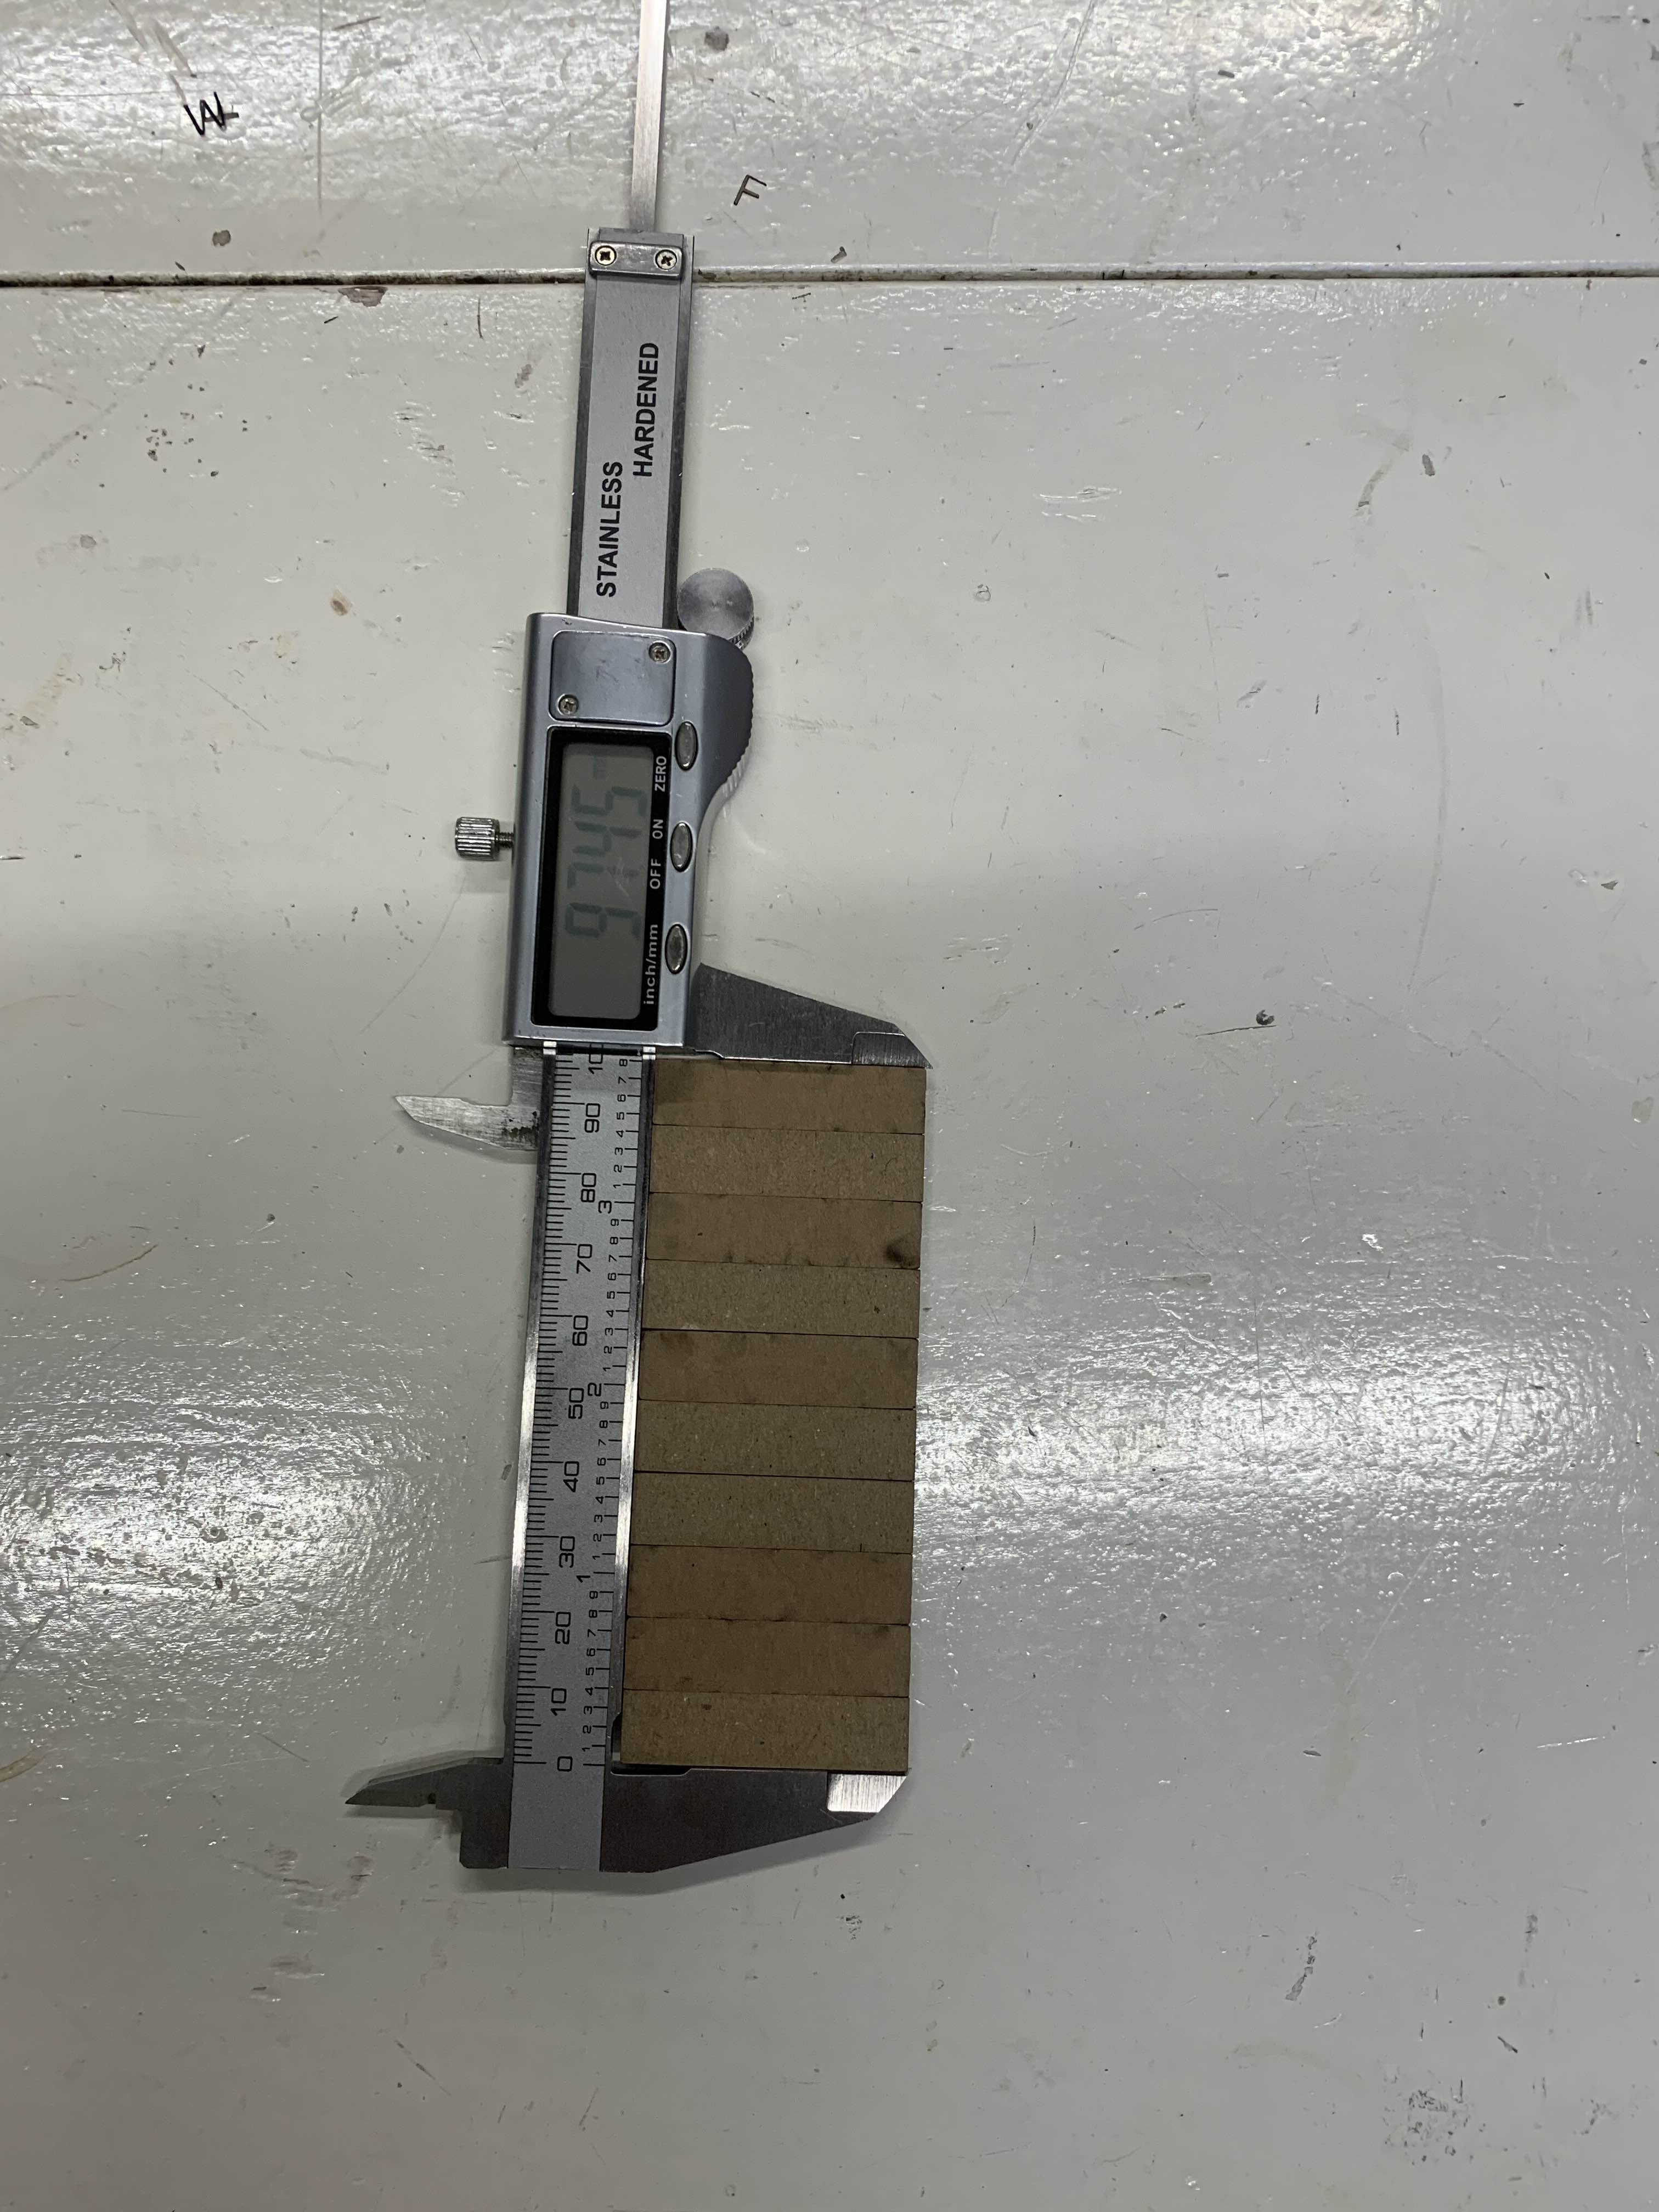 (100-97,45)/11=0.23181818181mm karf distance per line/cut
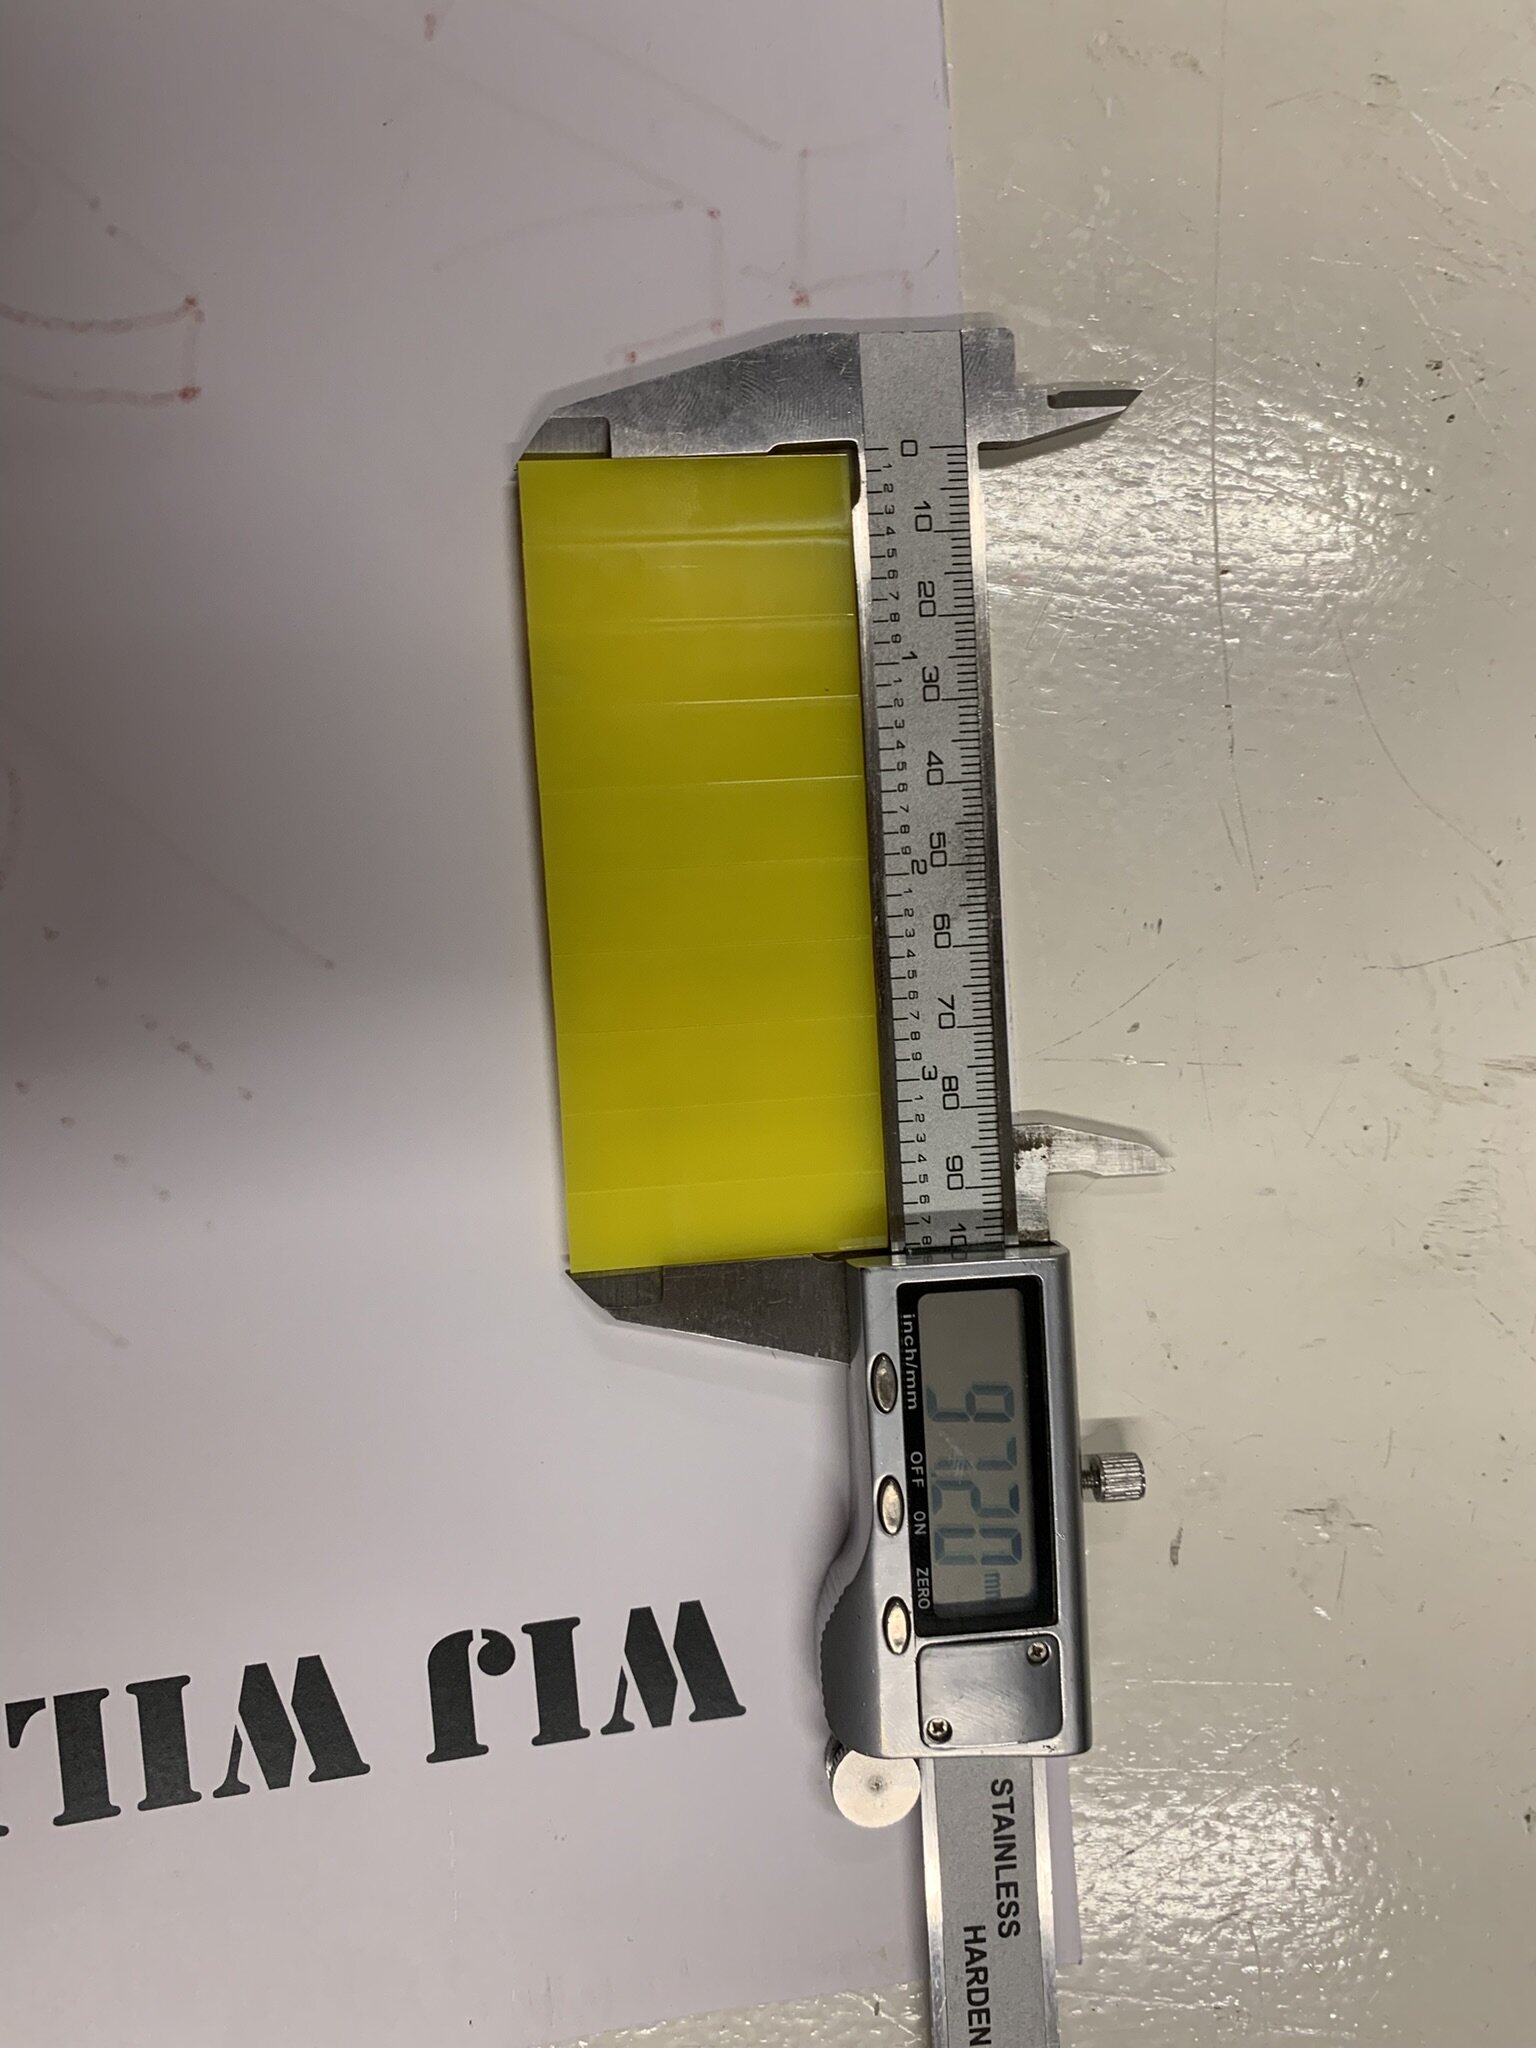
We also did a test with a full length piece to test if there are any biases.
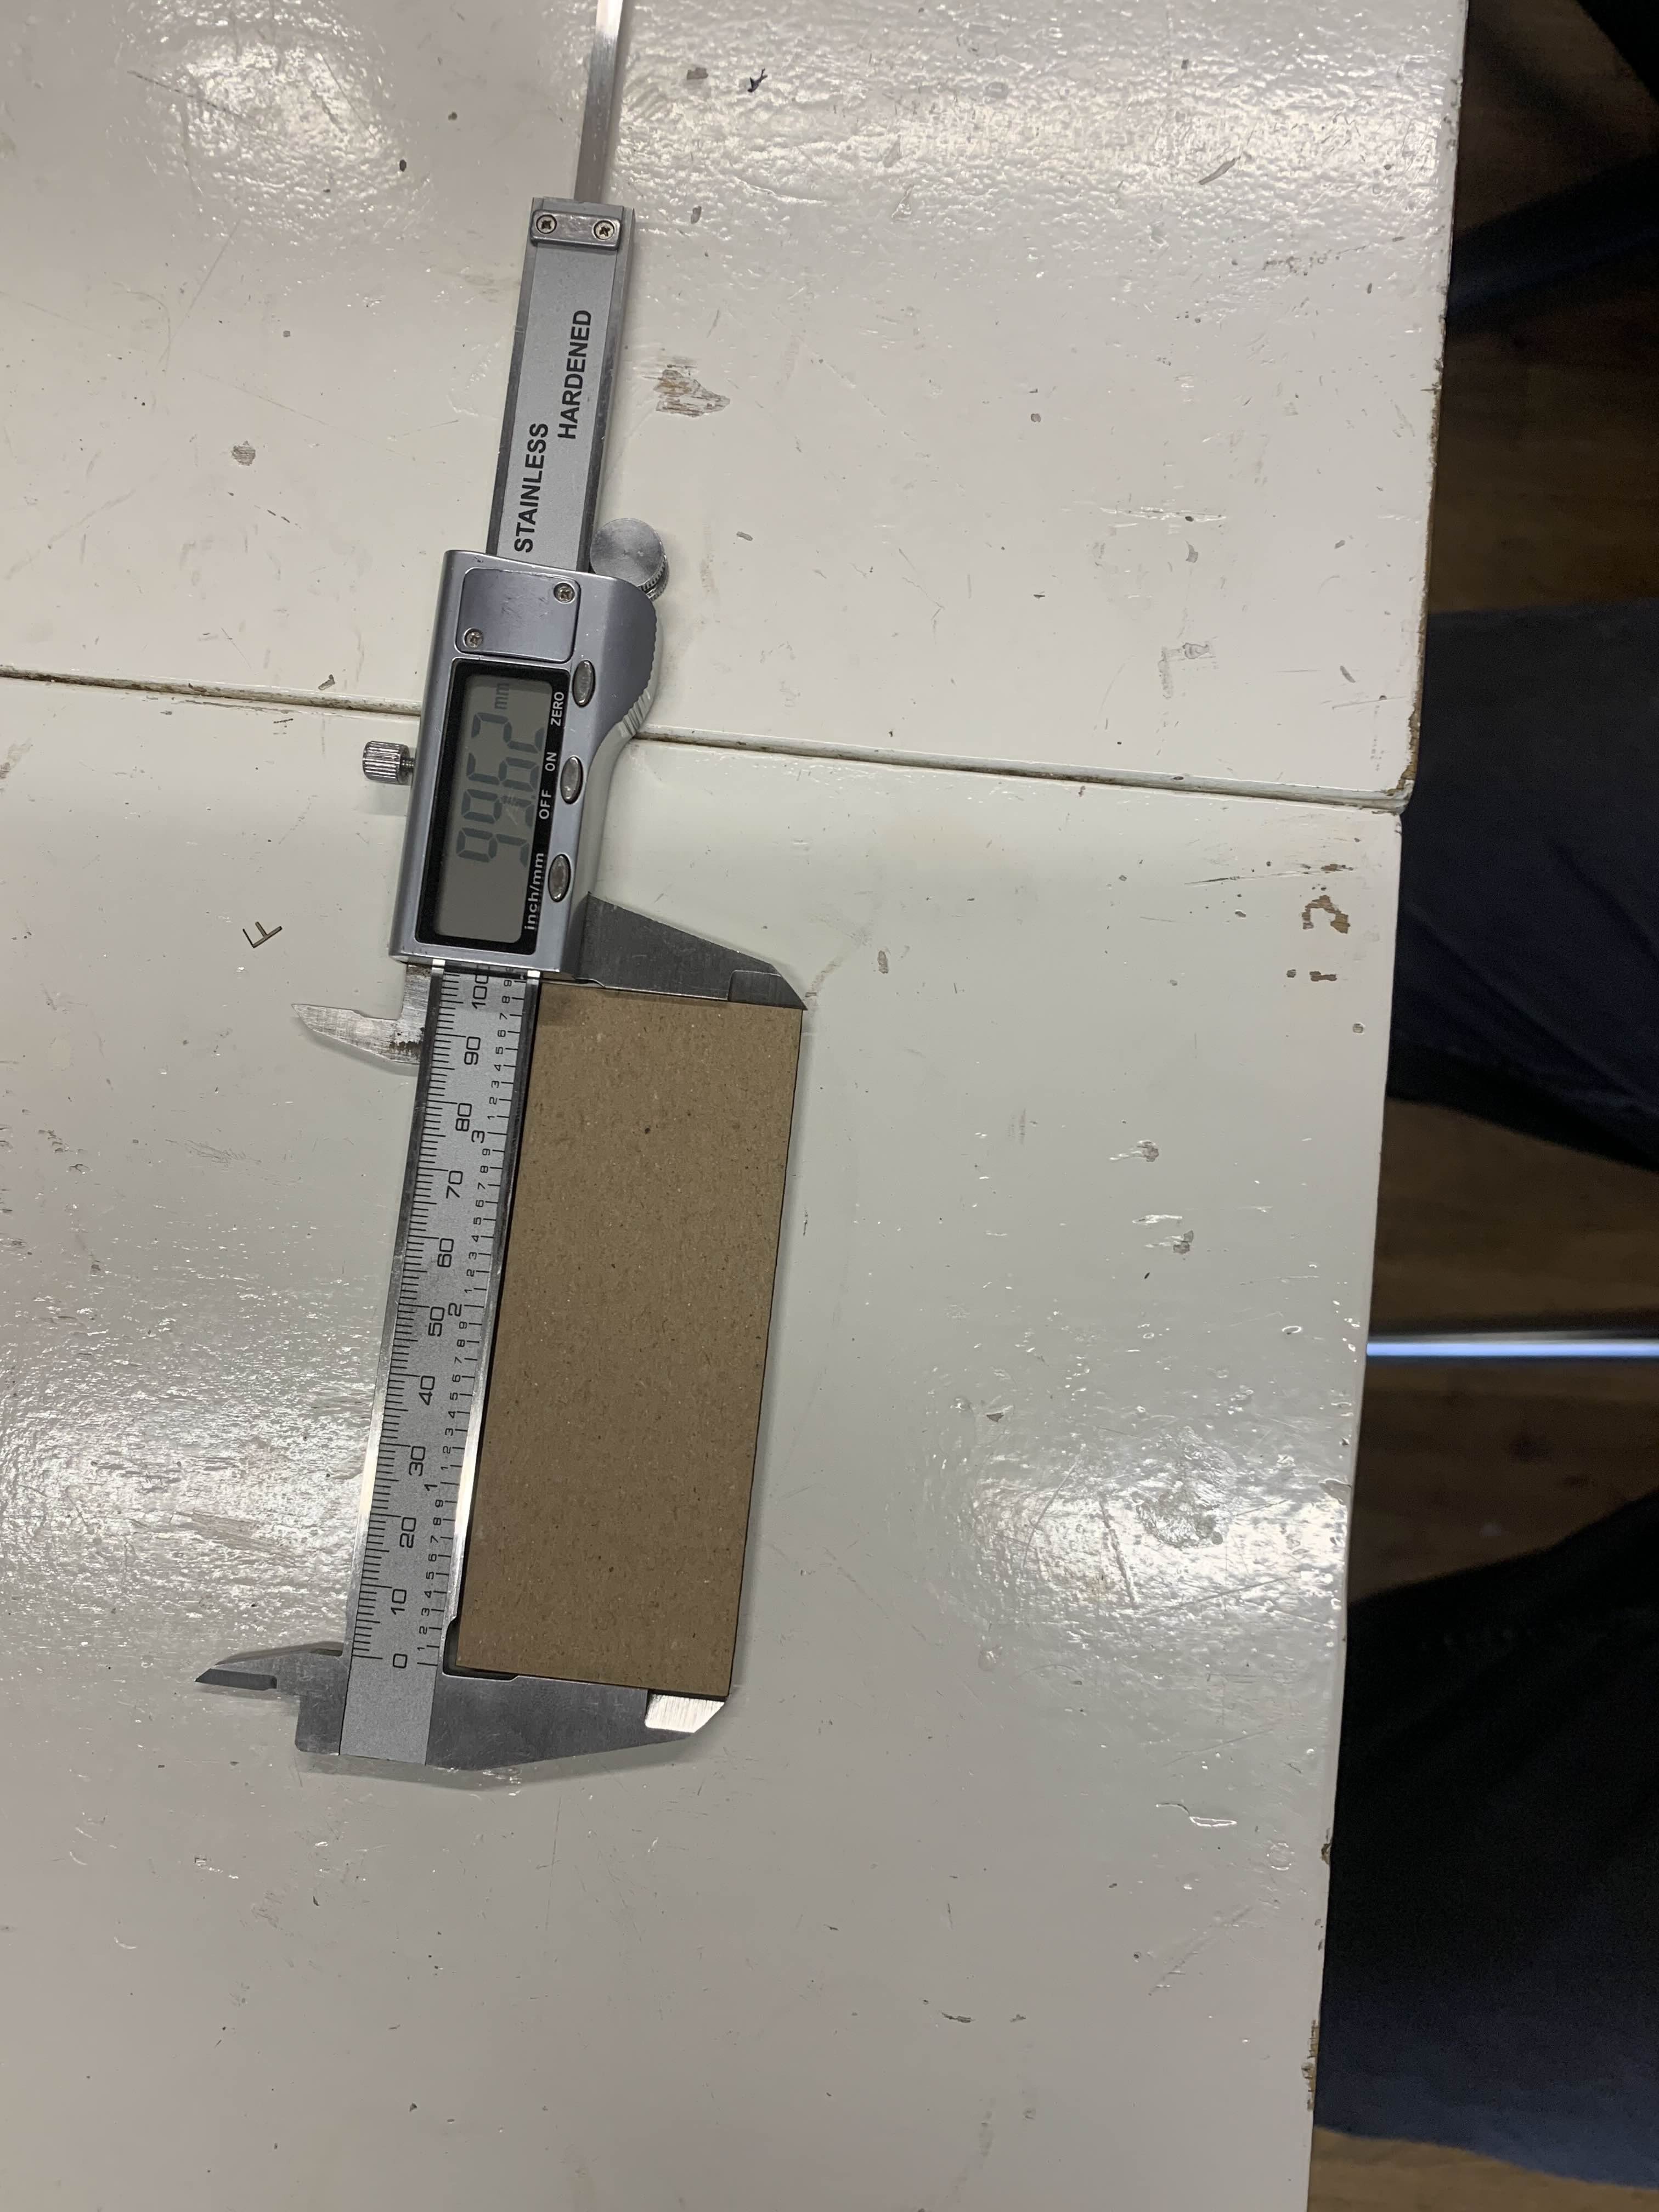 (100-99.62)/2=0.19mm
There is definitely some bias but that could be because cardboard can be squishy so maybe that's it.
Curve test
In the first test we used 150 speed and 15 power. There the curves and edges of the laser where super good for example if you look at the E.
The second test we did with 200 speed and 15 power and there you can see around the edges that it burned more and the letters less. So either the minimum power needed to be decreased or the speed needs to be decreased for it to look better.

Acrylic 4mm yellow
Cutting test
We used the same test method as the cardboard but we found out that for 4mm thick acrylic you need high power and a super slow speed.
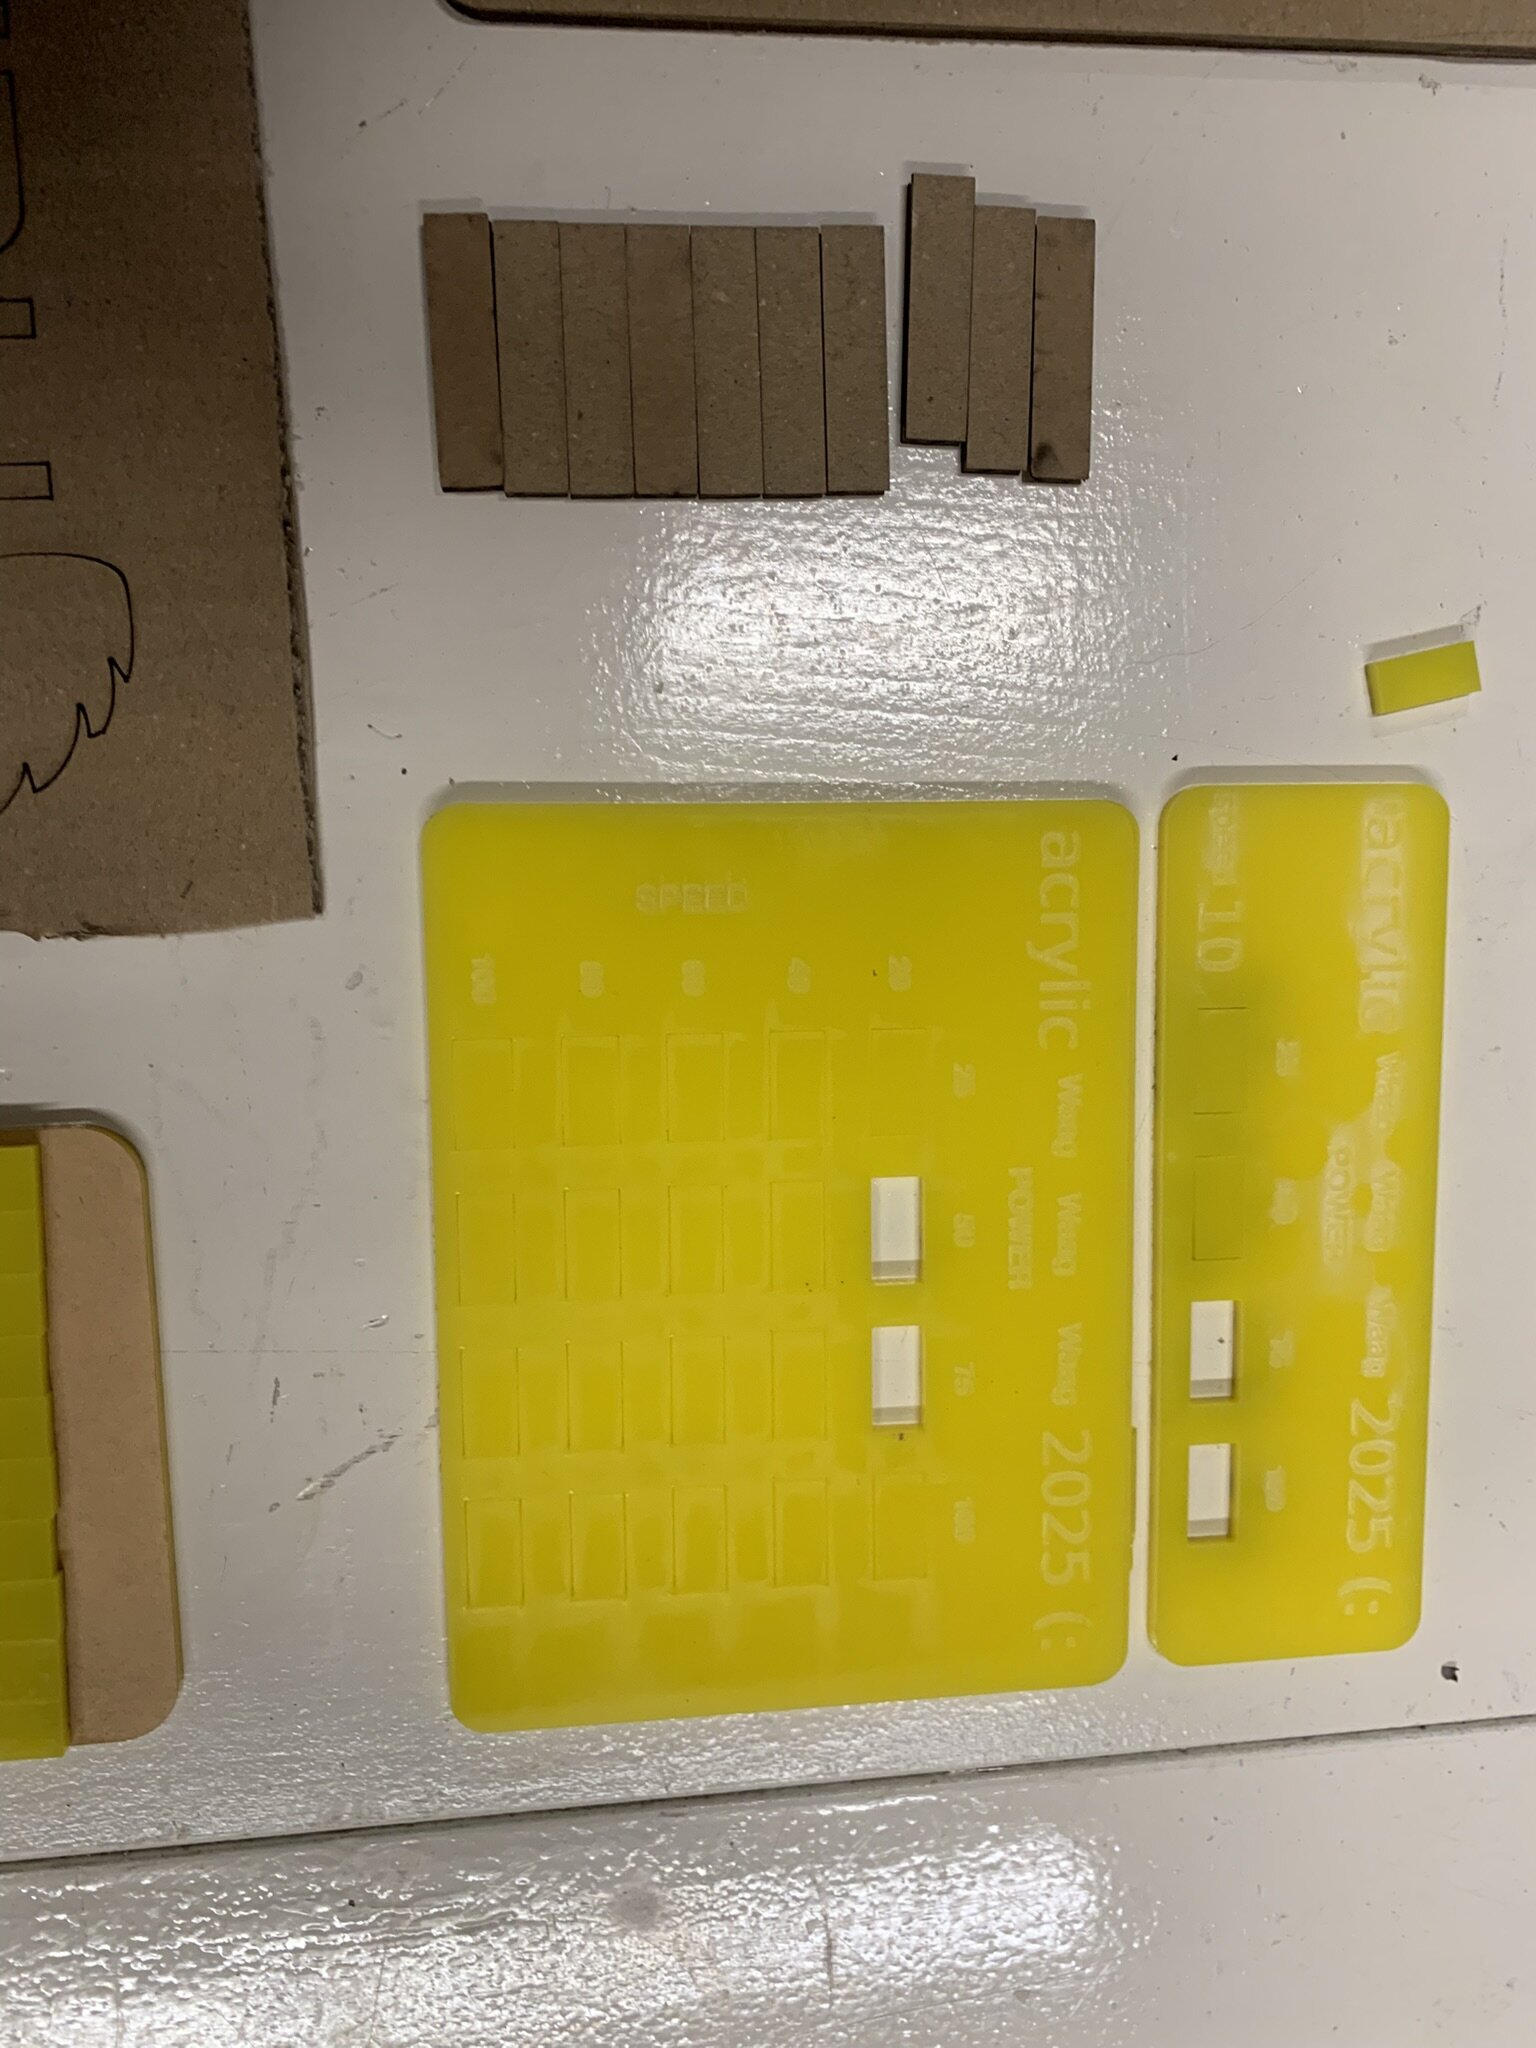 We first made the big one but we didn't have enough data on what speed and power where the best so we made an additional one with 10 speed and varying powers so we could figure out which where best. On an extra note: We dropped the big one and these 2 came out. With the smaller one the 2 fell out when we picked it up.
Kerf test
We did multiple kerf tests because with the first one the material dropped down during the cutting because we didn't have the order of the cutting right. The second time we didn't have the tool at the correct height so the laser wasn't focussed properly. The last time we had everything right and that is our most accurate reading.
 First image where it dropped during cutting
 Second image where the Z offset wasn't right
 Third image where we did everything right
Focus test
One of the lines of the focus test didn't go right because it was near an edge and the line bend. So we can't use of the lines to conclude something.
 You can see it start off thin then get a bit wider and then smaller. So the laser is focused, unfocused then focused. It's hard to see but its visible with the middle line.
Extra Acrylic things
You can mend acrylic together using acetone. You can also remove the laser frequently lines using acetone. It's a powerful chemical that can do a lot with acrylic.
Wood 9mm thick
With 9 mm wood we had a lot of issues with cutting it. Because it is so thick it chars really easily and it's almost impossible to cut without charring
Cutting test
We tried to cut the wood but it really was engraving. We needed to add more passes along the wood, because we where trying to cut 9 millimeter thick wood.
On the outer line we did 4 passes with 20 speed and 80 power and that didn't even cut through.
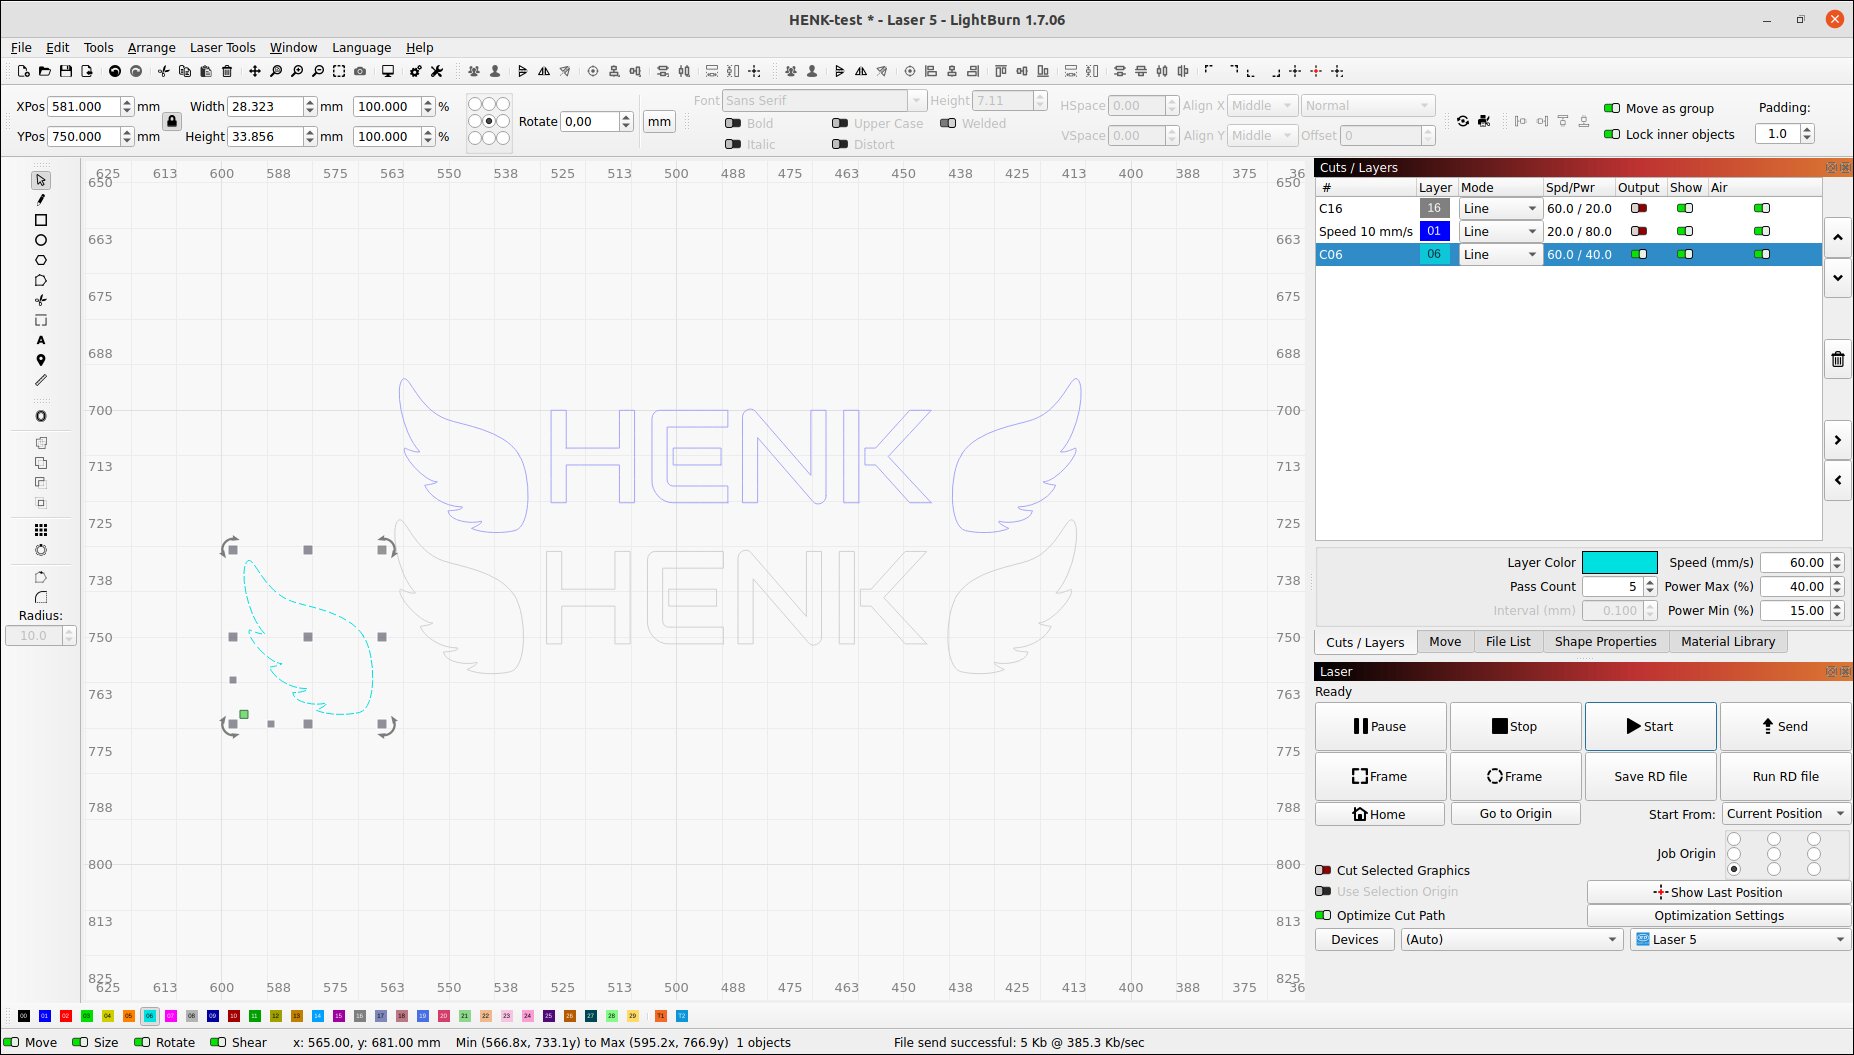
 We also did a couple of extra tests with Henk where he configured the laser. We got very close to cutting without charring but we weren't completely through.
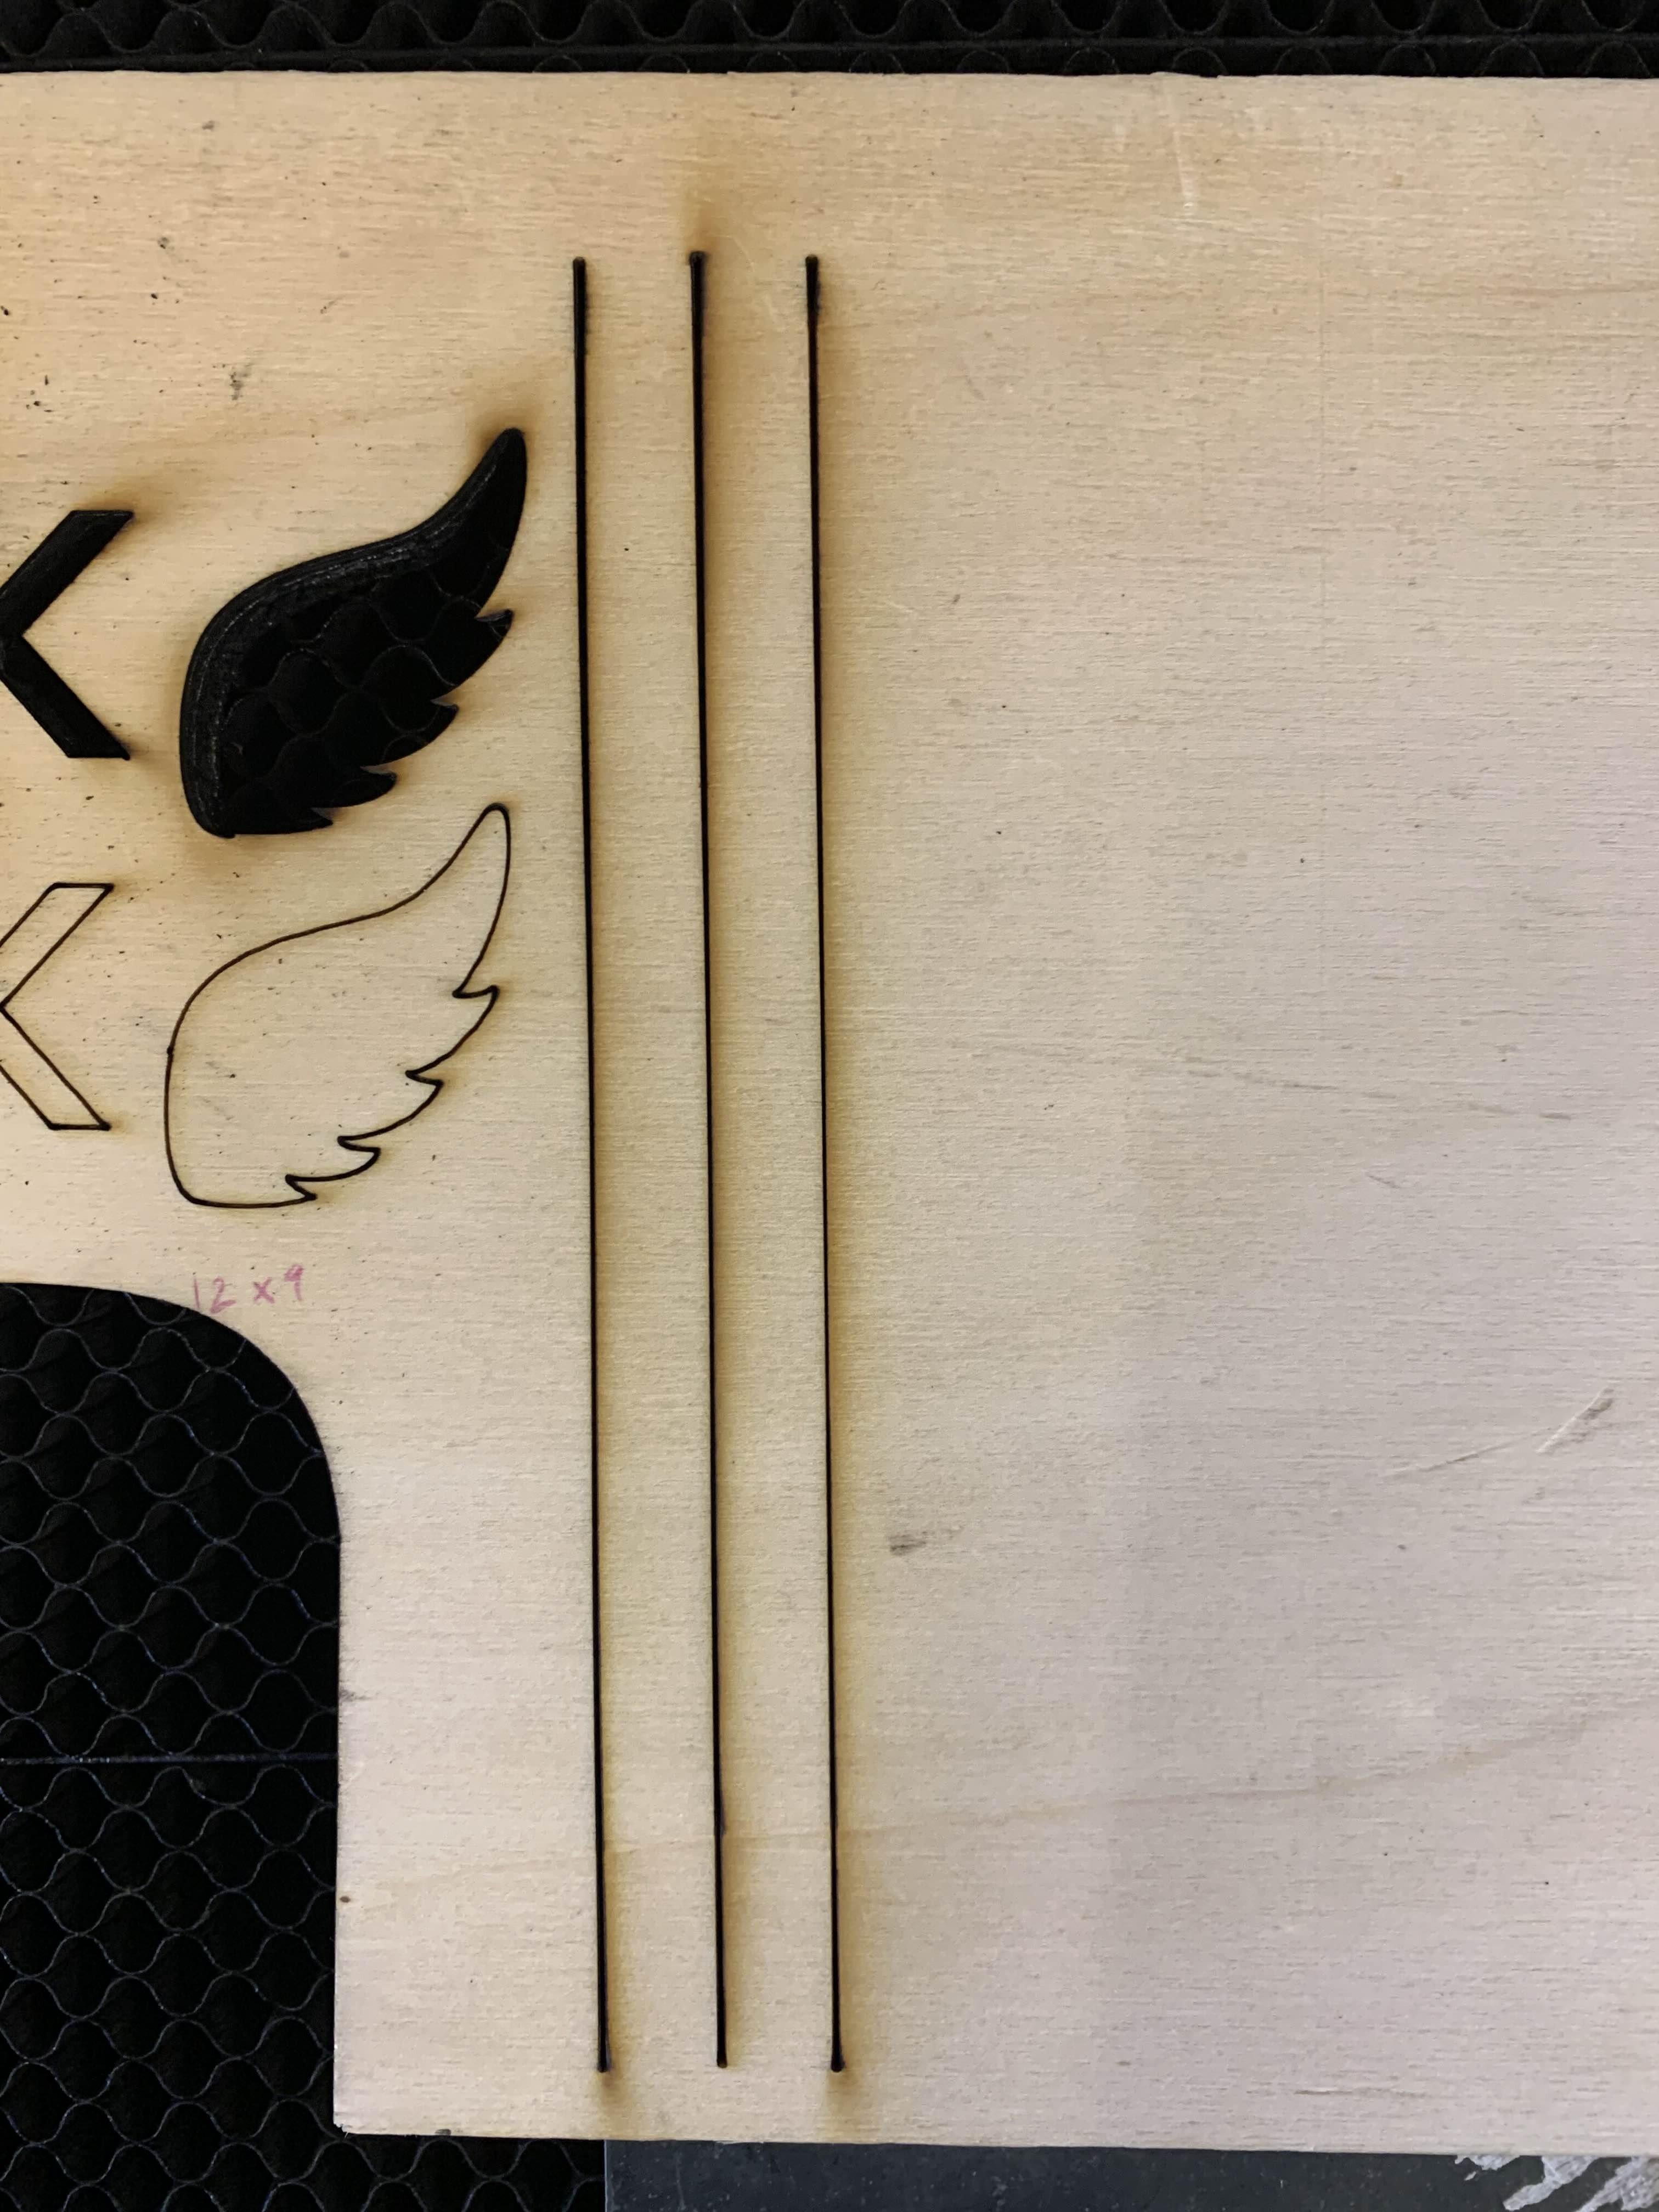
Focus test
Here we aligned the laser to the middle. So on the outer parts you see that the line is thicker and in the middle it's going thin again.
Extra notes for laser cutting
When designing watch out with copy pasting lines and don't overlap them. Then you will get duplicate lines and also duplicate cuts.
When cutting also make sure that your design that you're cutting doesn't drop down during cutting.
Files
//TODO: Files
Making a construction kit
After brainstorming for a while I'm gonna make a drawer construction kit. It's gonna be for a simple 4 drawer box right now.
Drawings
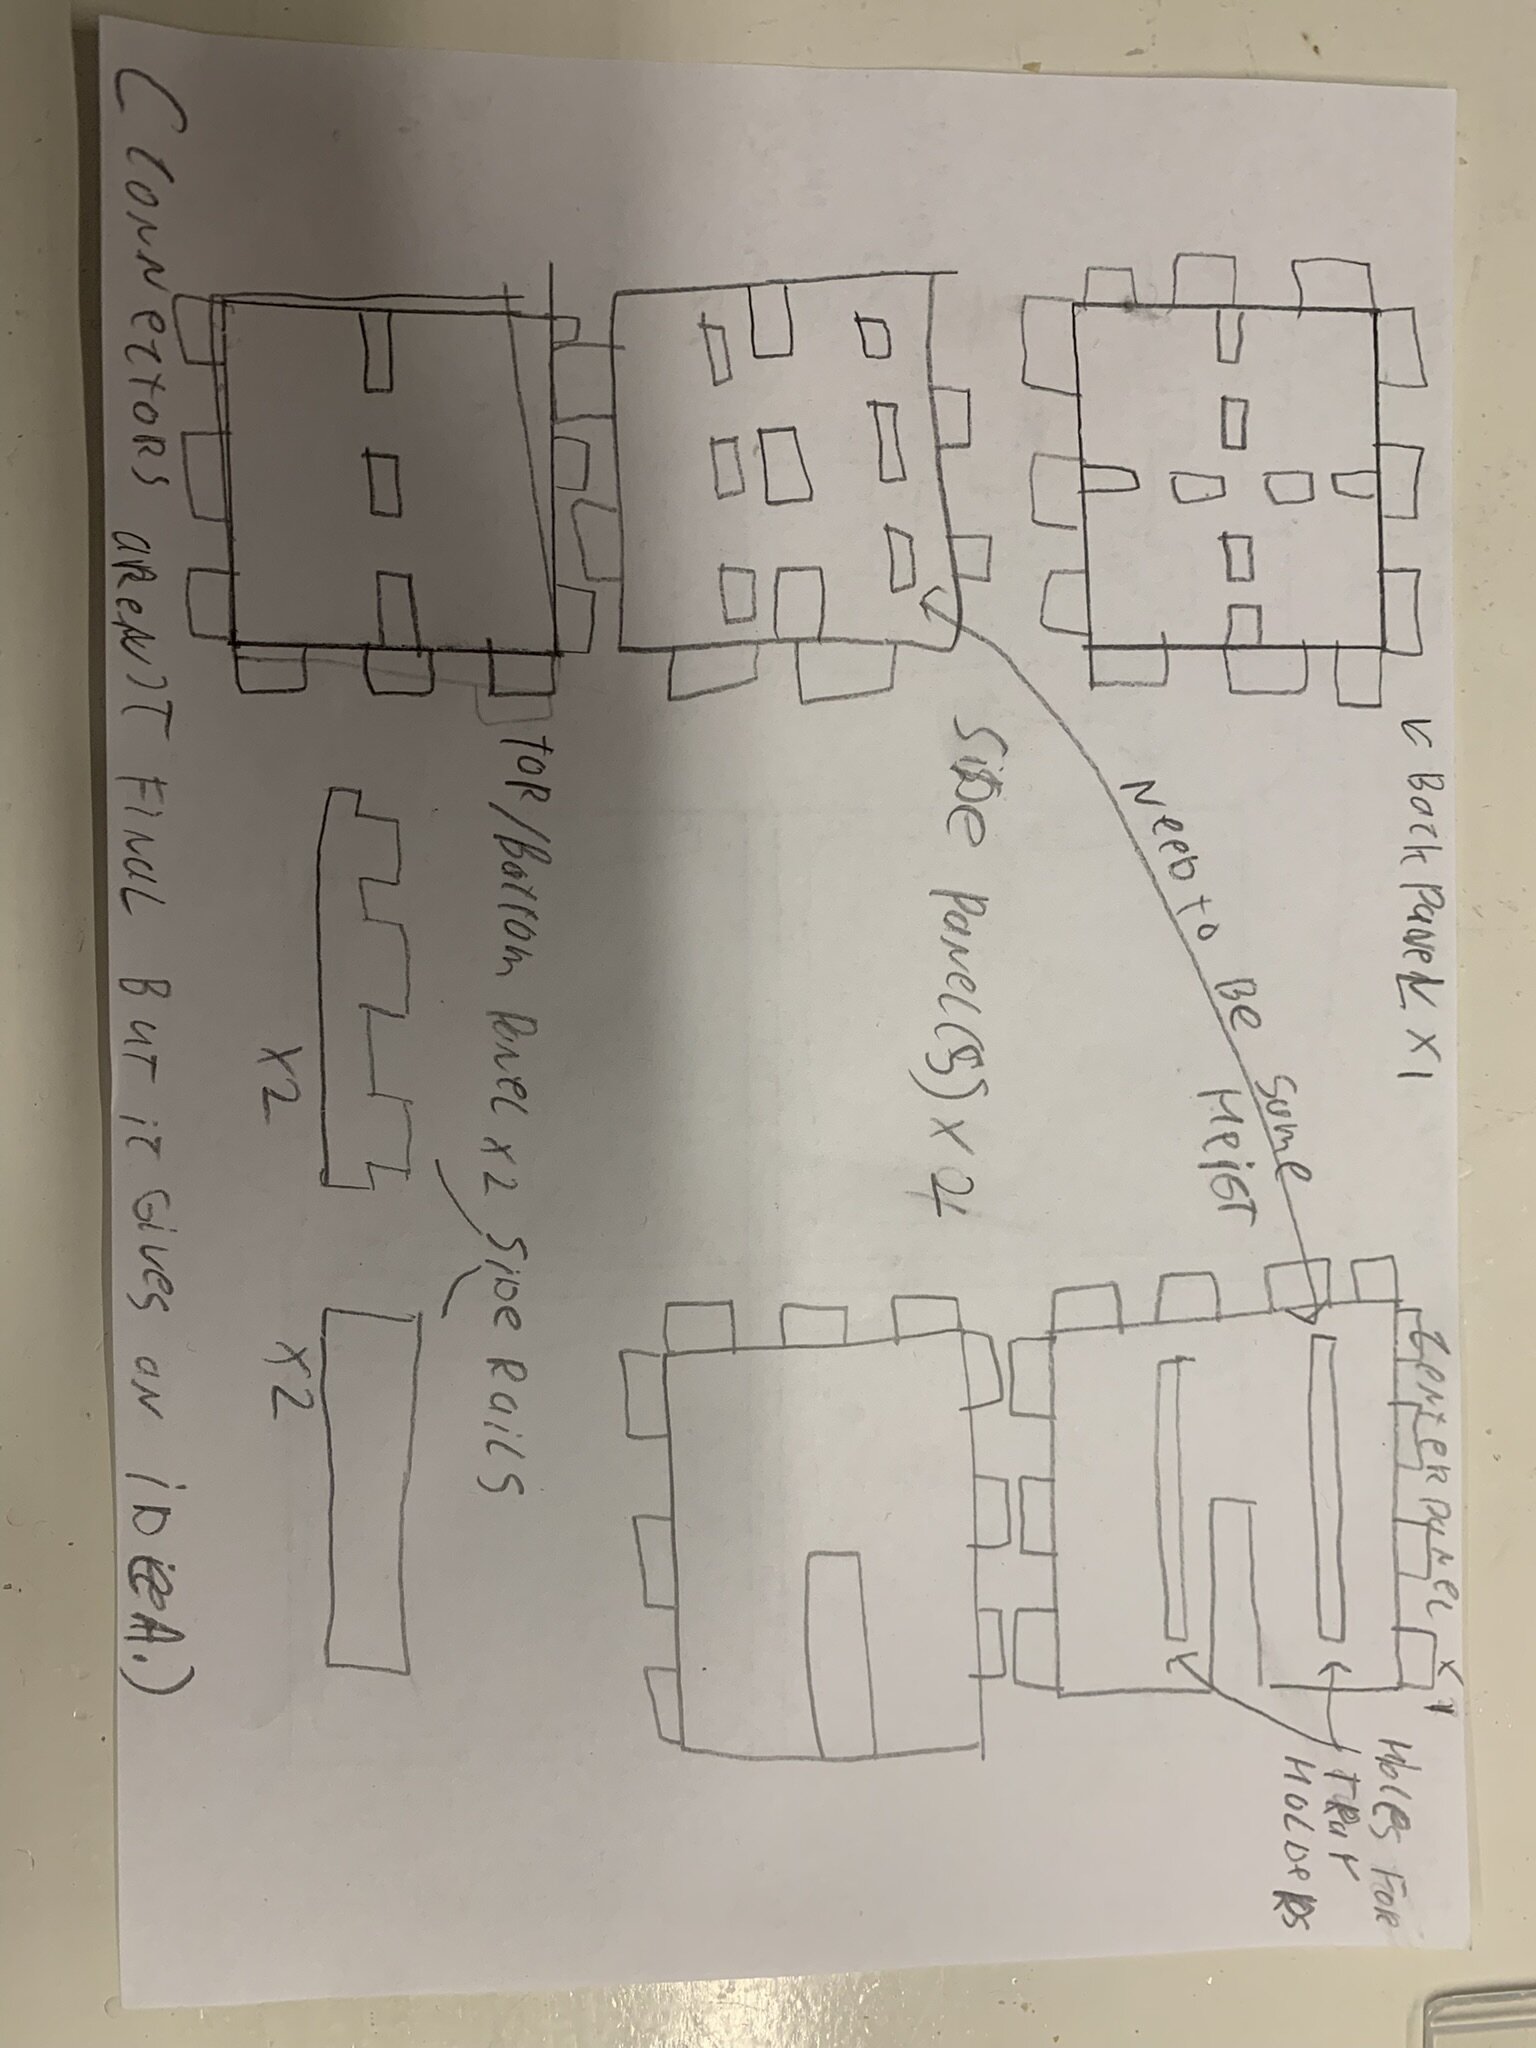
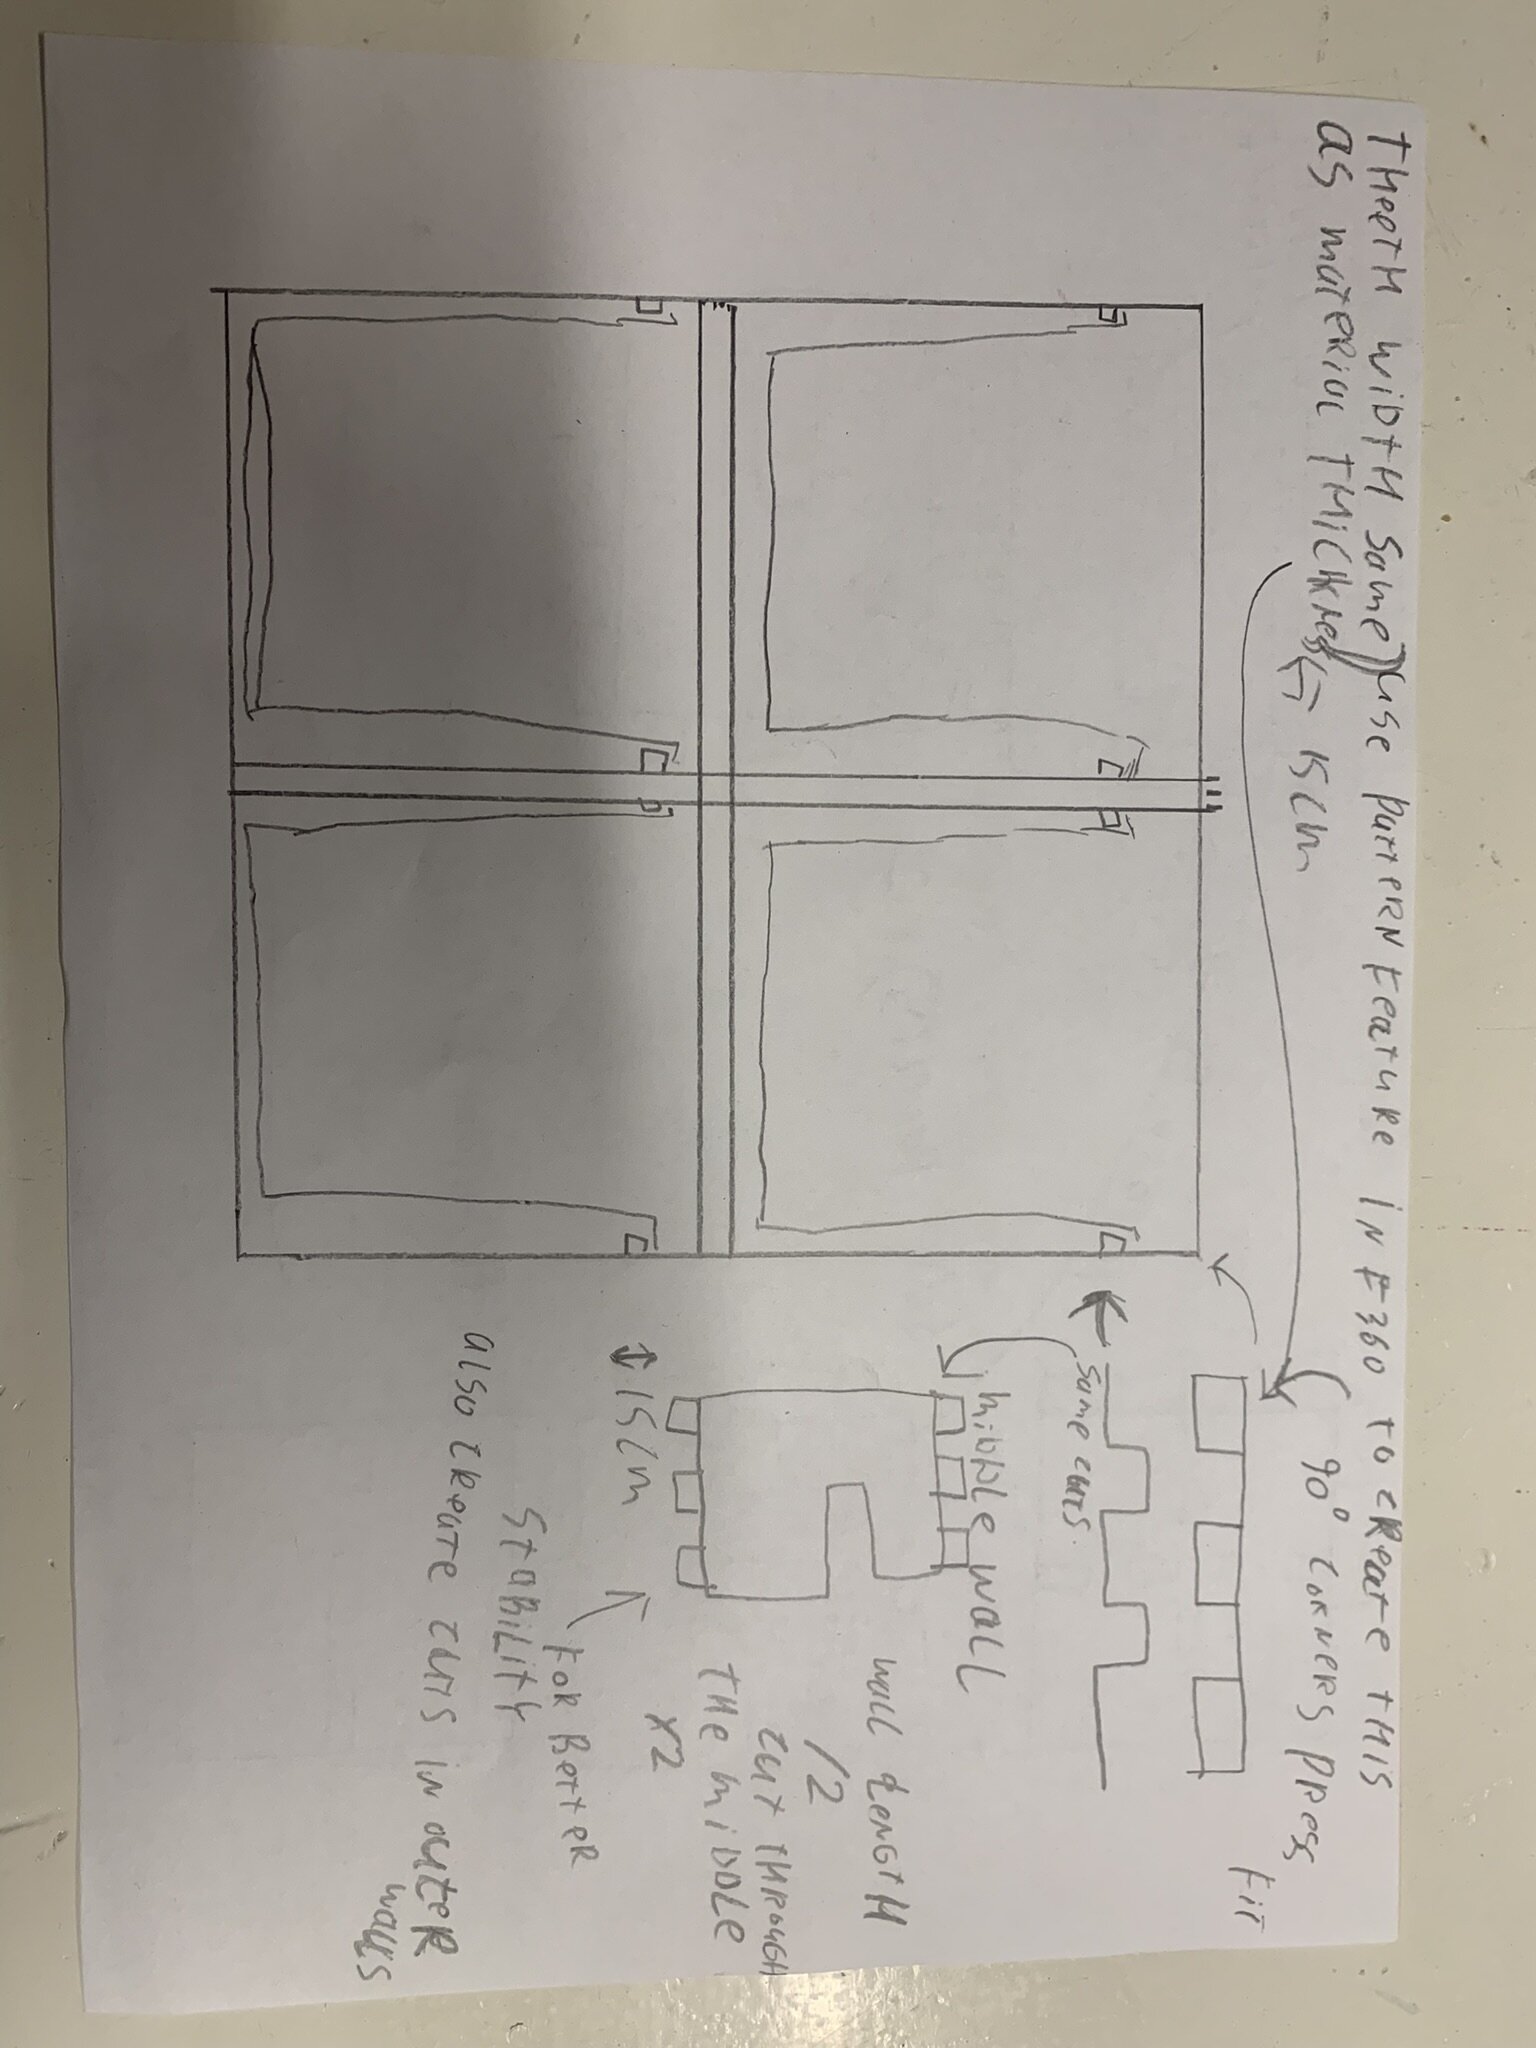
I first have drawn out every part I needed and the necessary cuts and connections to make it sturdy. I ended up with this. I really like drawing first before I construct it because I can visualize the box better and make changes before I design it digitally.
Designing
I started by designing my base for my construction kit in fusion360 as a sketch.
 I have made the teeth on the outside so I could extrude them as a separate body so I could use the pattern tool to attach them to the sides.
Patterns
Once I extruded the teeth as separate bodies I could use the pattern tool to automatically generate the rest of the teeth.
 Using that tool I made the multiple bodies into one body.
For some reason I couldn't enter the a variable in the Quantity section of the pattern tool. Even through I have set the Variable to not be a unit.
Using that tool I made the multiple bodies into one body.
For some reason I couldn't enter the a variable in the Quantity section of the pattern tool. Even through I have set the Variable to not be a unit.
Combining bodies
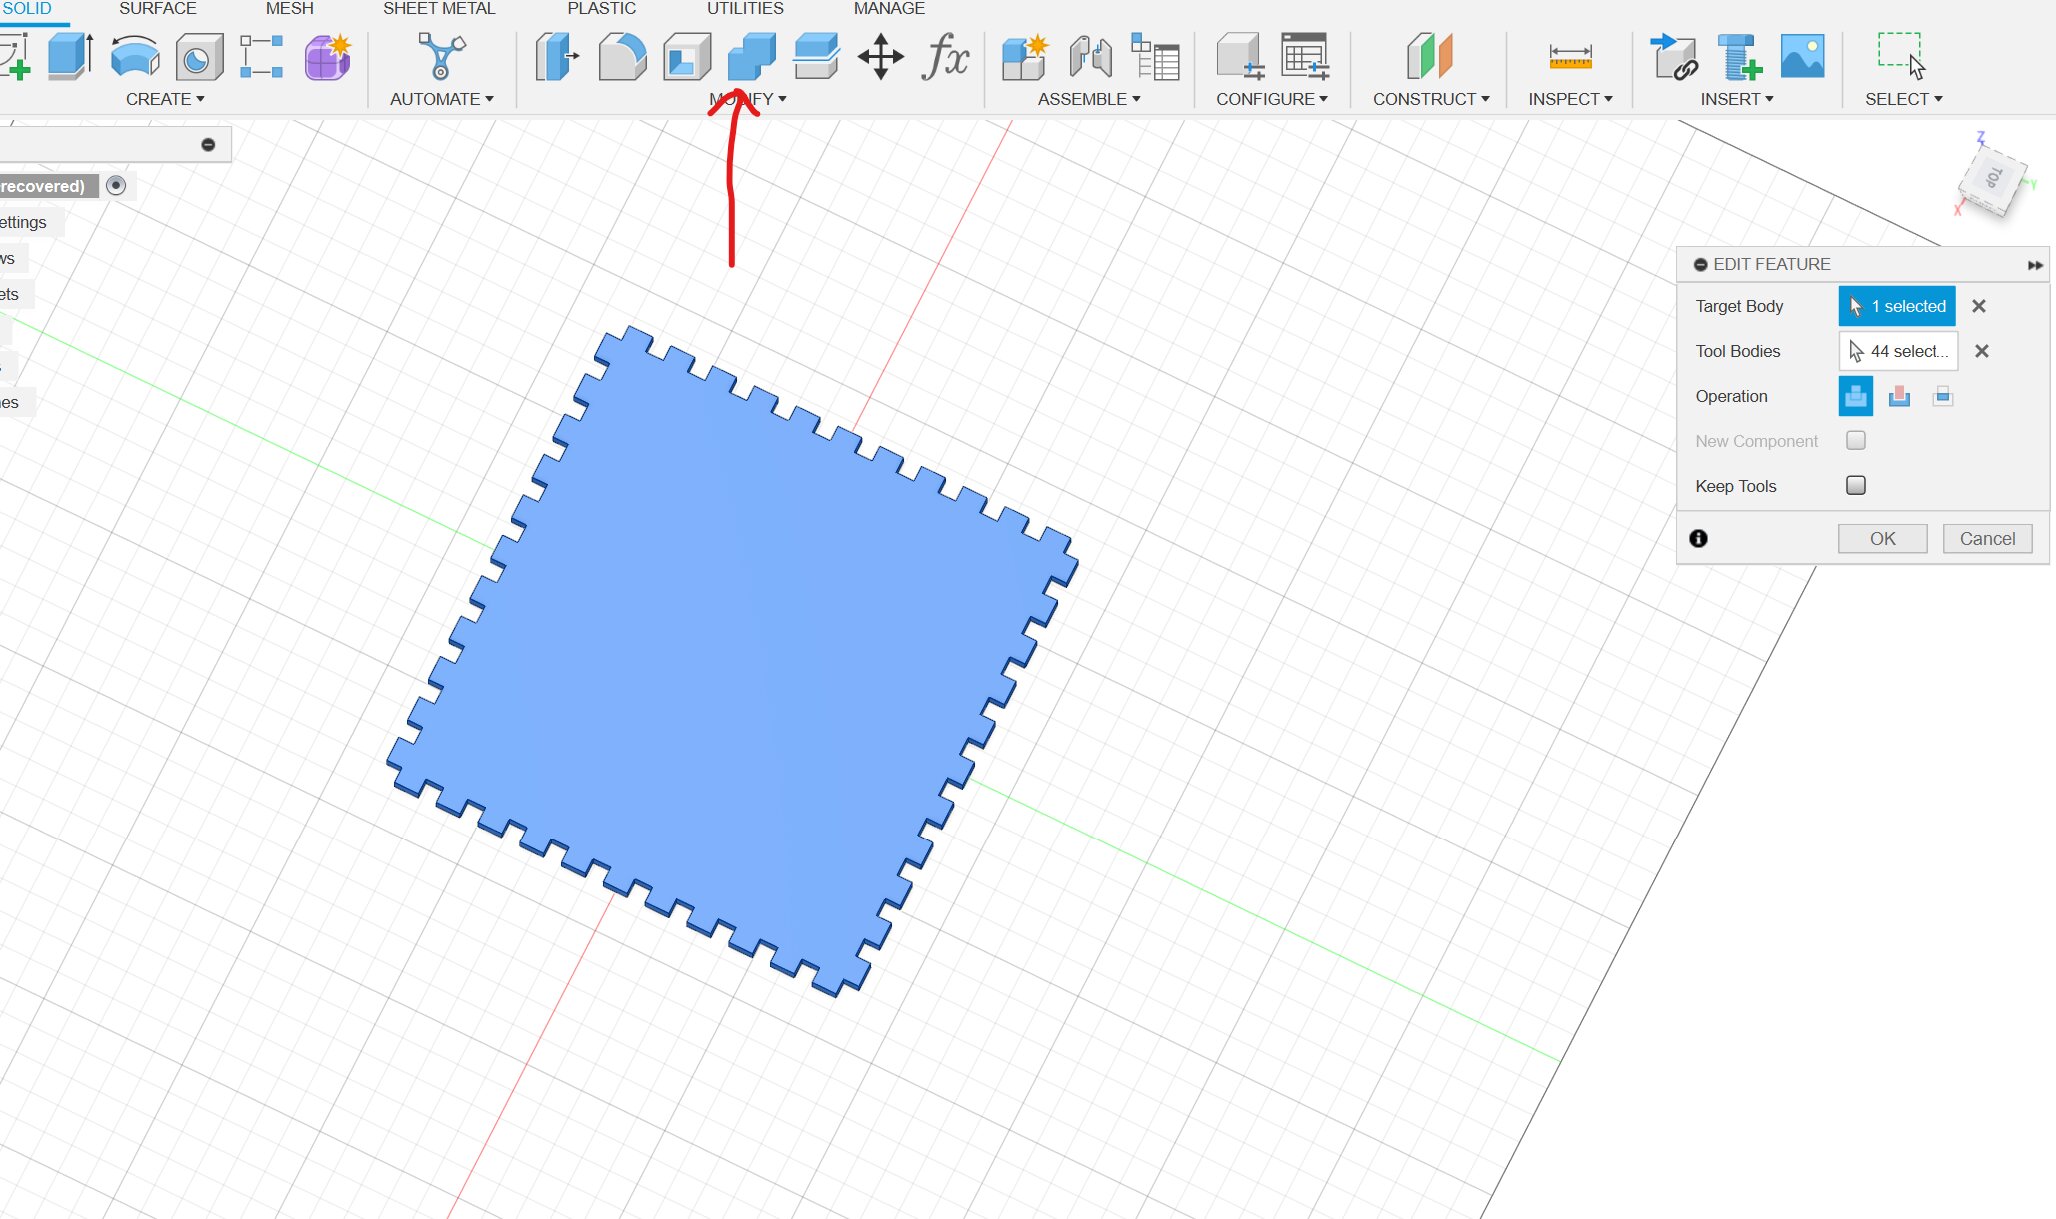
After I did that four times I was left with a lot of separate bodies. So to combine them I went into the Modify tab and then selected combine.
Kerf and press fit
Aligning the teeth parametrically
Turning the 3D model into a SVG file
Here I've had some struggles because when using Fusions build in export utility it only exports the sketches. After that I creating a new sketch and then projecting the 3D design onto the sketch.
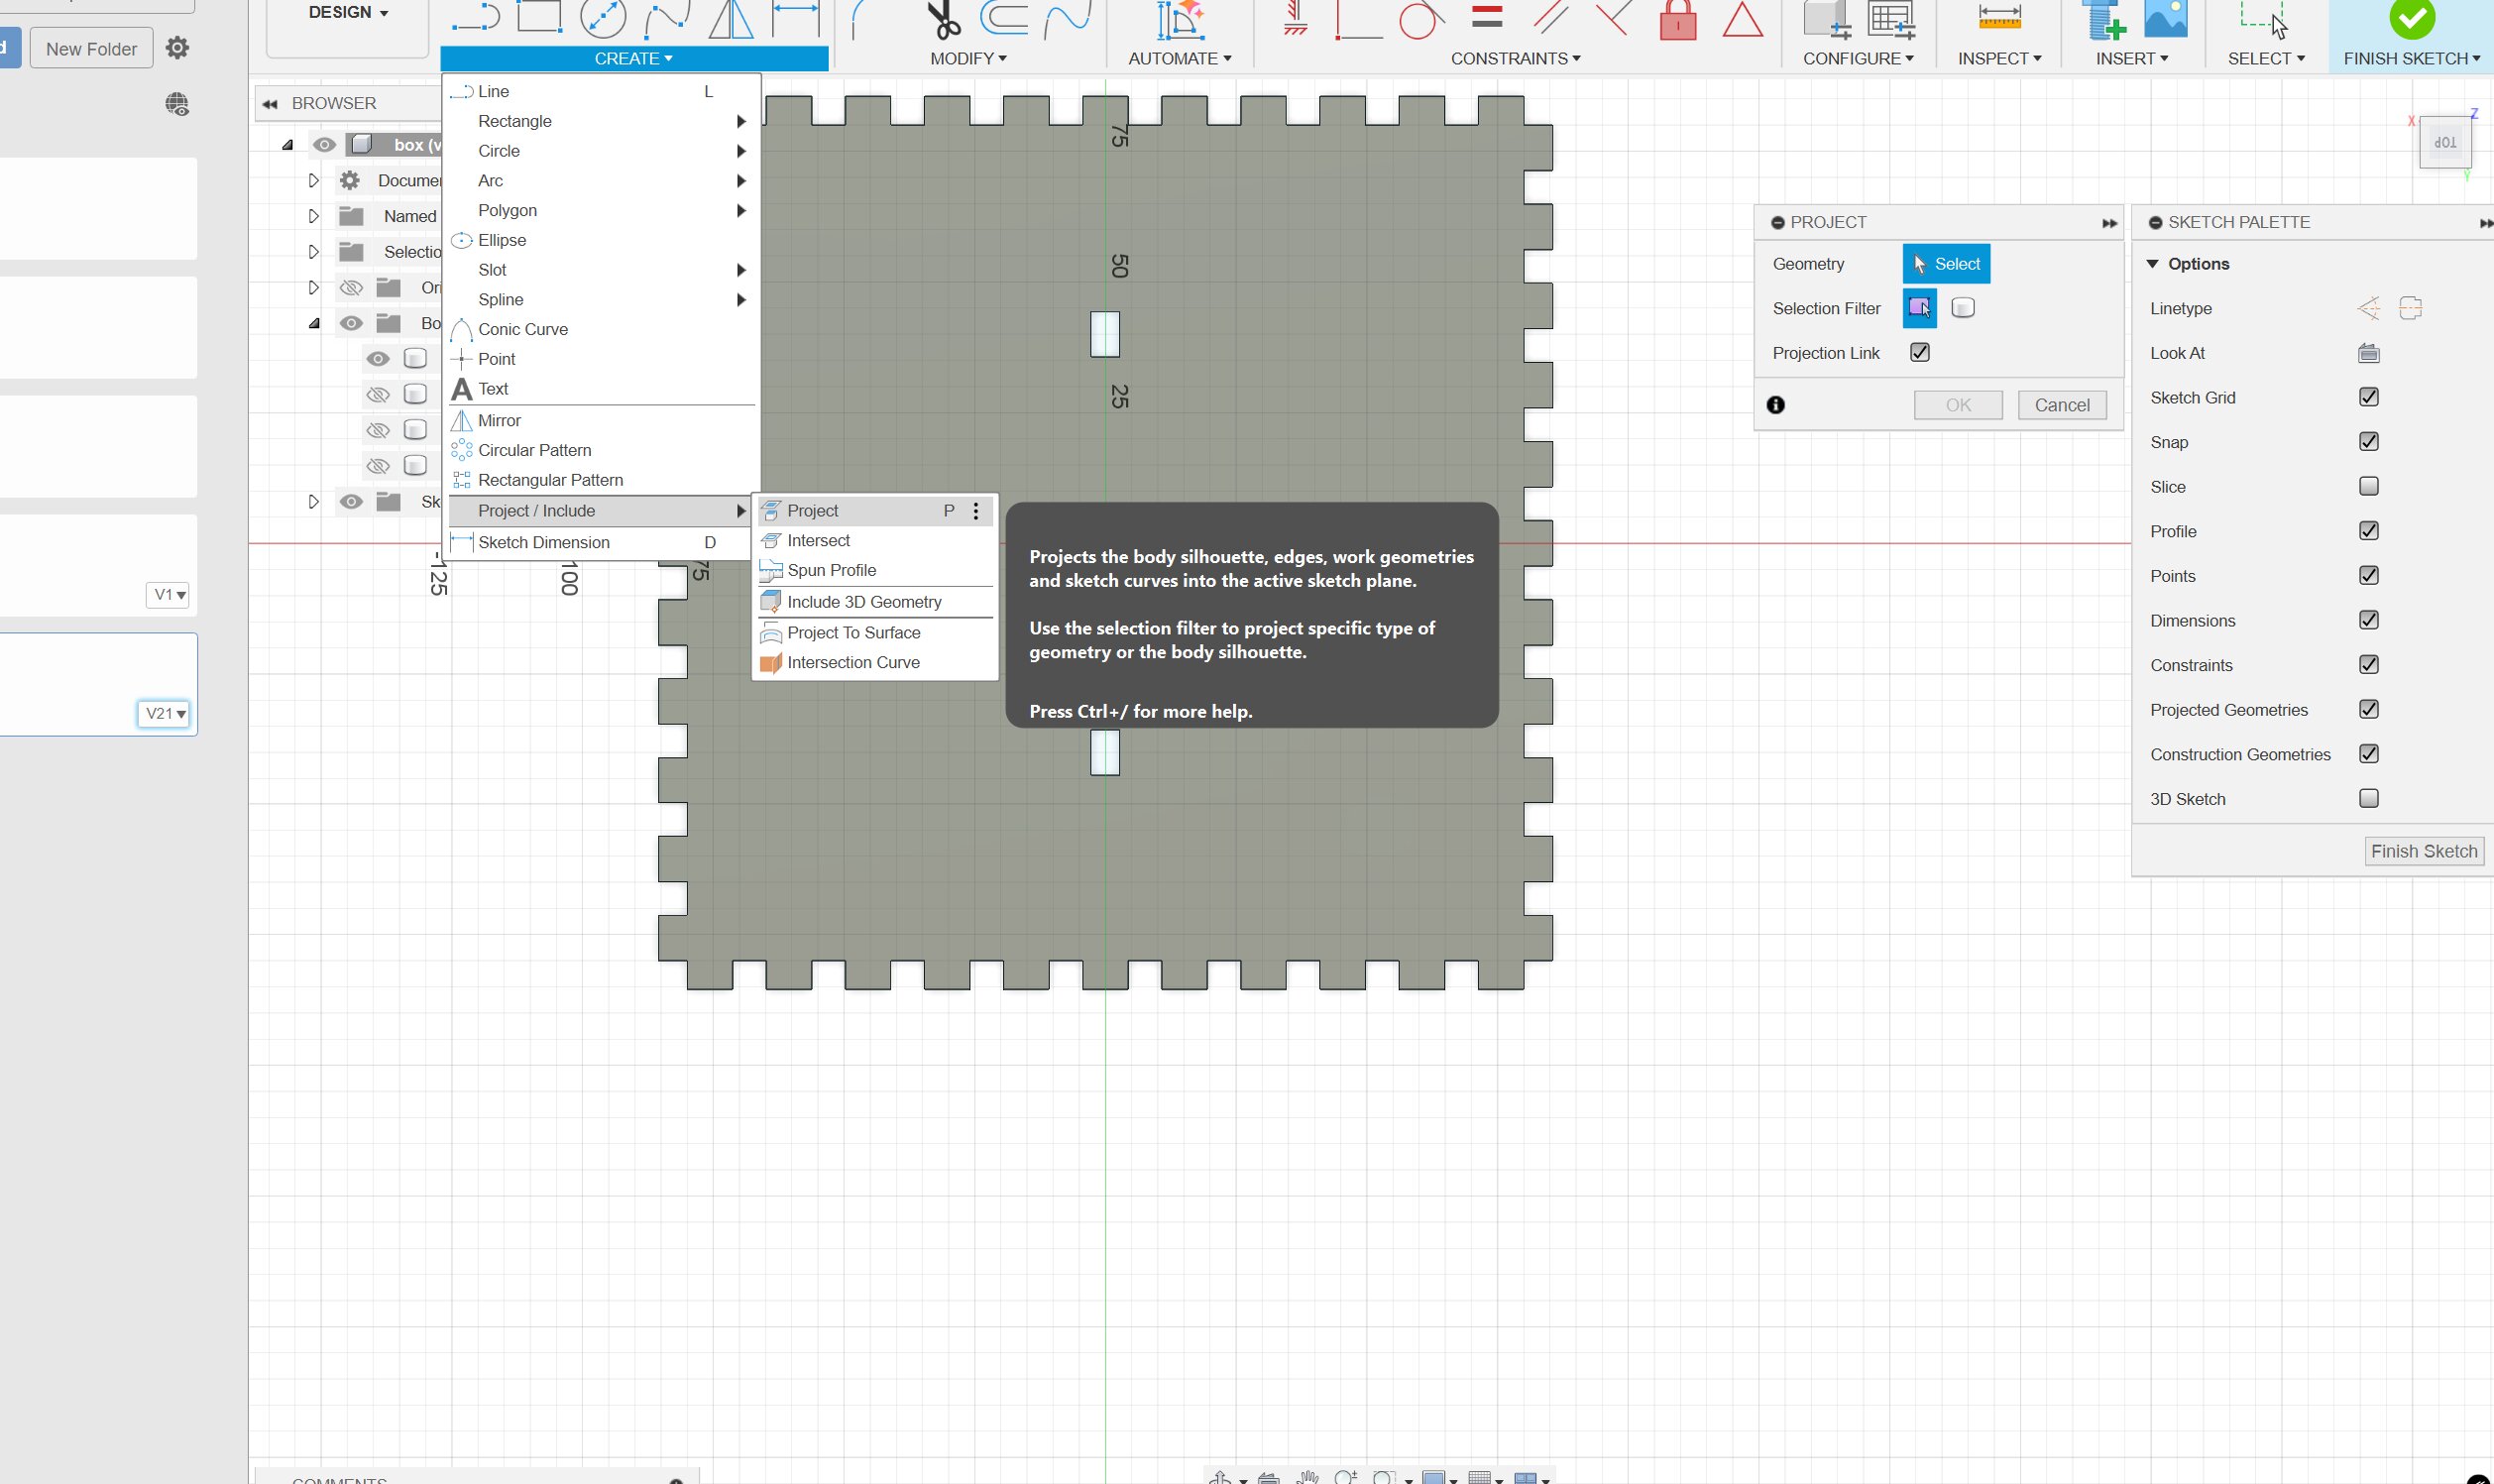 But the issue with this is that it isn't 100% accurate
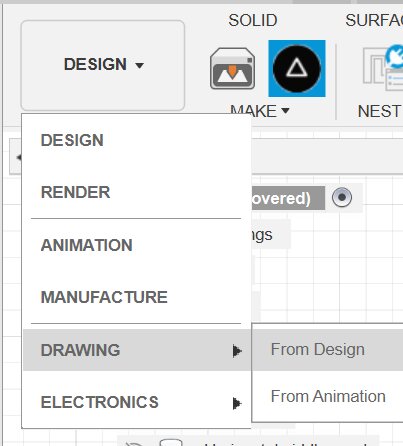
Then I tried the Shaper Origin tool. But that crashed my fusion when I tried running it. After struggling for a while Michelle came to me and showed me the drawing tab of Fusion where you can define flat drawings of your 3d models and export them as svg.
The tab is found here.
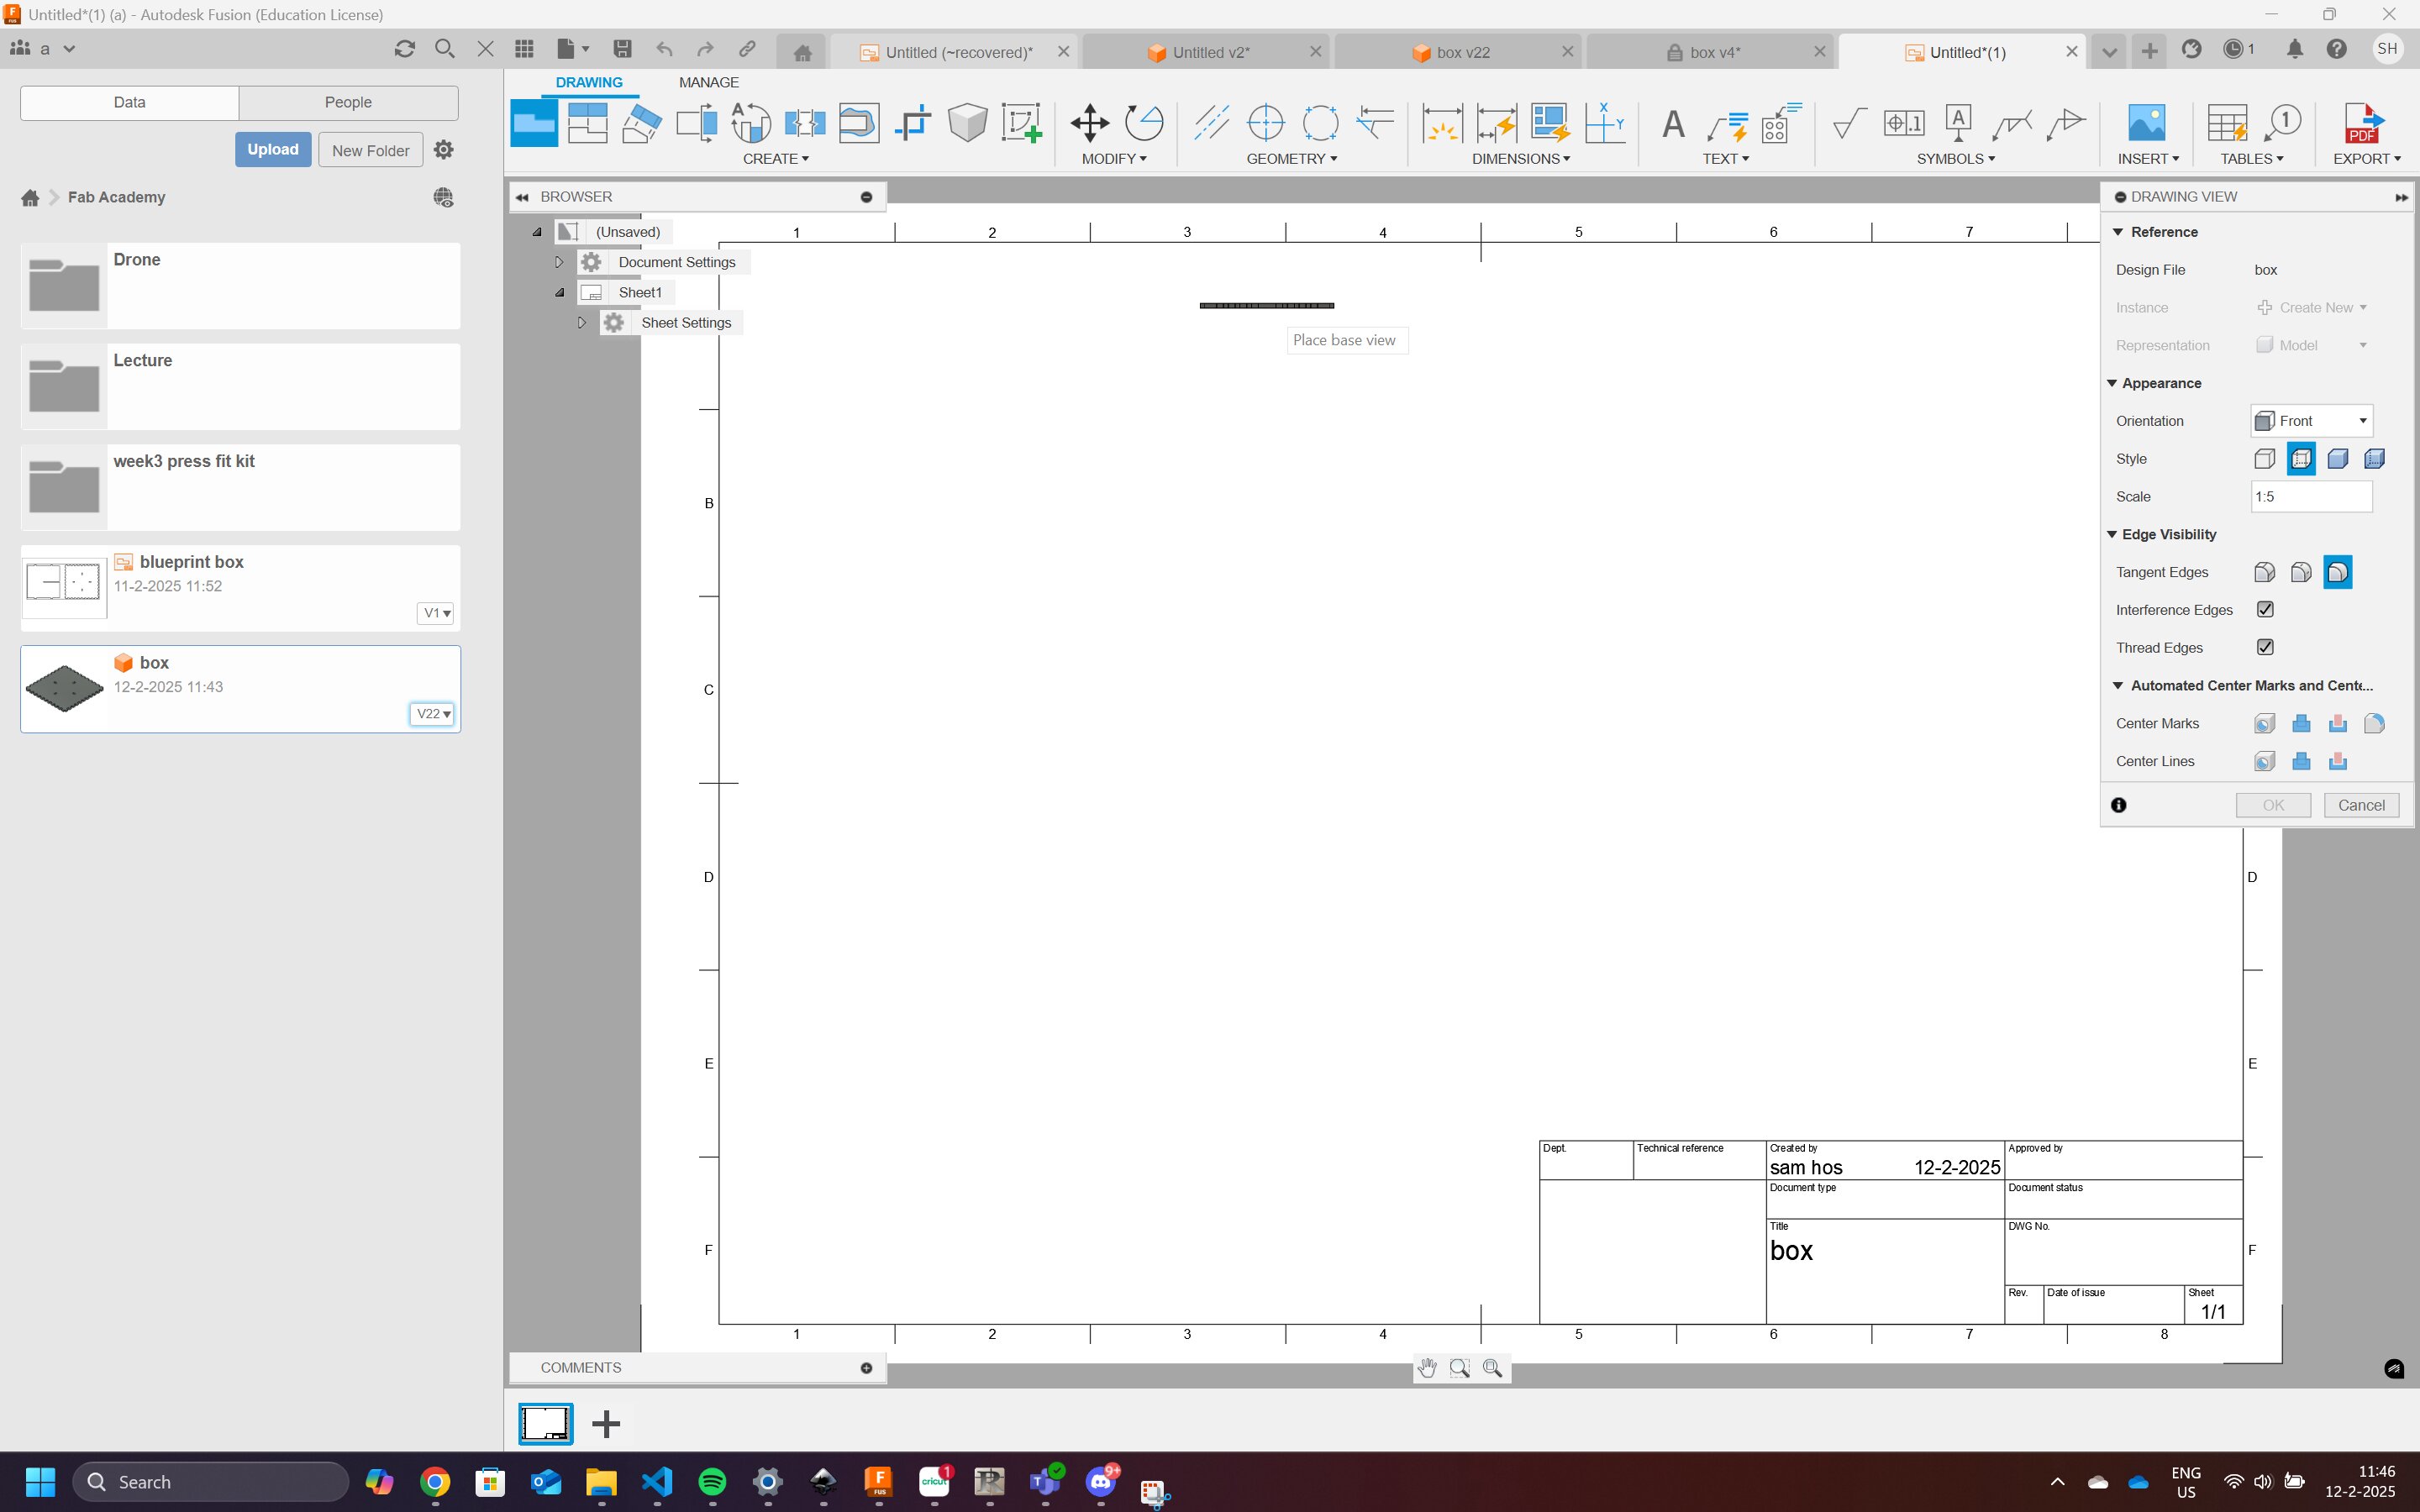
Once you press that this menu will pop up

The standard settings are fine. You maybe wanna increase the sheet size to get your full design on it.
Now you will enter this screen. You wanna set the scale to 1:1 and change the orientation to the top (if you've designed from the top).
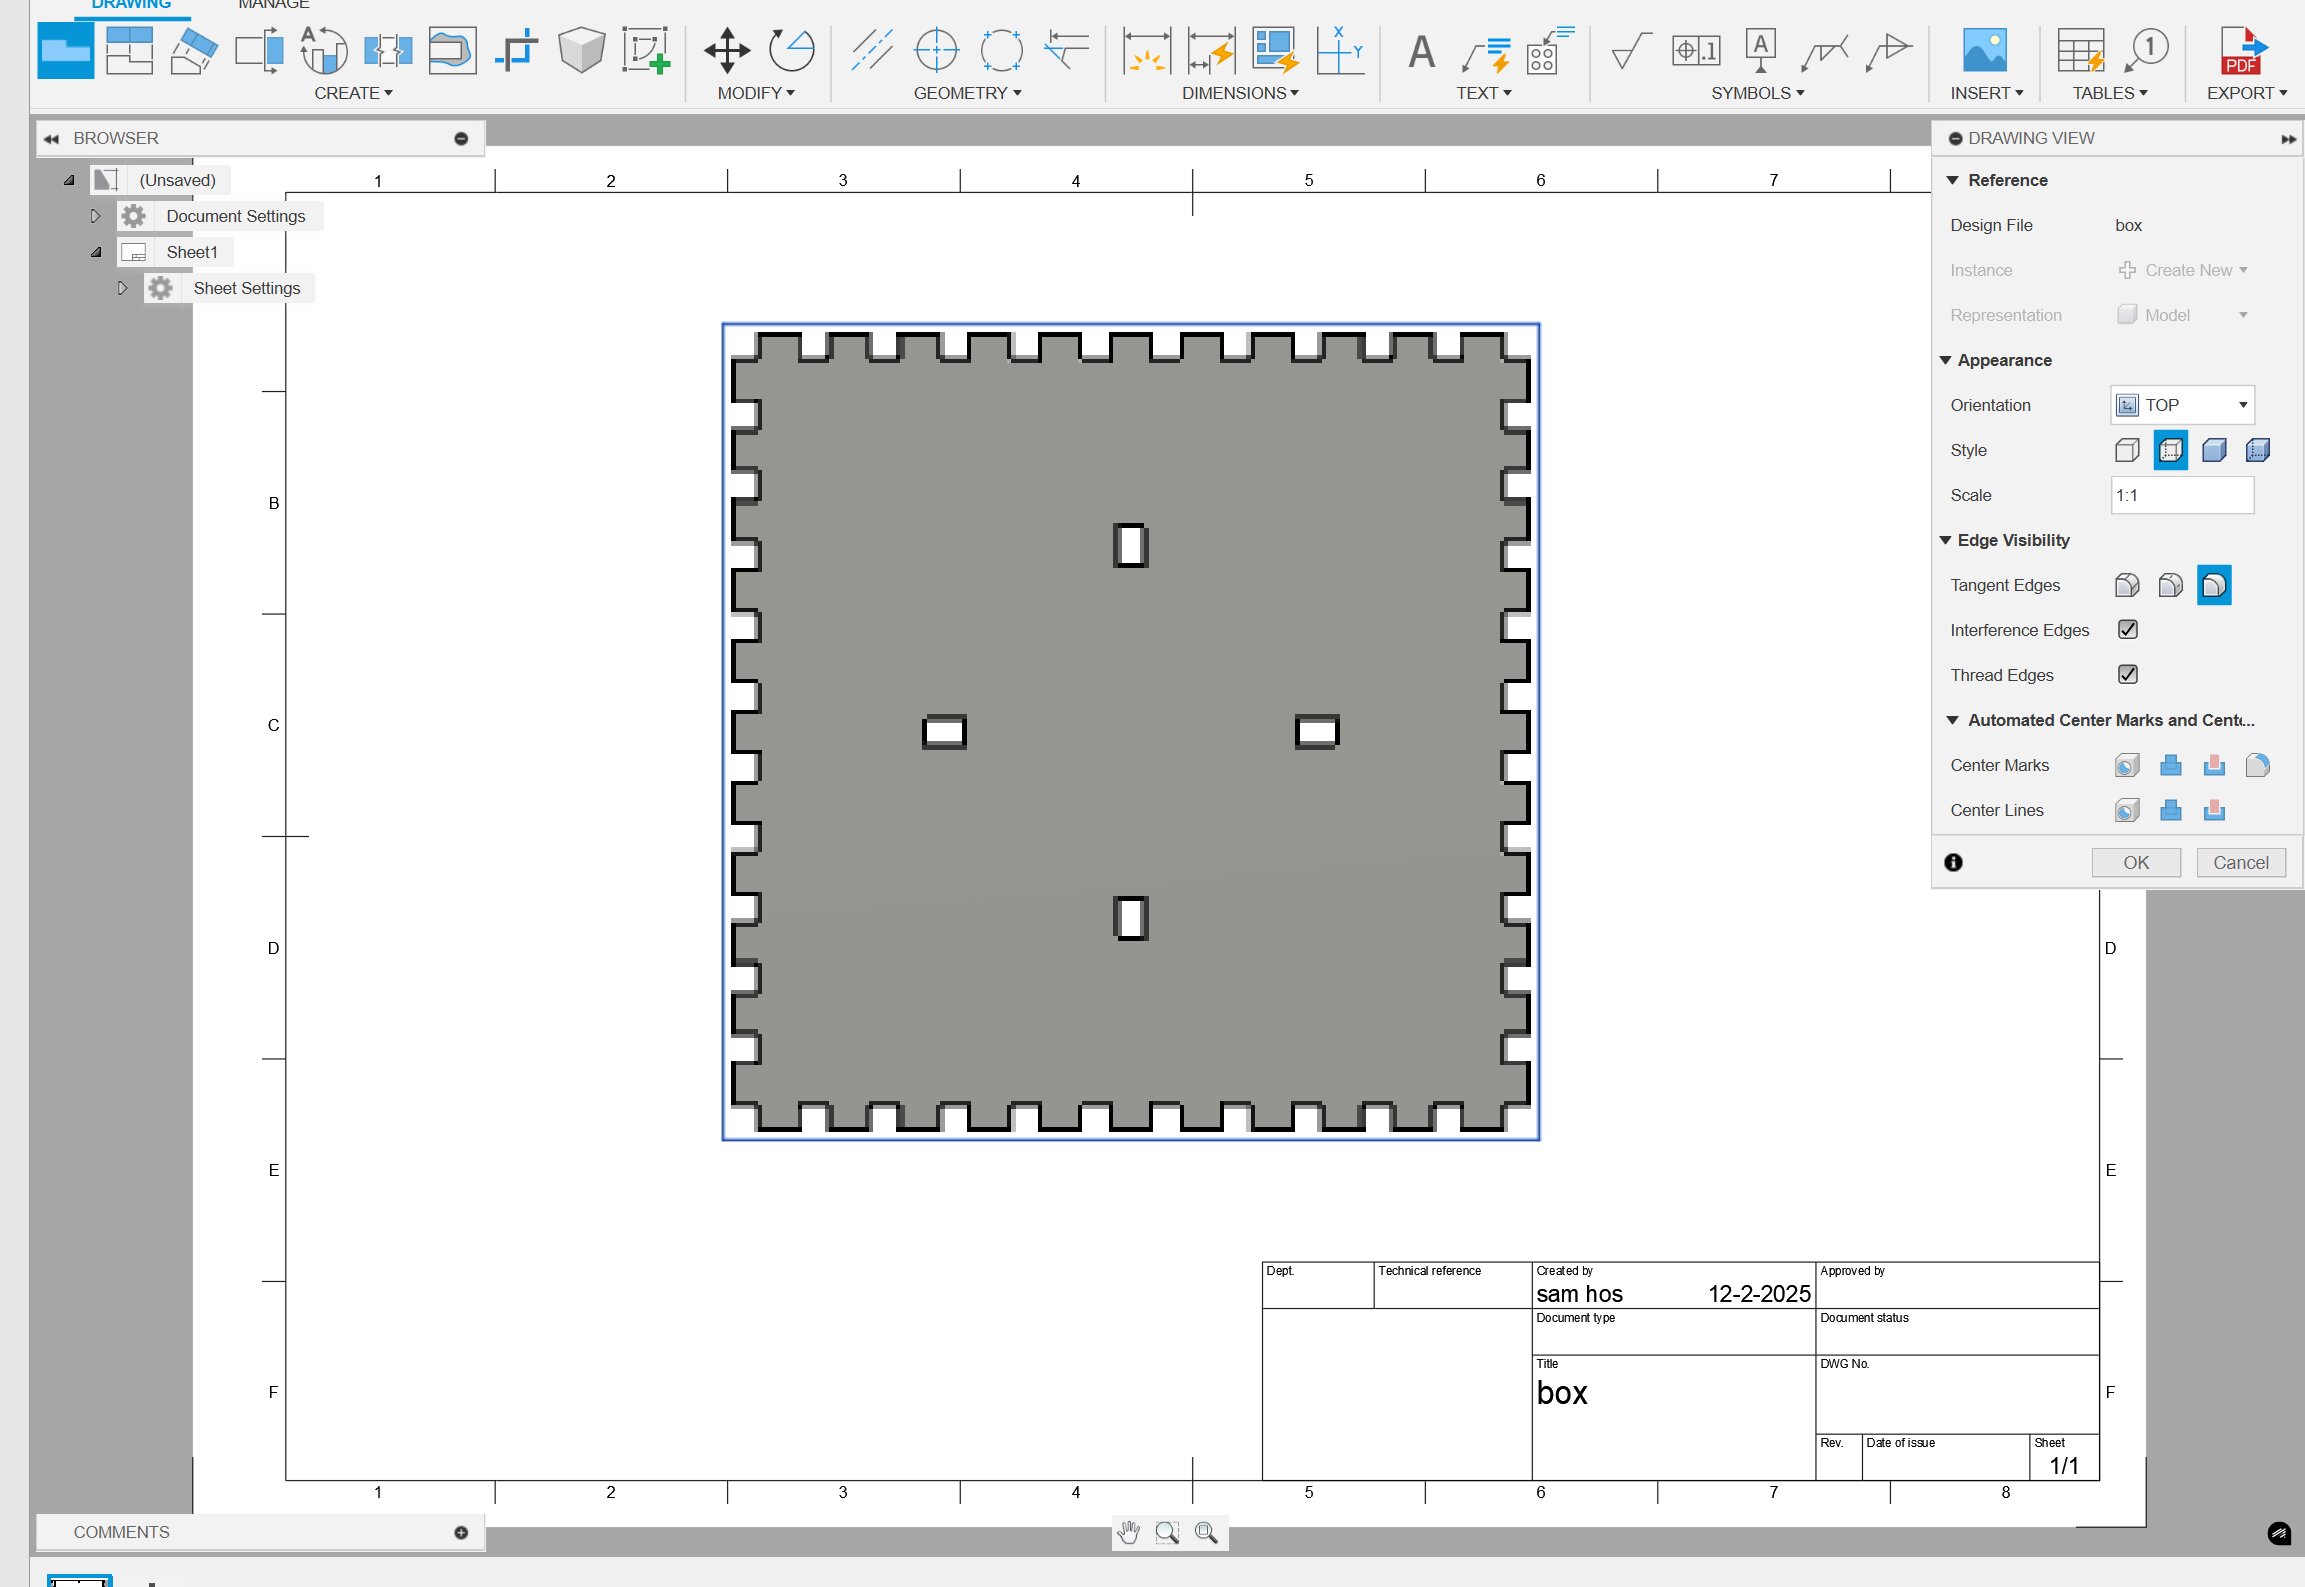 You can Left click to place your design on the paper. Once you've placed everything you can select the outer borders and press delete.
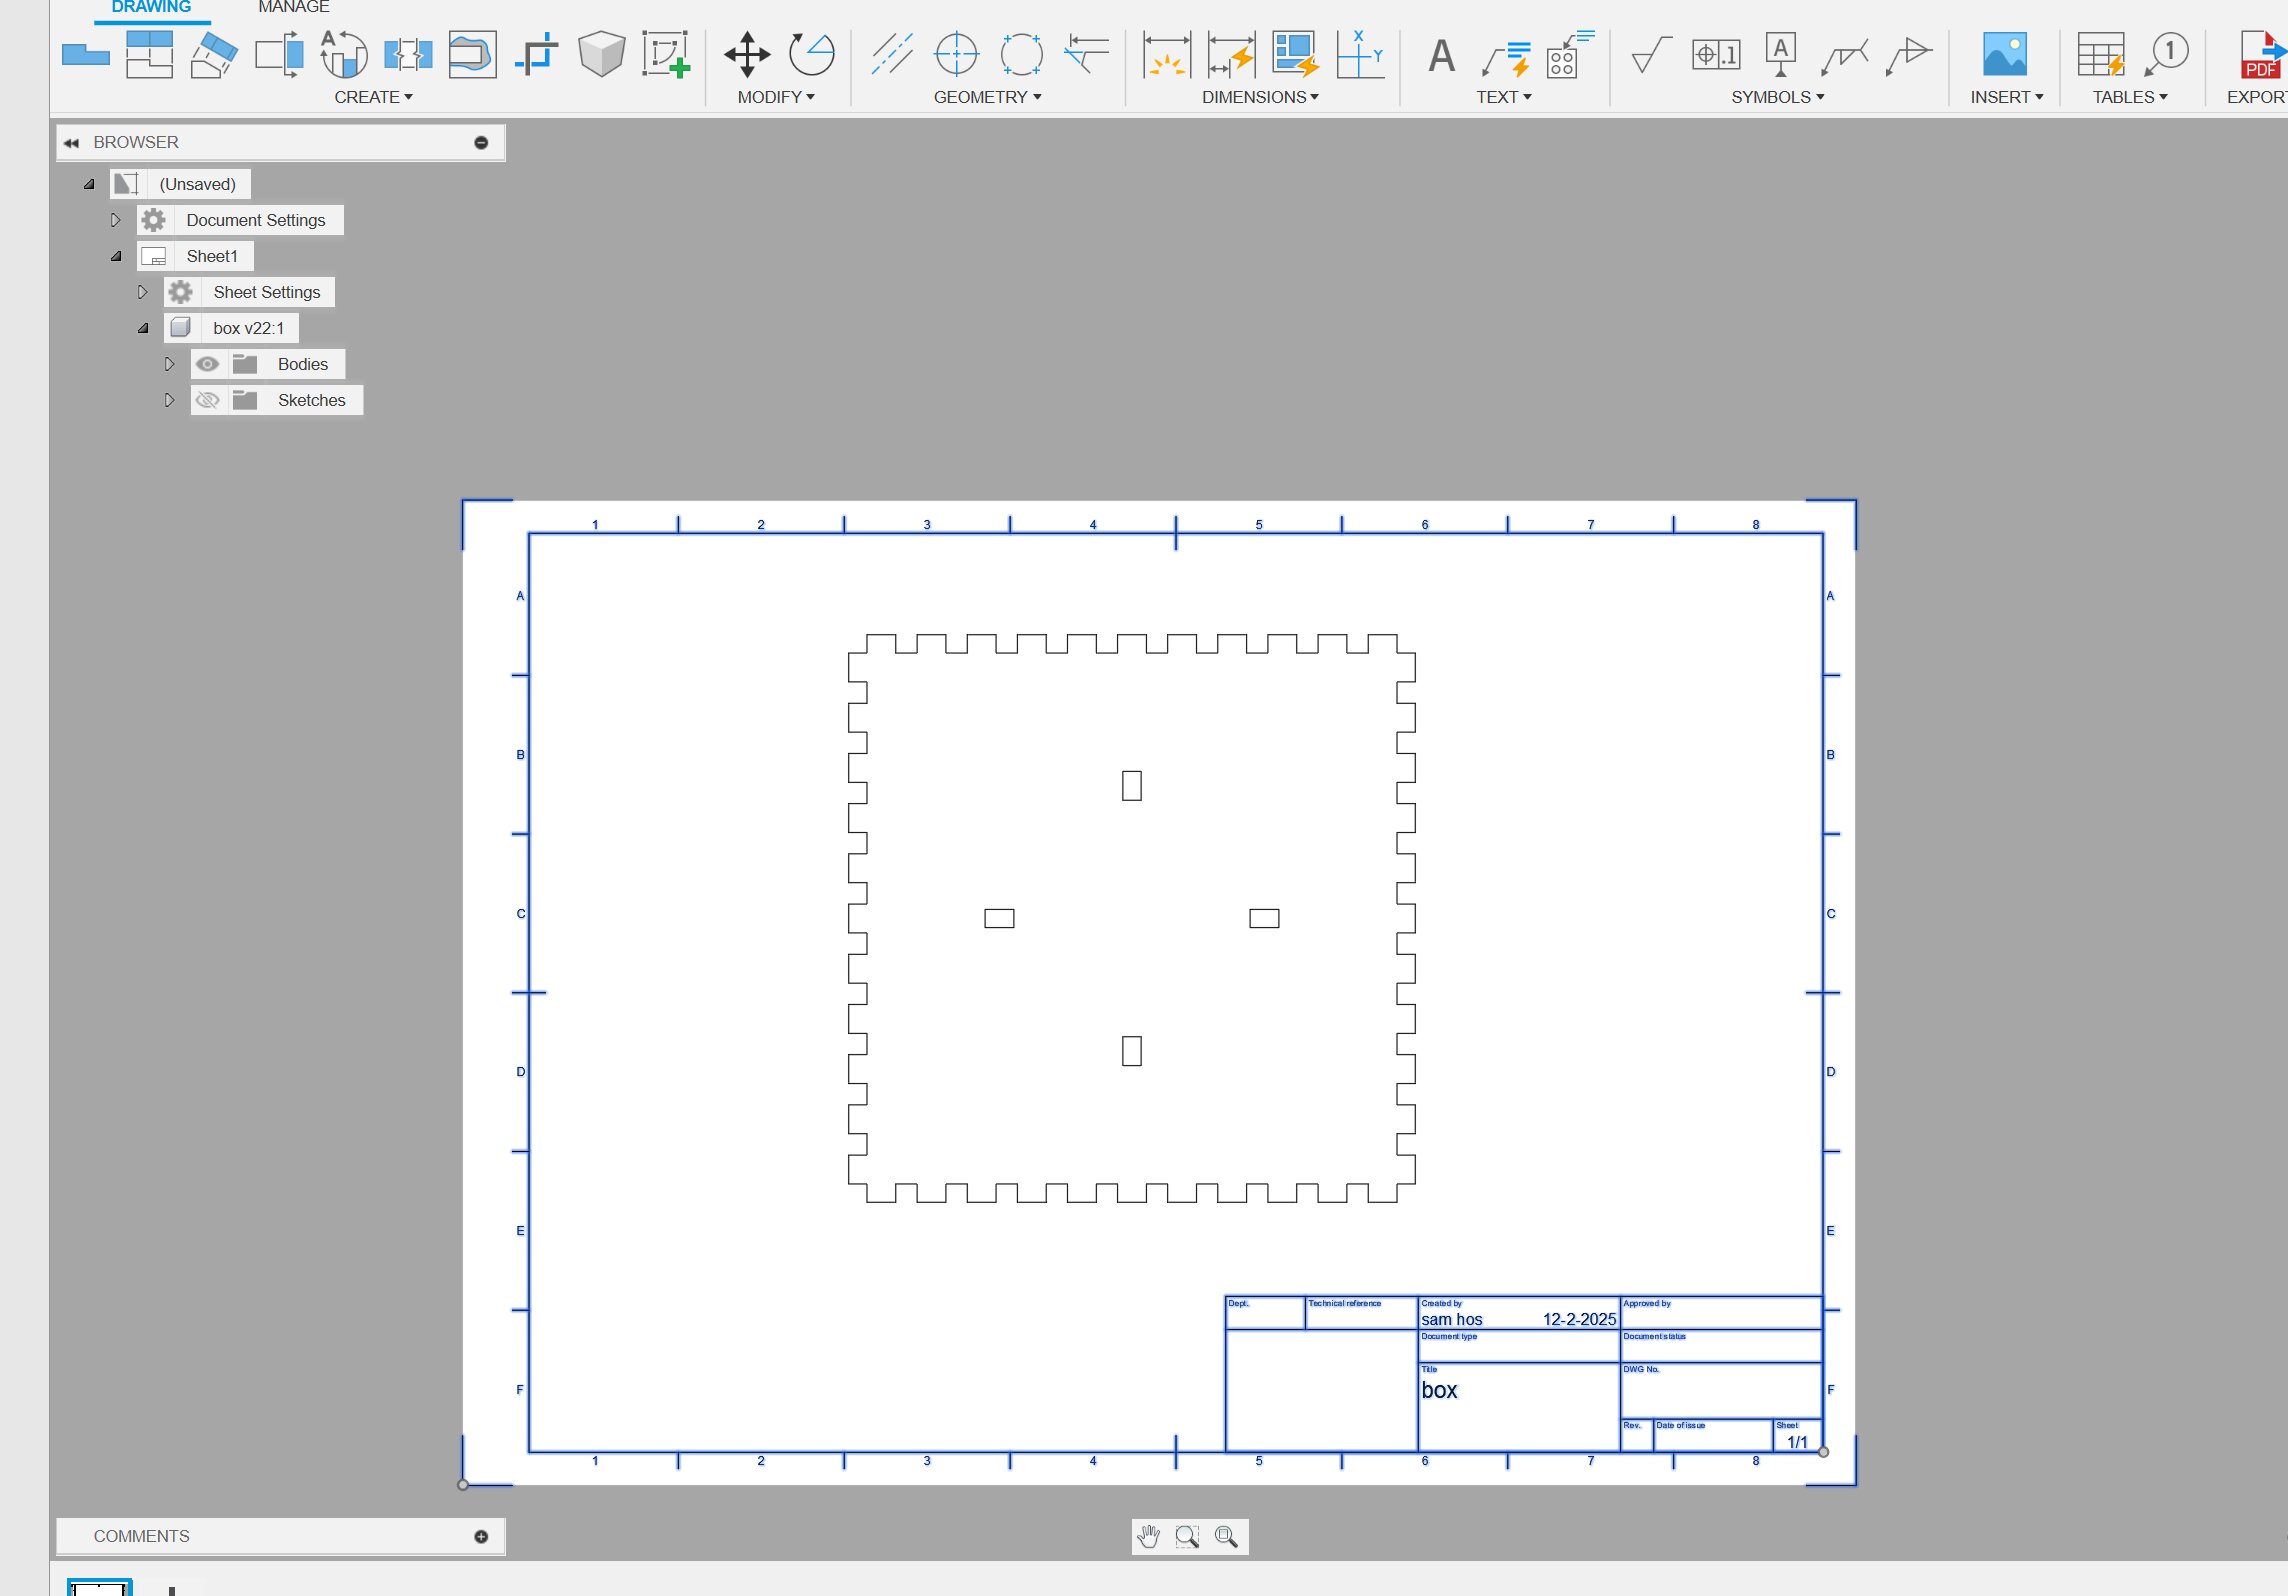
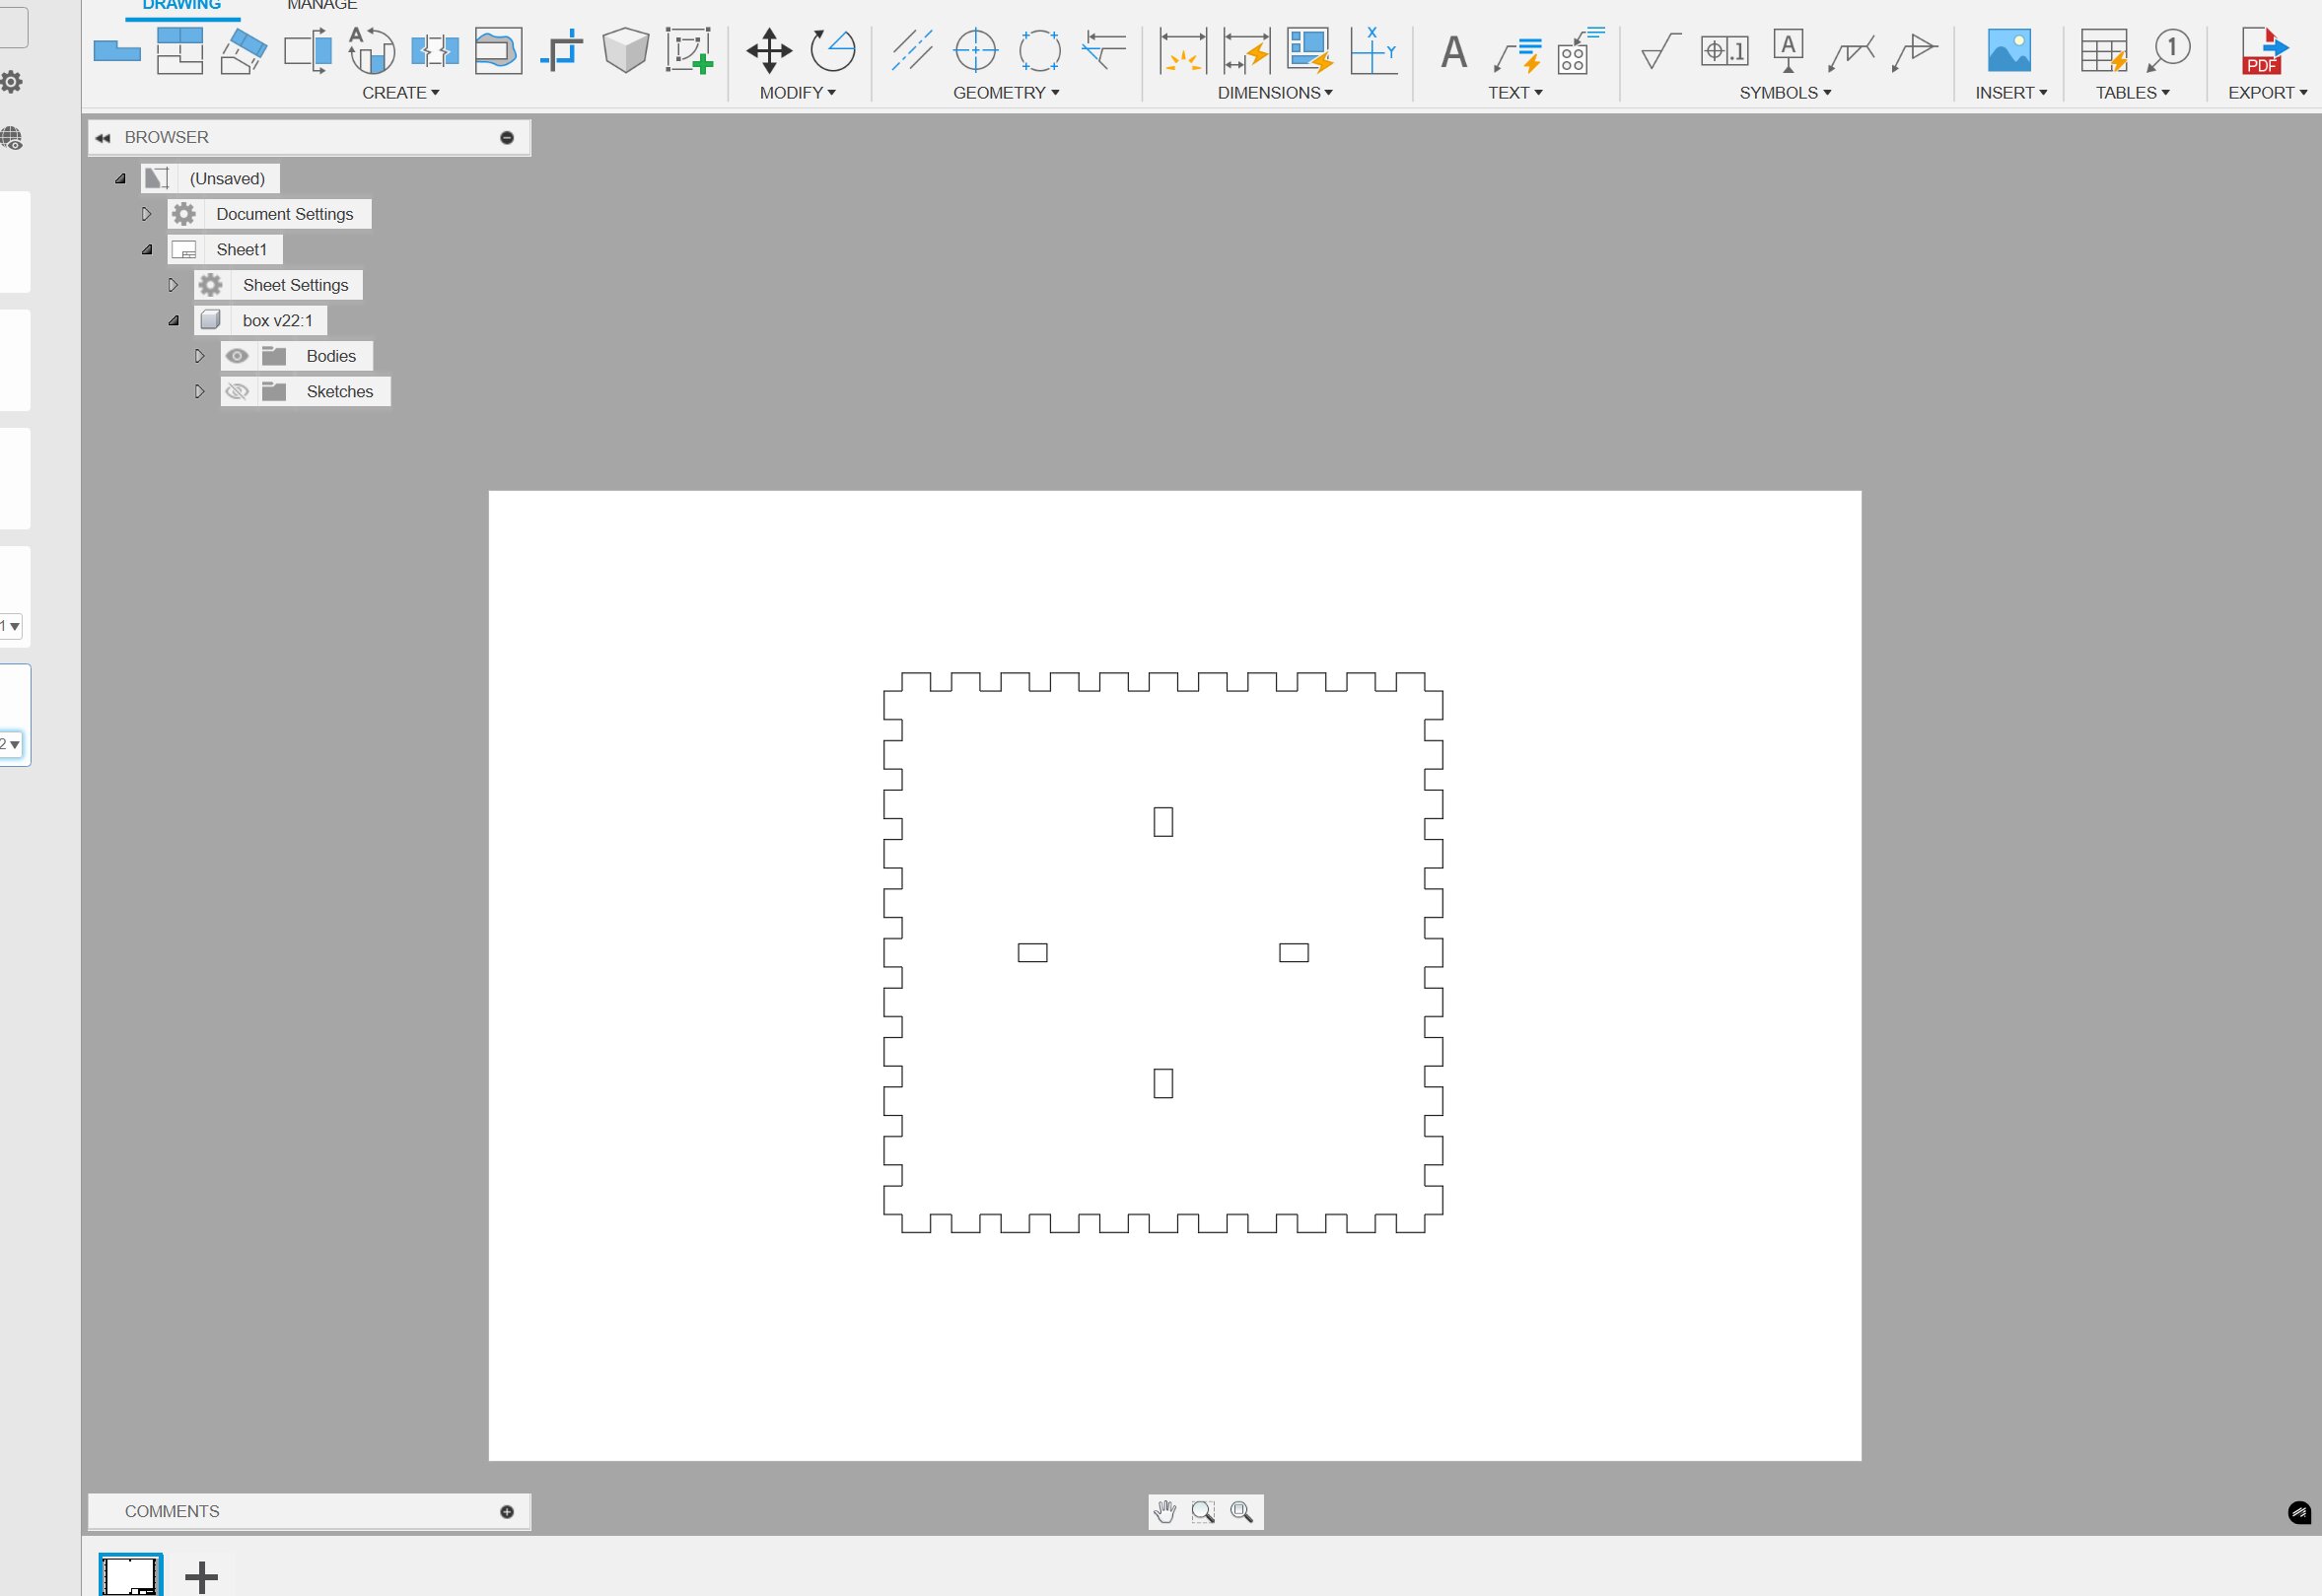
So you end up with this.
Now you can export the file as DXF file that LightBurn can understand.
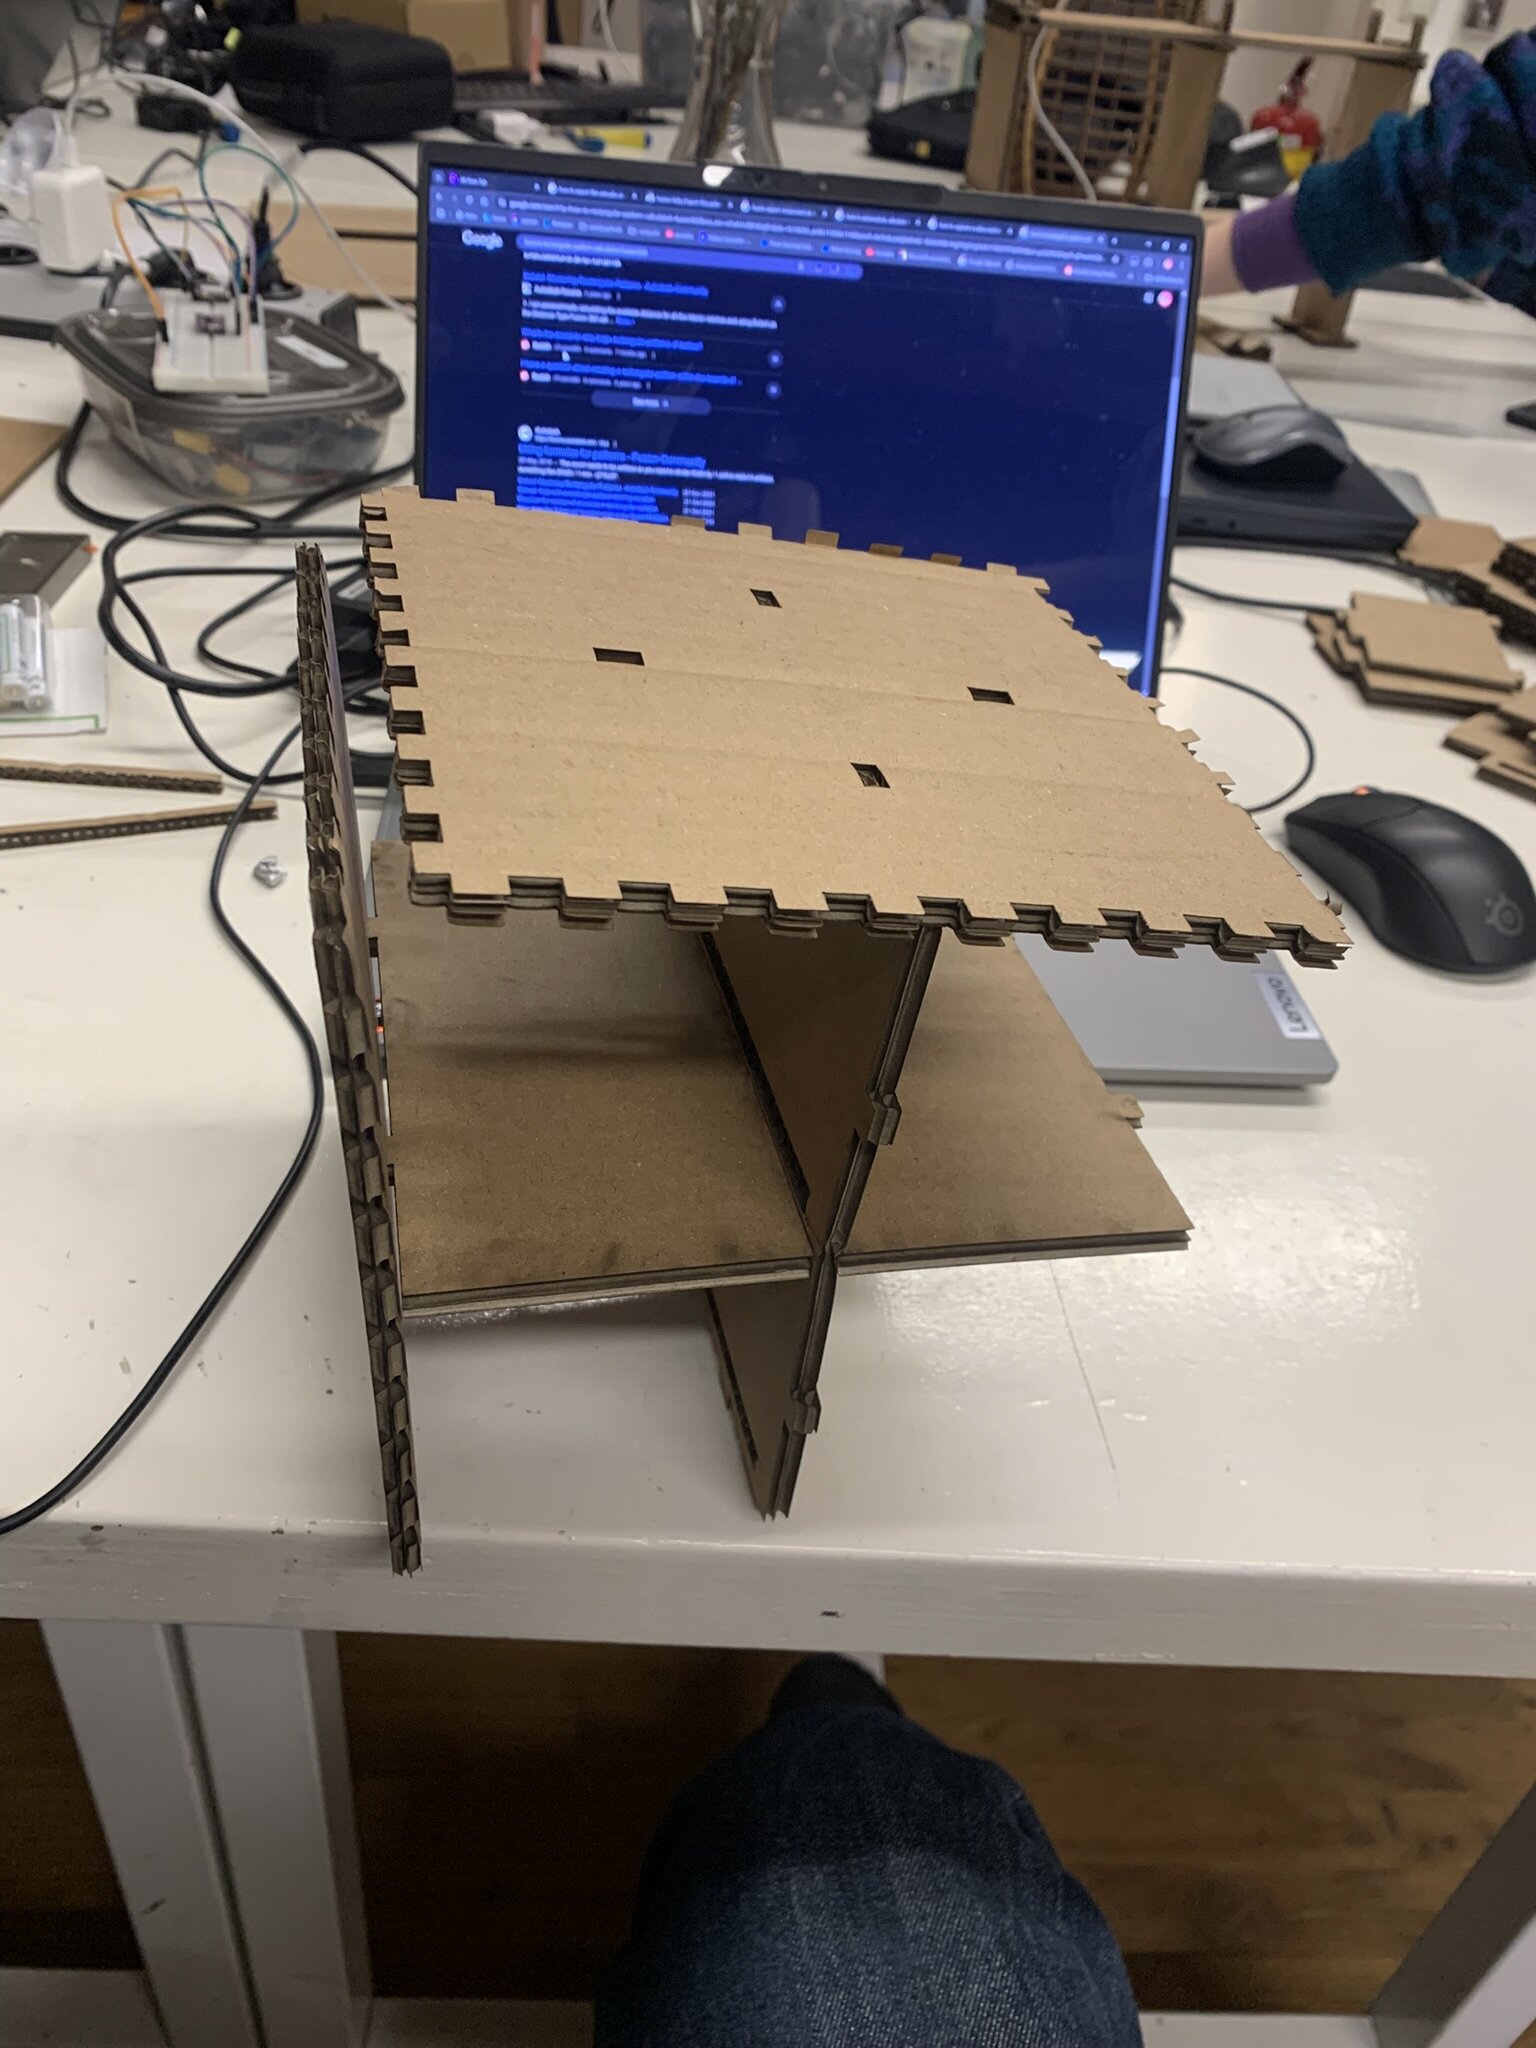
Result lasercutting
I didn't complete this weeks assignment because I didn't have enough time and I still needed to fix stuff for my internship. This is the furthest I got. I ended up at the issue that the teeth weren't aligned properly.
Vinyl cutter
https://modsproject.org/ (made during fabacedemy) (using for making pcb's, cnc machine and roland vinyl cutter) Roland GX-24 Connects through webusb but doesn't work